EasyManuals Logo

Renogy REGO Quick Guide

Renogy REGO
28 pages
To Next Page IconTo Next Page
To Previous Page IconTo Previous Page
Page #11 background imageLoading...
Page #11 background image
— 8 —
Step 8. Connect the Inverter Charger to a Battery
Battery Scenario A: REGO Battery Kit
Recommended Components & Accessories
*REGO 4 Ports 400A
System Combiner Box
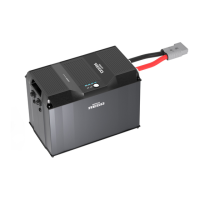
*REGO 12V 400Ah Lithium
Iron Phosphate Battery
*NH2 Fuse
(400A)
*Anderson Adapter
Cable (4/0 AWG)
Anderson
SB350
M8
DC-DC Charger
Inverter
Accessories marked with “*” are available on renogy.com.
N L2
AC OUT
L1 N L2
AC IN
L1
BAT-
BAT+
STEP-1 Install the Cable on the Inverter Charger
STEP-3 Install the Cable on the System Combiner Box
Through the grommet of the
Battery Positive Port and Battery Negative Port
N L2
AC OUT
L1 N L2
AC IN
L1
BAT-
BAT+
STEP-2 Install an NH2 Fuse
Anderson
Adapter
Cable
1
Battery
Inverter
System Combiner Box
Battery
Inverter
System C
ombiner Box
2
M8

Other manuals for Renogy REGO

Questions and Answers:

Question and Answer IconNeed help?

Do you have a question about the Renogy REGO and is the answer not in the manual?

Renogy REGO Specifications

General IconGeneral
Output Voltage12V/24V
Output Current20A
Charging AlgorithmMulti-stage (Bulk, Absorption, Float)
Battery CompatibilityFlooded, Lithium
Operating Temperature-20°C to 50°C
ProtectionOver-voltage, Short-circuit, Reverse polarity
CommunicationBluetooth
Cooling MethodFan

Related product manuals