11
8. Connect battery leads to both back-up batteries and
ret batteries.
LEFT Battery: Red lead to the Red (+) battery
terminal
Blue lead to the Black (-) battery
terminal
RIGHT Battery: Blue lead to the Red (+) battery
terminal
Black lead to the Black (-) battery
terminal
Note: The Power LED may ash to indicate that the
unit is being operated from the back-up batteries and
that mains supply is not present.
9. Close the lid of the Control Panel and fasten the
cover xing screws.
10. Plug in and switch ON the Power Supply Adaptor,
(the Power LED should illuminate).
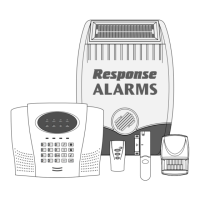
CONFIGURING THE CONTROL PANEL
HOUSE CODE
IMPORTANT: When pressing keys, do not leave
more than 3 seconds between each press.
With unit in Standby (Power LED only illuminated).
1. Press
The Panel will beep twice and the Arm and Part-Arm
LEDs will illuminate. All Zone, Fire and Tamper LEDS
will ash.
This puts the Control Panel into Program Mode.
2. Press ,
This prepares the Control Panel ready to learn the
system House Code.
The current House Code setting will be displayed on
the status LEDs with an illuminated LED indicating a
setting of “1” in the House Code and LEDs which are
OFF indicating a “0”. For example, a house code of
1101 0011, will be indicated as shown below:
3. The new system House Code can be programmed
either directly at the Control Panel or using a Remote
Control Unit as follows:
At the Control Panel:
Press buttons 1-8 on the Control Panel to congure the
LEDs so that they indicate the required house code.
As each button is pressed the corresponding digit in
the House Code will change to the opposite state, (“0”
or “1”).
LED ON = 1, (House Code DIP Switch On/Up)
LED OFF = 0, (House Code DIP Switch Off/Down)
Using a Remote Control:
With the required House Code already congured,
press the button on the Remote Control.
The Control Panel will beep twice to acknowledge the
signal and the LED status will change to correspond
with the House Code set on the Remote Control.
4. Press to save the new setting.
5. Press again to return to Standby.
TESTING THE CONTROL PANEL &
REMOTE CONTROL
1. Arm the Control Panel by pressing the button
on the Remote Control.
The Zone LED will illuminate for a few seconds to
indicate which zones are being armed. As the entry/exit
delay expires the Control Panel will slowly beep and
the Arm LED will ash. Towards the end of the delay
IMPORTANT: Take care when connecting battery
leads to the batteries as connecting incorrectly could
damage the batteries or the Control Panel.
Note: If the Control Panel Tamper alarm sounds
during the installation reset the alarm by pressing
on the Control Panel.
IMPORTANT! The keys must be pressed rmly
and within 3 seconds of each other. If you make a
mistake, press and start the sequence again.
User Access Code
User Access Code