Page 9 of 80
© Retrotec 2022
2. Gauge overview
The front of the gauge has a capacitive multitouch screen, with an On/Off button at the top right side, and
a battery charging indicator light at the bottom.
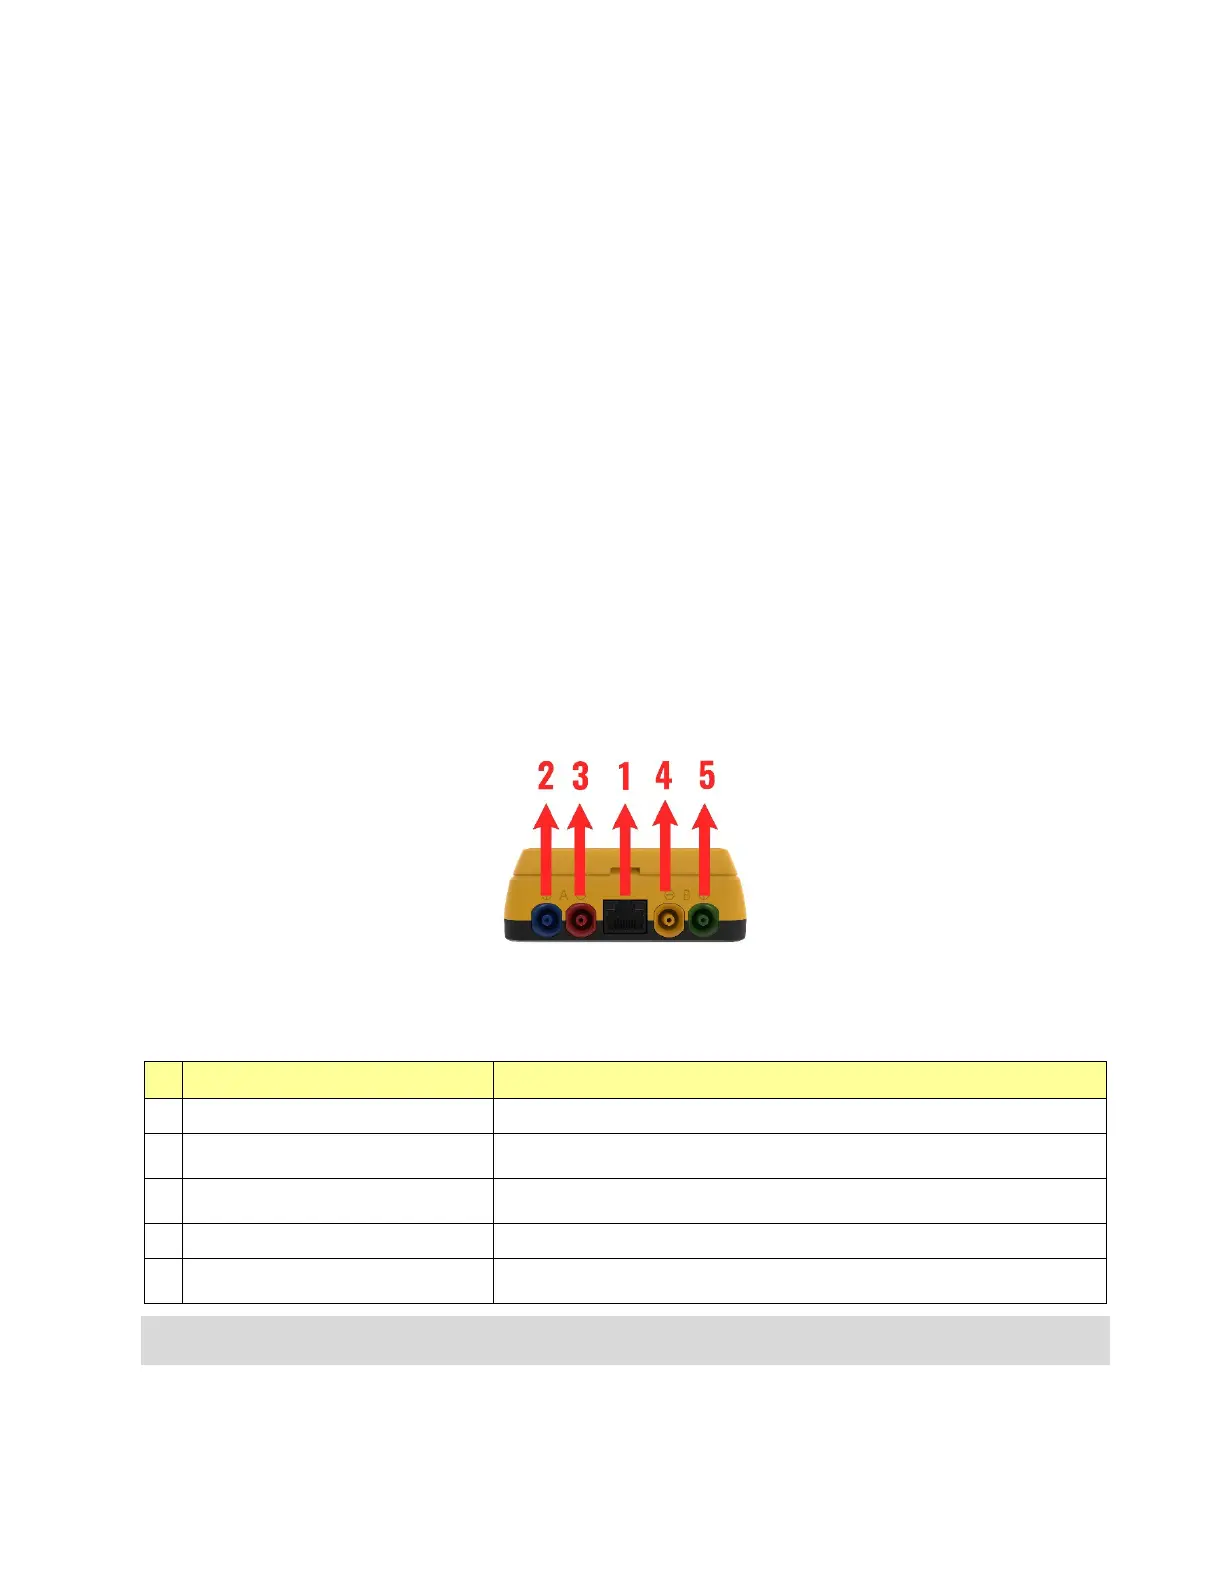
The top of the gauge has four color-coded pressure tube ports, and a Control output port (for fan speed)
The bottom of the gauge has USB-C port for battery charging and gauge-computer communications.
The touchscreen serves as both the information display and the keypad for the gauge. The information
displayed depends on selections a user makes by touching the screen. This manual uses square brackets []
to indicate where to touch items on the screen.
2.1 Make connections to the gauge
Physical connections from the gauge to a calibrated fan are on top of the gauge. Physical connections to a
computer or power adapter are on the bottom of the gauge.
An Ethernet-style cable from the fan speed output control port connects to a calibrated fan to control its
speed. The cable supplied for this purpose with Retrotec systems is yellow.
Pressure tube ports on the top of the gauge are color-coded to distinguish where pressure tubes are
connected. Retrotec has a specially designed pressure tube port that grips pressure tubes well, but
releases them without tearing after long-term use. This exclusive connector is designed by Retrotec to
make contact with both the tube internally and externally with a shallow taper.
Connect tubes and Speed Control Cable
Table 1: Physical connections from gauge to fan are on top of gauge
gauge port connection
“Fan Speed” control cable port
Connect the yellow Retrotec-proprietary Speed Control Cable
2
Blue pressure port: “input B (+)”
Often has no pressure tube connected. For duct testing, a blue pressure tube
leads from the gauge into the ducts.
3
Red pressure port: “ref B (-)”
Connect the red pressure tube from the gauge through the Door Panel to the
outdoors.
Yellow pressure port: “ref A (-)”
Connect the yellow pressure tube from gauge to yellow port on a Retrotec fan
5
Green pressure port: “input A (+)”
Connect green pressure tube to green port on Retrotec fan, if applicable. No
pressure tube will be here if Retrotec fan does not have a green pressure port
Pressure tubes should be clean and not stretched in order to make a proper connection. If a pressure tube is
damaged, simply slice a short piece of tube off the end to ensure a clean fit. Tubing can crack in cold weather, but can
 Loading...
