Page 18 of 80
© Retrotec 2022
3. Get Results directly from the gauge
3.1 Connect Speed Control Cable between the gauge and fan
Refer to section 2.1 which describes the connection ports from the gauge to a
device such as a Retrotec calibrated fan. The connections for pressure tubing
between a DM32X and a device are the same as the connections between a
DM32X gauge and that device.
Refer to Retrotec’s Manual-Door Fan Operation for detailed illustrations on these
connections, depending on what kind of test is to be performed.
3.2 Connect pressure tubes to gauge
3.3 Control the test and read Results on the Home screen
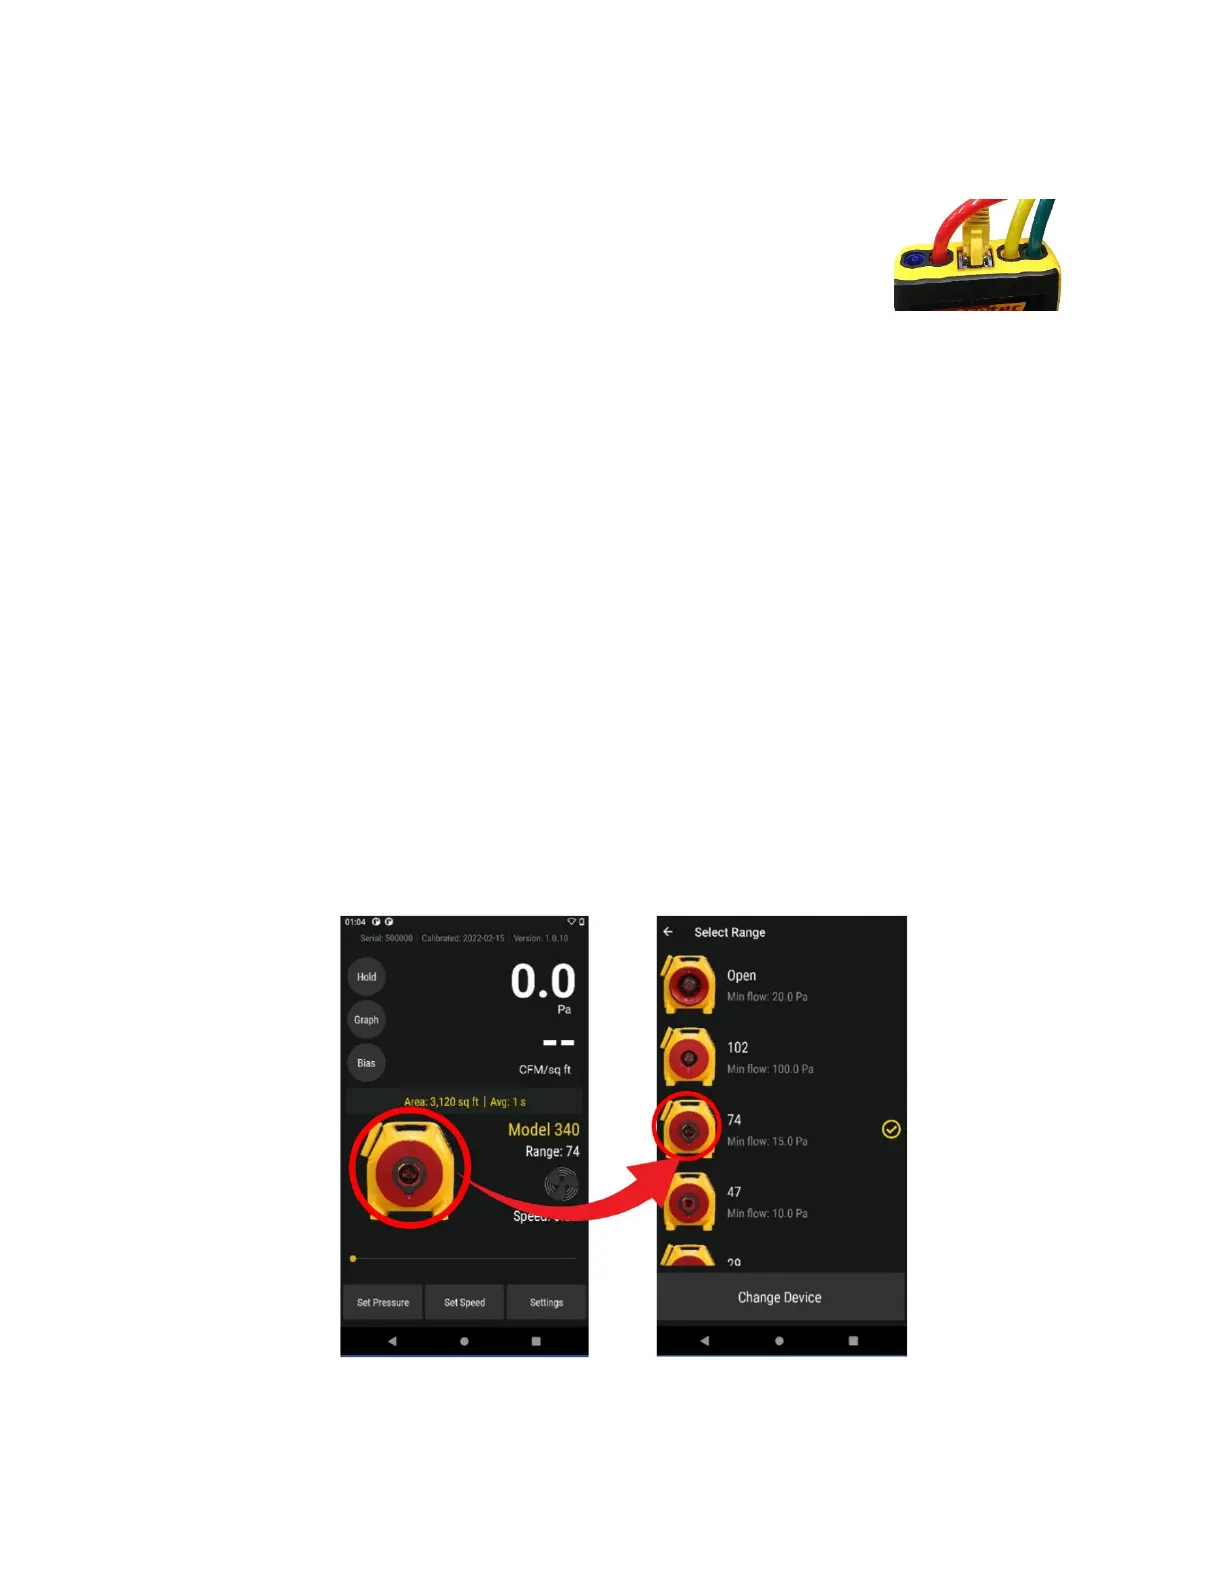
• Tap [Range/Device] to select the Range Configuration in use
• If the Range Configurations associated with the Device in use do not appear, tap [Change
Device] to change the Device first
• Tap
[Settings] to display gauge settings that can be changed
• If the
[Area] or [Volume] key appears, tap to enter a value for conditioned area or volume, which
will be used to compute the result displayed on [Channel B]
• Tap
[Set Speed] to run the fan at a particular speed
• Tap
[Set Pressure] to achieve a particular enclosure pressure
• Tap [Hold] to Hold results being displayed
• Tap [Channel B] to change the “Display Results”
• Tap
[@Pressure] to estimate a [Channel B] Result at the set pressure
To jump to screen illustrations showing how to use each function, click on the hyperlink in the above list.
3.3.1. Tap [Range/Device] to match Range on Device in use
Change Range for selected Device