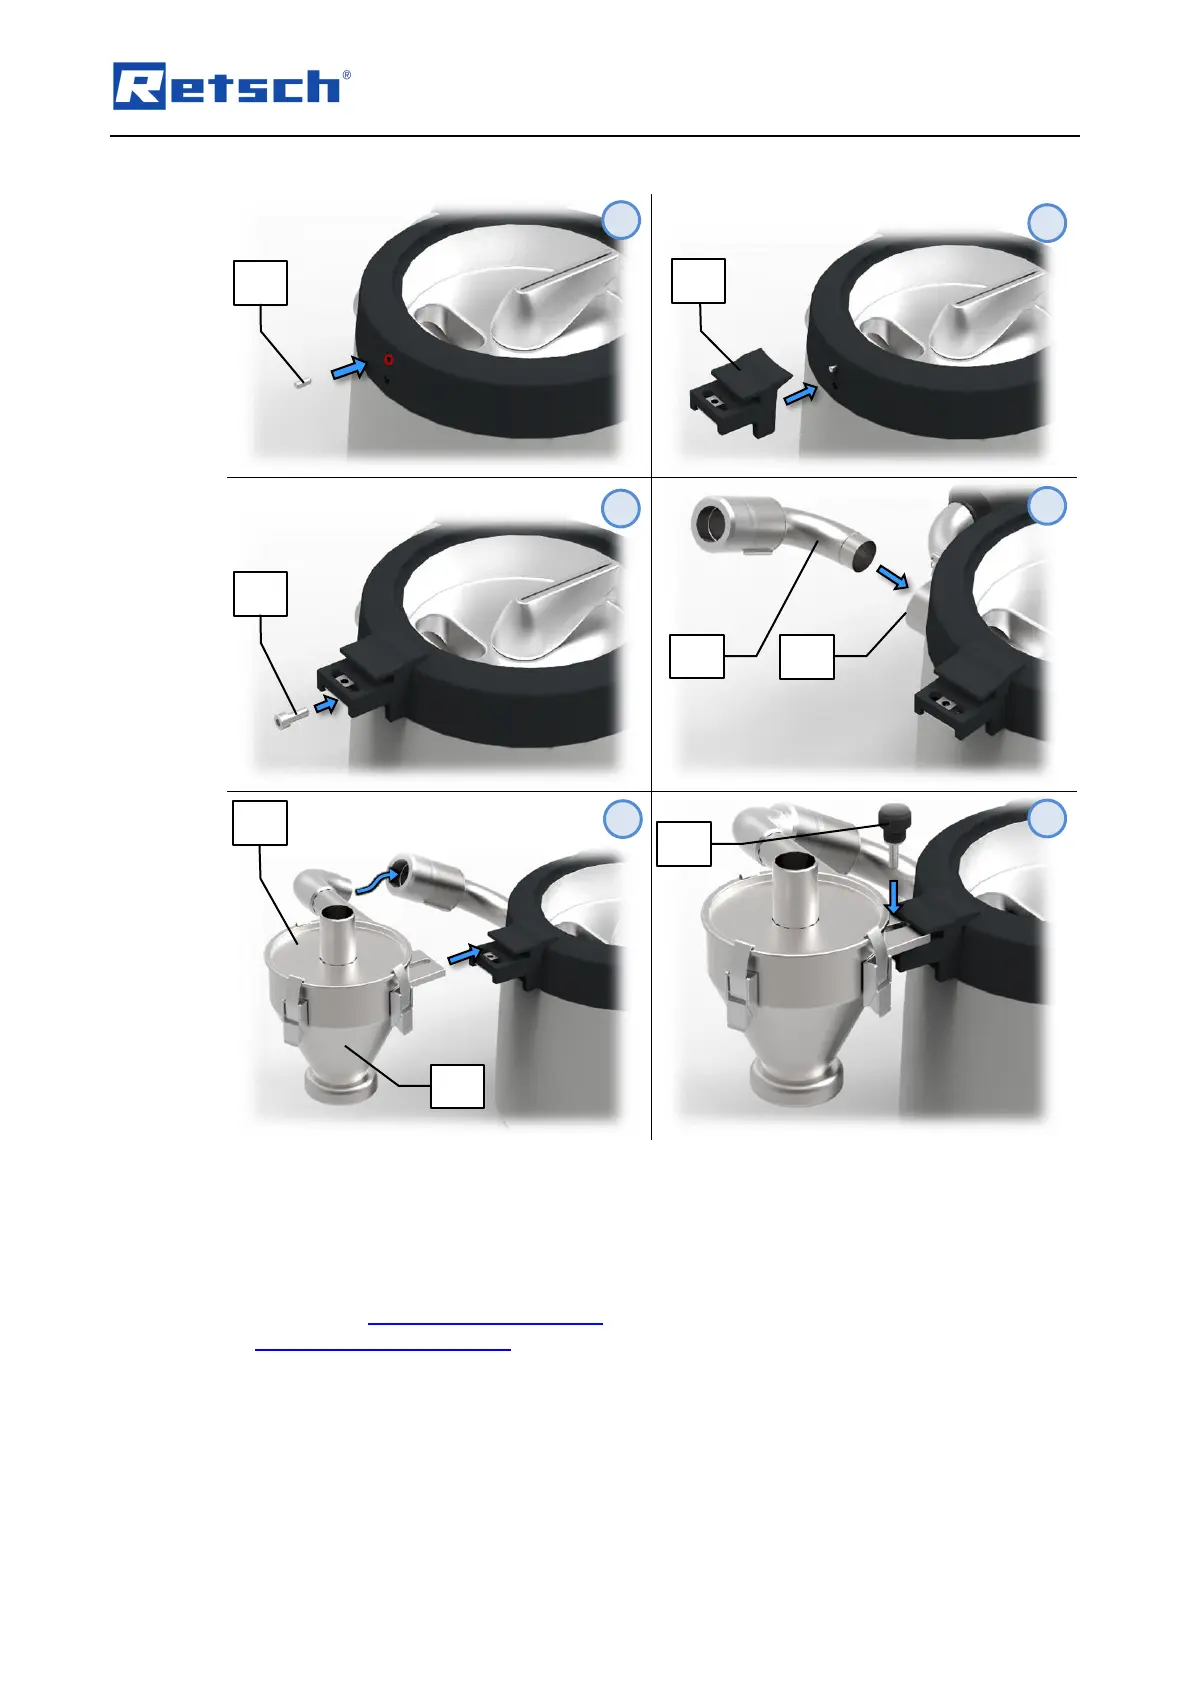
Insert the cylinder pin (Z6) in the top of the two housing openings. If necessary, remove the
two plastic covers from the openings in the housing.
Place the bracket (Z4) on the cylinder pin (Z6).
Screw the bracket (Z4) to the housing of the AS 200 jet by means of fixing screw (Z5).
Connect the manual vacuum regulation (G) to the air outlet duct (E). Alternatively, the
automatic vacuum regulation can be mounted.
Insert the cyclone separator (Z) with attached cyclone lid (Z1) into the mounted vacuum
regulation and position the cyclone separator so that the mounting plate on the cyclone
separator fits into the bracket (Z4) on the housing of the AS 200 jet.
Screw the cyclone separator (Z) into the bracket (Z4) by means of the knurled head screw
(Z3).
 Loading...