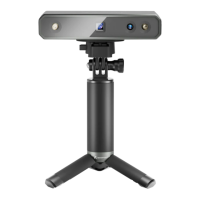
POP 3D Scanner User Manual
COPYRIGHT ©2021 REVOPOINT 3D ALL RIGHTS RESERVED 10
Cloud) or deleting the entire project to start over.
Undo: Undo several scanned frames of the model at a time. Unlimited Undo operations, but there is no Redo.
Delete: Delete all scanned frames, but not the project definition. Remains in same Scan Mode to continue the project.
Mesh: Maps the scanned 3D point cloud data into planes or triangles. This operation can also be performed in Handy
Studio with higher resolution.
If "No Color" was selected when the Scan Mode was defined, the model only consists of point cloud and mesh
information.
If the "Color" option was selected, then the model will also contain the color information of each point.
Texture: Match pixels of the picture on the mesh model to improve the texture and color resolution.
Export: Export the completed 3D model.
6. Clip Plane: Remove unwanted planes in the scene such as turntable, desktop, or floor. But if you want scanned objects containing
planes, please untick this option.
7. 3D Model
Preview Window: Display the current 3D model data. The view of the model may be dragged or zoomed in the 3D Model preview area
by the mouse (Left: Rotate the model; Wheel: Zoom in/out).
8. RGB Background: Hide or show the background in the 3D Model Preview window.
9. Home: Reset the view of the model to the default position in the 3D Model Preview Area.
This is determined by the first scanned frames of the object.
10. Frame Count: Display the frame count of acquired 3D model data. The maximum number of frames that can be scanned in one
batch is determined by the memory of the computer or mobile phone.
11. Point Cloud
RGB Preview: Check Color/No-color point cloud data.