POP 3D Scanner User Manual
COPYRIGHT ©2021 REVOPOINT 3D ALL RIGHTS RESERVED 12
underexposure.
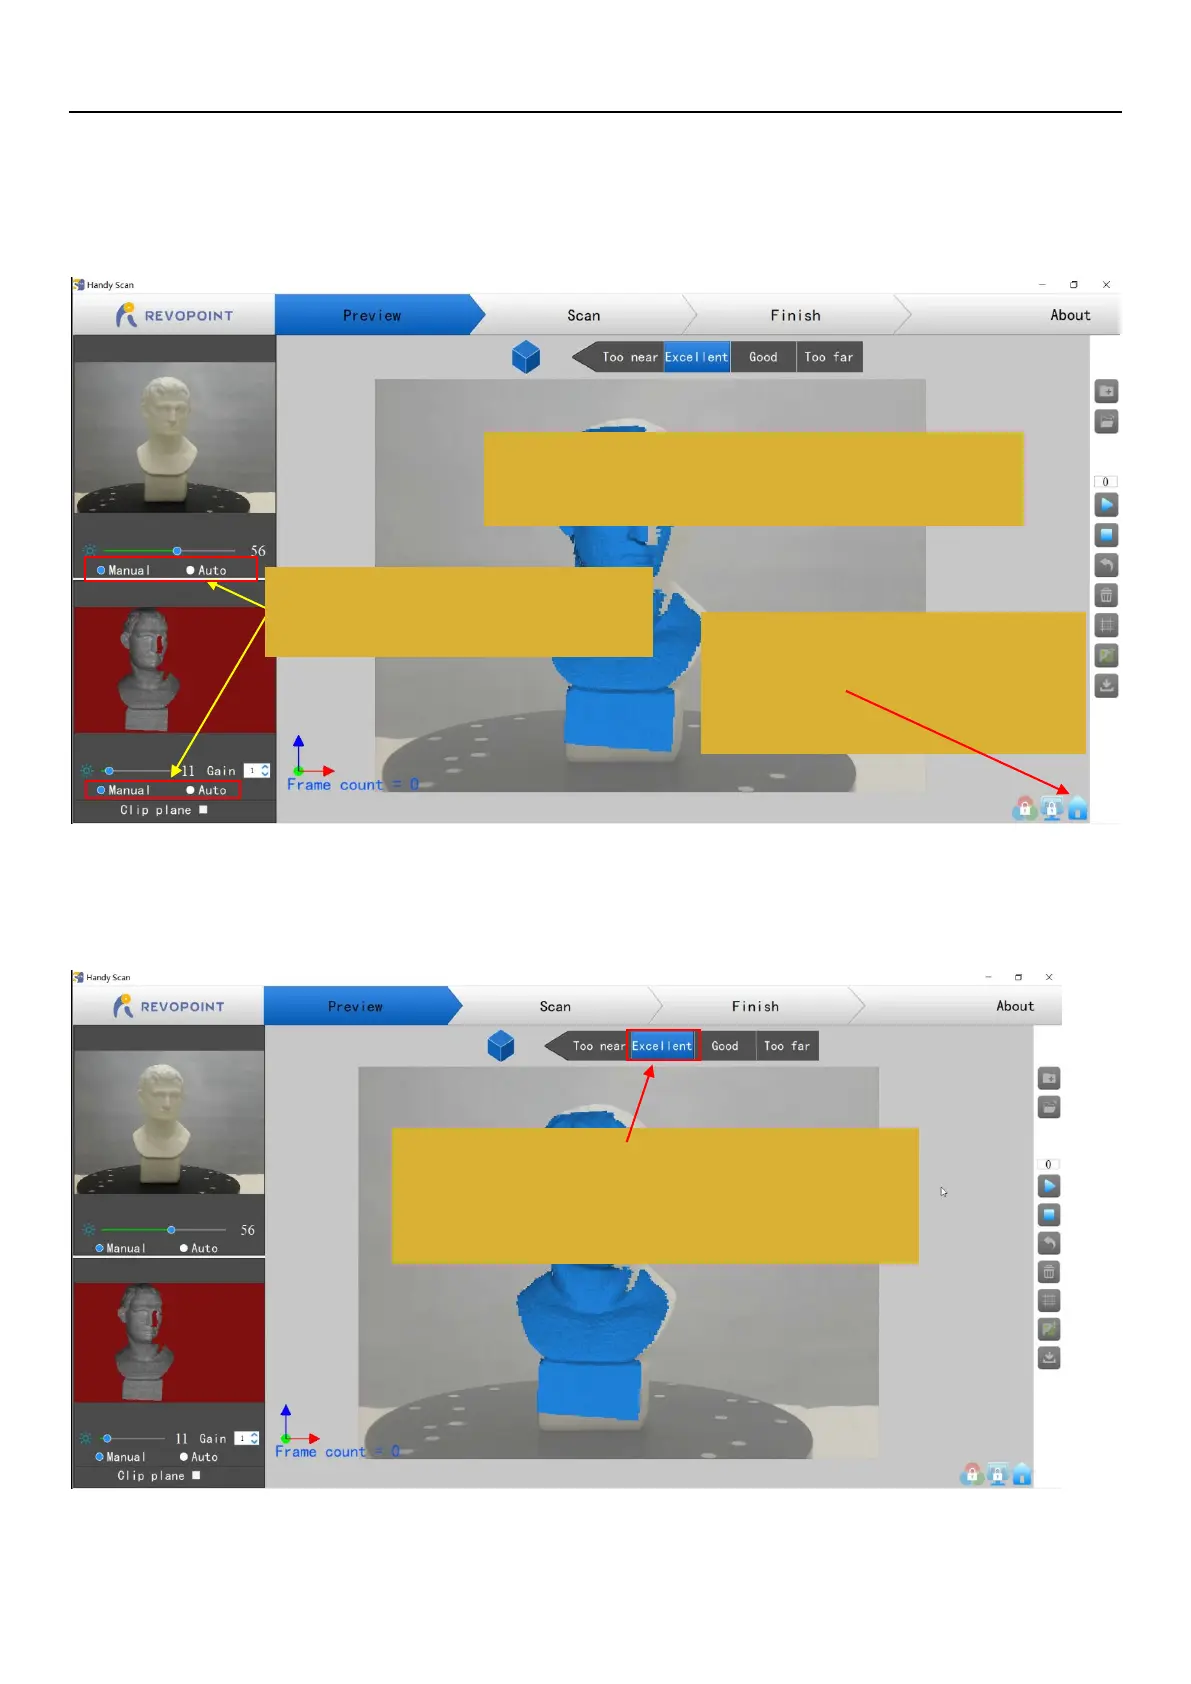
·IR camera: (Lower left preview window) When available, switch to "Auto" to find the best overall exposure and then to "Manual" to
prevent Handy Scan from continually adjusting the exposure during the scanning process and possibly locking the user
interface.
The top area of the 3D model preview window shows the distance. Place the POP scanner or the object to confirm an "Excellent" distance and
keep it during scanning. If you want better details than the standard, you can move the POP closer to the object, but tracking can be a problem.
Keep the distance at “Excellent” during scanning. Using the “Too
near” distance does create a model with higher accuracy, but it is
also more likely to lose tracking.
Make sure the infrared image (lower left) and point cloud image
(center window) are identical.
Click “Auto” first, then “Manual”.
May enter infinite loop if “Auto” is left on.
If the point cloud (center window) is empty, click
the HOME icon to re-center the model on the
screen.