Company Registered in England No: 4167649 VAT Registration No: 732 5692 25 BS EN ISO 9001:2008 No: LRQ 0964389
+44 (0)1204 699959
enquiries@hyquip.co.uk
Hyquip Limited New Brunswick Street Horwich Bolton Lancashire BL6 7JB UK
www.hyquip.co.uk/web/index
32/60 Installation
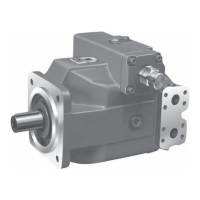
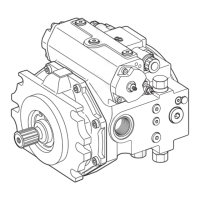
Bosch Rexroth AG, RE 92100-01-B/09.2012 Series 10, 11 and 30,
7.4.2 Dimensions
The installation drawing contains the dimensions for all connections and ports on
the axial piston unit. Also observe the manuals provided by the manufacturers of the
other hydraulic components when selecting the required tools.
7.4.3
General instructions
Please keep in mind the following general instructions for installation of the axial
piston unit:
t Note that you can expect certain installation positions to affect the control
device. Gravity, dead weight and case pressure can cause minor shifts in control
characteristics and changes in response time.
t Torsional vibrations and speed variations may cause leakages on the shaft seal and
increased rotary angle accelerations of the rotary group of the axial piston unit. At
risk are diesel drives with a small number of cylinders and low flywheel mass and
toothed belt or V-belt drives. Belts can lose a large part of its tension after just a
short time.
An automatic clamper can lessen the speed variations and vibrations and thus
avoid consequential damage.
– Always use an automatic tensioning device when using toothed belts or V-belts to
transfer the input or output drive.
t On the input or output drive of an axial piston unit, a cardan shaft may cause
vibrations and impermissible rotary angle accelerations. Depending on the
frequency and temperature, they may result in leakage on the shaft seal and
damage to the rotary group.
t For combinations of multiple units, make sure that the respective case pressure in
each unit is not exceeded. In the event of pressure differences at the drain ports of
the units, the shared drain line must be changed so that the minimum permissible
case pressure of all connected units is not exceeded in any situation. If this is not
possible, separate drain lines must be laid if necessary.
How to install the axial piston unit depends on the connecting elements to the drive
side. The following descriptions explain the installation of the axial piston unit:
t with a coupling
t on a gearbox
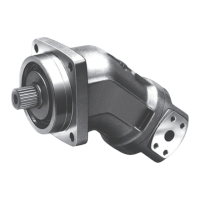
7.4.4 Installation with coupling
The method for installing the axial piston unit with a coupling is described below:
NOTE! Danger from improper handling!
Product can be damaged!
▶ Do not install the coupling hub onto the drive shaft of the axial piston unit by
striking it.
1. Install the specified coupling half onto the drive shaft of the axial piston unit
according to the instructions of the coupling manufacturer.
The drive shaft of the axial piston unit is equipped with a female thread. Use this
female thread to pull the coupling element onto the drive shaft. The size of the
female thread can be seen in the installation drawing.