Company Registered in England No: 4167649 VAT Registration No: 732 5692 25 BS EN ISO 9001:2008 No: LRQ 0964389
+44 (0)1204 699959
enquiries@hyquip.co.uk
Hyquip Limited New Brunswick Street Horwich Bolton Lancashire BL6 7JB UK
www.hyquip.co.uk/web/index
Installation 33/60
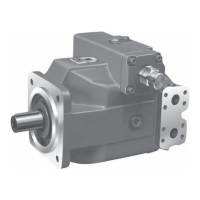
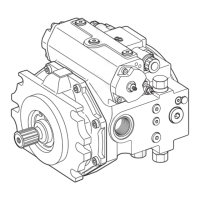
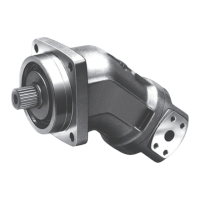
RE 92100-01-B/09.2012, A4VSG Series 10, 11 and 30, Bosch Rexroth AG
2. Clamp the coupling hub onto the drive shaft or ensure permanent lubrication
of the drive shaft. This prevents the formation of frictional corrosion and the
associated wear.
3. Transport the axial piston unit to the installation location.
4. Remove dirt and contaminants from the installation location.
5. Install the coupling on the output shaft of the engine in accordance with the
specifications provided by the coupling manufacturer.
The axial piston unit may not be bolted down until the coupling has been
correctly installed.
6. Fix the axial piston unit at the installation location.
7. Align the drive shaft of the axial piston unit and the output shaft of the engine so
that there is no angular deviation.
8. Make sure that no impermissible axial and radial forces act on the drive shaft.
9. For bell housing installation, check the coupling axial play through the bell
window according to the manufacturer's instructions.
10. Details on the required tools and tightening torques for the mounting bolts are
available from the machine/system manufacturer.
11. When using flexible couplings, check that the drive is free of resonance after
completing the installation.
7.4.5 Installation on a gearbox
The installation layout for the axial piston unit on a gearbox is described below.
After installing on a gearbox, the axial piston unit is covered and is difficult to access:
▶ Therefore, before installing, make sure that the centering spigot centers the axial
piston unit (observe tolerances) and that no impermissible axial or radial forces
act on the drive shaft of the axial piston unit (installation length).
▶ Protect the drive shaft against frictional corrosion by providing permanent
lubrication.
▶ Fix the axial piston unit at the installation location.
No gearing forces higher than the permissible axial and radial forces are to act on
the shaft, if necessary the gear wheel must be supported separately at the gearbox
output.
7.4.6 Installation with cardan shaft
To connect the axial piston unit to the engine via a cardan shaft:
1. Position the axial piston unit close to the specified installation location. It should
allow enough space for the cardan shaft to fit through on both sides.
2. Position the cardan shaft on the output shaft of the engine.
3. Push the axial piston unit to the cardan shaft and join the cardan shaft to the
drive shaft of the axial piston unit.
4. Bring the axial piston unit to the installation position and secure. If necessary,
details on the required tools and tightening torques for the mounting bolts can be
obtained from the system manufacturer.
For attachment via gear
wheel or helically-toothed
shaft