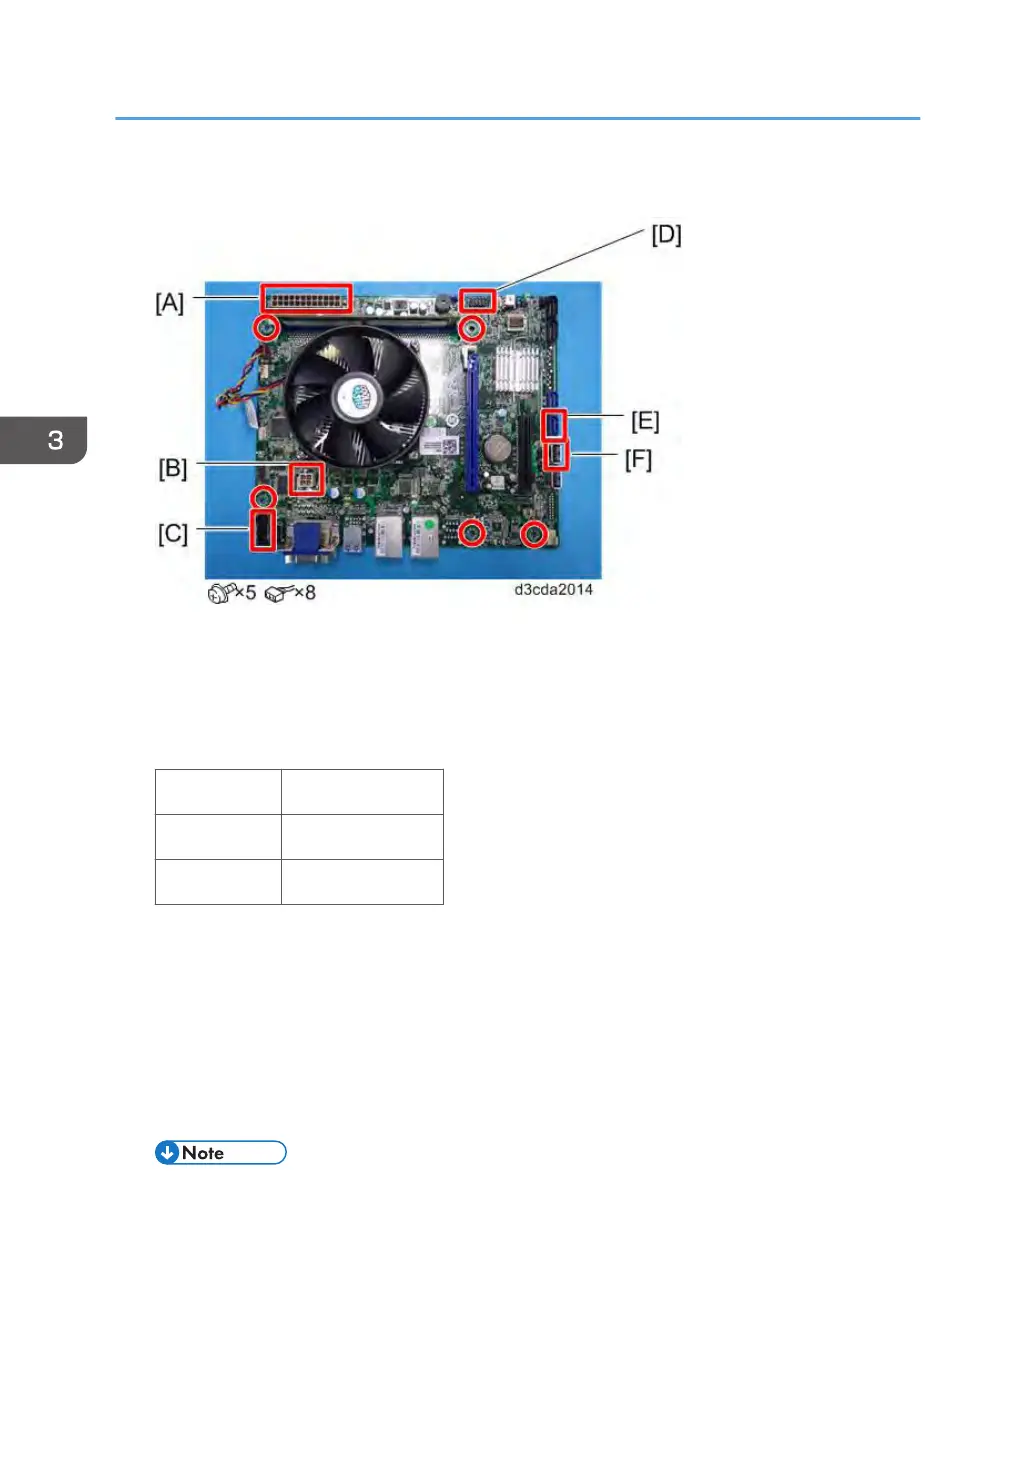
2. Remove the cables from the motherboard.
24-pin power connector from ATX24P [A].
4-pin power connector from ATX POWER [B].
DIAG cable from PORT80 HDR [C].
Front panel cable from J15 [D].
PIN1 & 3 HDD LED
PIN2 & 4 Power LED
PIN6 & 8 Soft Switch
SATA data cable from SATA 0 [E].
USB cable from USB A1 [F].
3. Remove the Motherboard.
4. Remove the Memory [Link to page 86 "Memory – 2GB DIMM (E-24B)"]
5. Remove the CPU Cooling Assembly [Link to page 87 "CPU and Cooling Assembly"]
6. Remove the CPU [Link to page 87 "CPU and Cooling Assembly"]
• When you replace the motherboard, remove the CPU and memory and attach them to the
new motherboard [Link to page 87 "CPU and Cooling Assembly"].
3. Replacement
82