Various Scan Settings
118
6
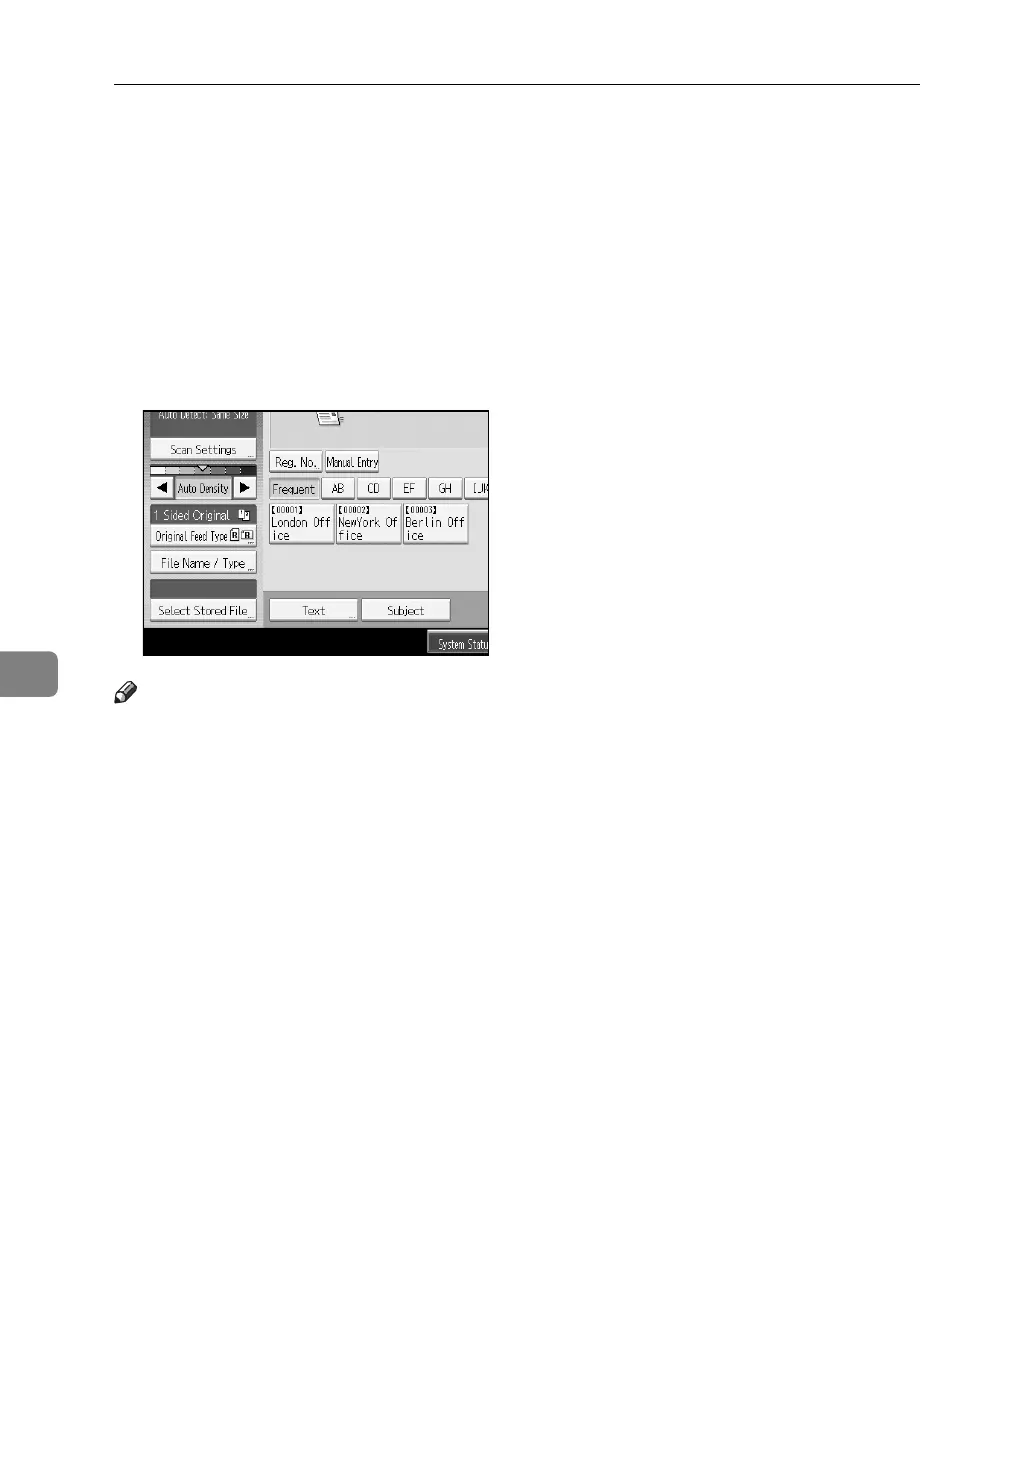
Adjusting Image Density
This section explains how to adjust image density.
To adjust image density, press [W] or [V], at the left and right of [Auto Density].
These buttons increase or decrease the image density in single increments up to 7.
Selecting [Auto Density] corrects scanning density to improve resolution of paper
types such as non-white paper like newspaper or transparent originals. To ad-
just image density when [Auto Density] is selected, under [Scanner Features], select
[Background Density of ADS (Full Colour)]. For details, see General Settings Guide.
Note
❒ If you select [Black & White: Text], [B & W: Text / Line Art], or [B & W: Text / Photo]
for [Scan Type] under [Scan Settings], [Auto Density] is automatically selected.