Rinnai 28 Multi Split Type AC
INDOOR INSTALLATION
Rinnai 25 Multi Split Type Air Conditioner
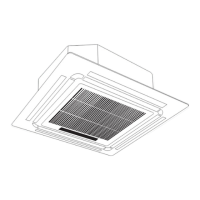
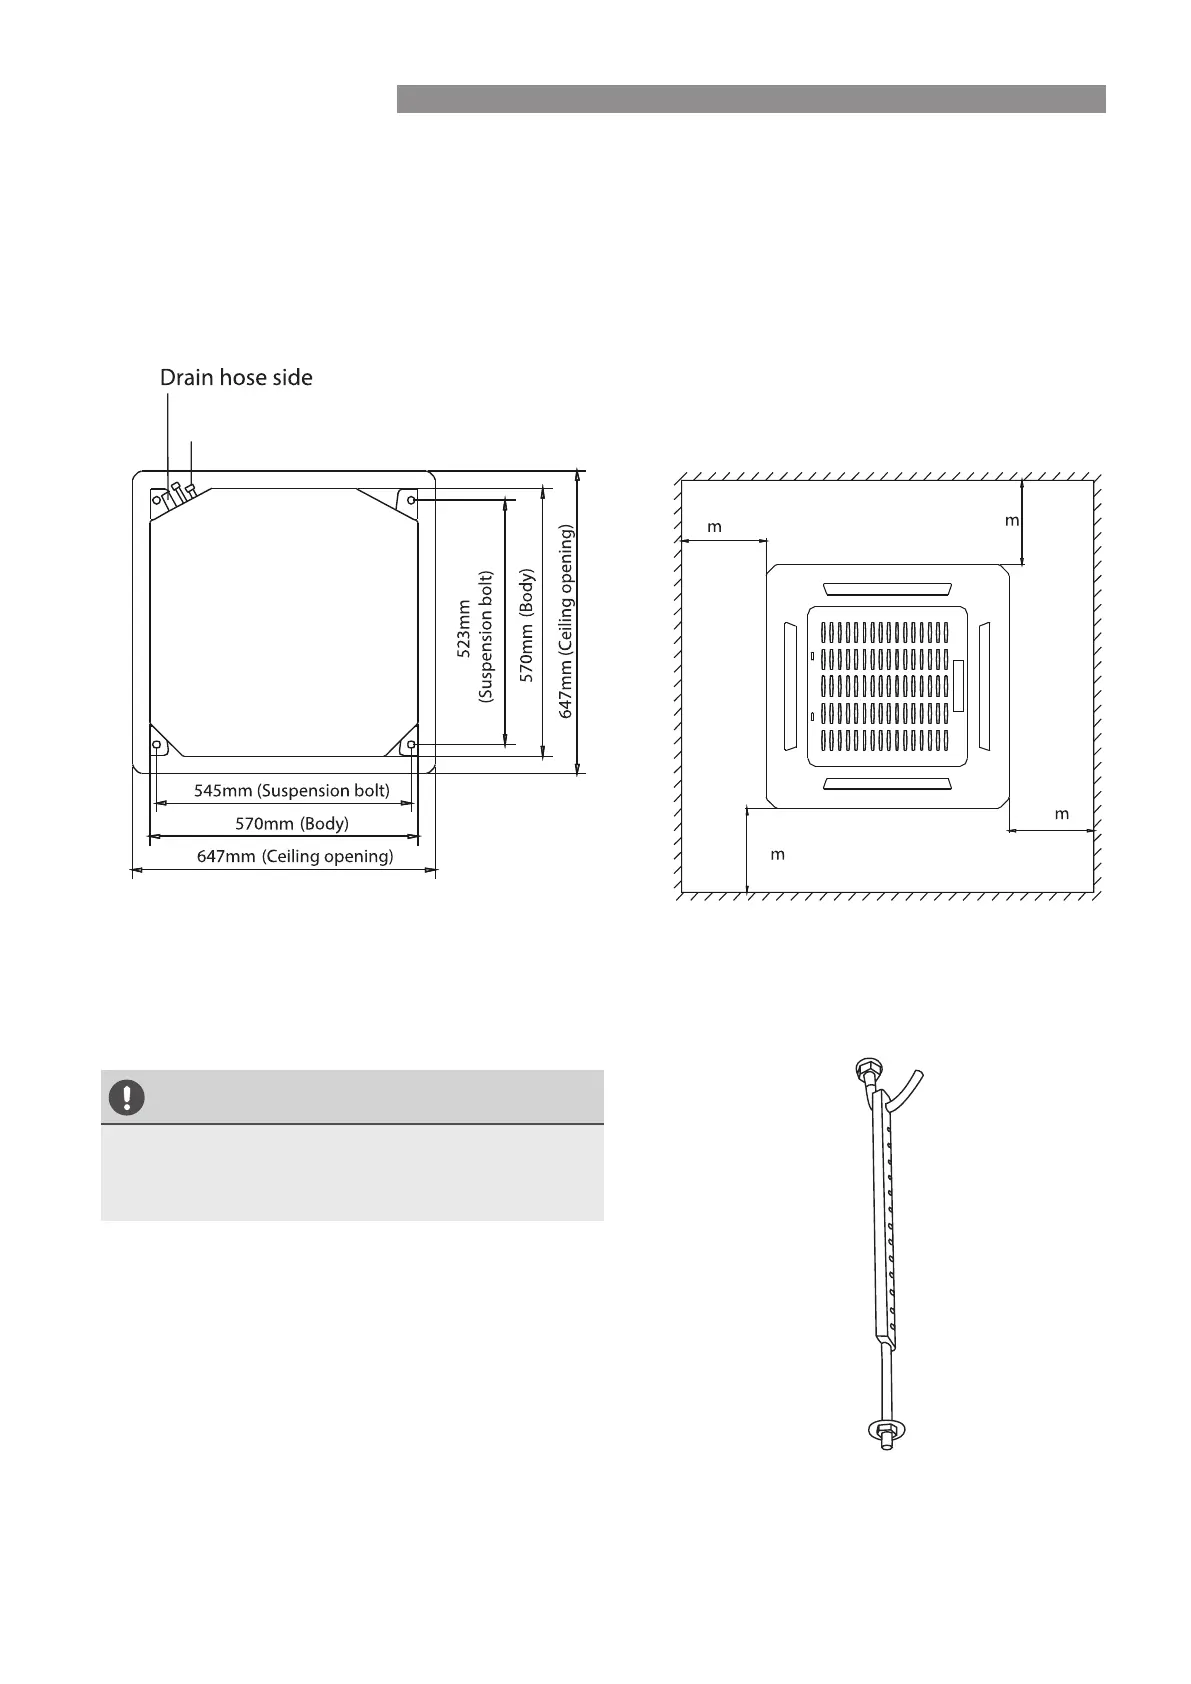
INDOOR CASSETTE INSTALLATION
CAUTION
The unit body should align perfectly with the
hole. Ensure that the unit and the hole are the
same size before moving on.
Step 2: Hang indoor unit.
1. Use the included paper template to cut a rectangular hole in the ceiling, leaving at least 1m
on all sides. The hole will be at a diamater of 60x60cm. Be sure to mark the areas where ceiling
hook holes will be drilled.
Refrigerant piping side
>1
>1
>1
>1
2. Drill 4 holes 5cm deep at the ceiling hook
positions in the internal ceiling. Be sure to hold
the drill at a 90° angle to the ceiling.
3. Using a hammer , insert the ceiling hooks into
the pre-drilled holes. Secure the bolt using the
included washers and nuts.
4. Install the four suspension bolts.
(See figure on right.)

 Loading...