19
Preparations
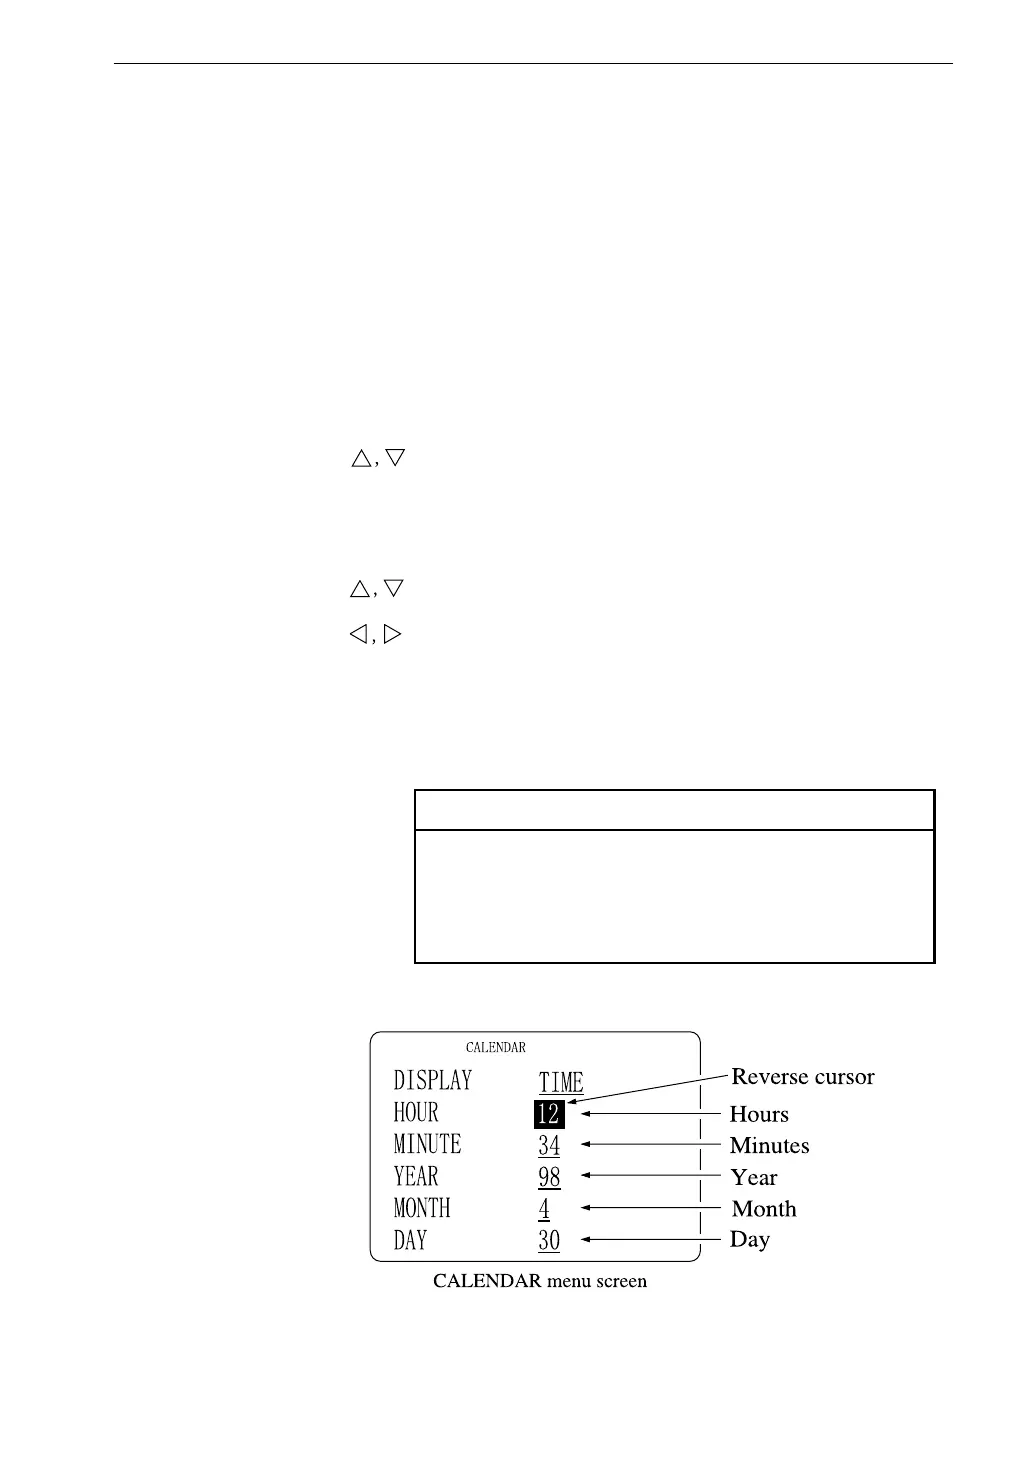
Setting the Date and Time
Before using the unit, you must set the date and time for the built-in calendar/
clock.
(The calendar/clock is not set at the factory before shipping.)
1. Set the POWER switch to ON.
2. After the measurement screen has appeared, press the MENU (ENTER)
key once to call up the MAIN MENU screen.
3. Use the keys to move the reverse cursor to the CALENDAR item.
4. Press the MENU (ENTER) key once more. The CALENDAR menu
screen appears.
5. Use the keys to move the reverse cursor to the item you want to set.
6. Use the keys to change the numerical value. (Each brief push of
the key changes the value by one increment. Keeping the key depressed
results in a continuous change.)
7. Press the SETUP (ESC) key twice to return to the measurement screen.
Note
The calendar/clock IC has an accuracy of ±25 ppm.
The time will be off by about one minute in one
month. Before making an important measurement,
be sure to check the time and set the clock if required.
 Loading...