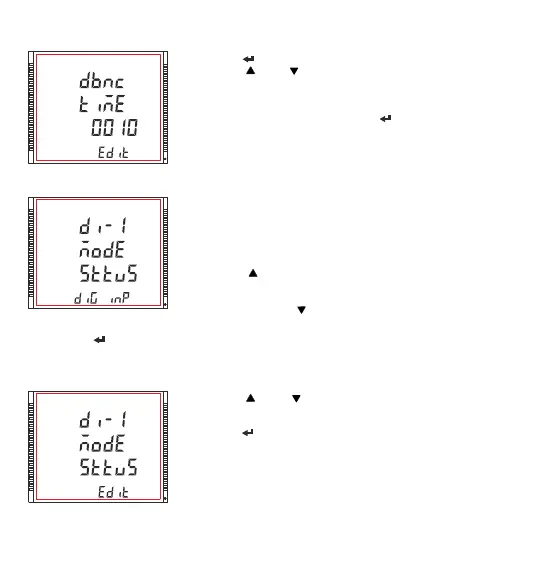
Pressing the “ ” and “ ” keys lets the user scroll through the available
options.
Pressing the “ ” key confirms the selection & takes the user to the “Digital
Input 1 Mode Selection” menu screen.(see Section 3.2.7.2)
Note : Default configuration is set to “status”.
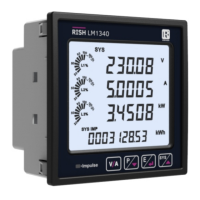
XXXXXXXXXXXXXXXX
Edit mode
XXXXXXXX
XXXXXXXXXXXXXXXX
3.2.7.2 Digital Input 1 Mode Selection
Edit mode
This screen allows the user to set the digital input in one of the three
modes.
1) Status
2) Tariff*
3) Pulse
Pressing the “ ” key advances to “Digital input 1 pulse multiplier” screen
(see Section 3.2.7.3) when pulse mode is selected and to “Digital Input 2
Mode Selection” screen (see Section 3.2.7.4) when other than pulse mode
is selected. Pressing the “ ” key advances to “De-bounce Time” Selection
Screen (see Section 3.2.7.1)
Pressing the “ ” key advances to Edit Mode.
*Note : When DI1 is selected in Tariff mode, then no input present on DI1 indicates Tariff 1 and an input
present on DI1 indicates Tariff 2.
Pressing the “ ” key promts for the first digit.
Pressing the “ ” and “ ” keys scroll the values of the first digit.
Similarly , enter second, third and fourth digits also.
After the fourth digit is entered, pressing “ ” key sets the value and
advances to “ De-bounce time” menu screen (see Section 3.2.7.1).
68