Roche Diagnostics
Urisys 1100® · ≥5.7 · Operator's Manual · 9.0
24 5. Installation
Analyzer connection
Powering-On
r To power-on
1
Unpack the Urisys 1100
®
system and place it on a
stable, level surface.
I Do not expose the analyzer to direct sunlight or
other source of direct light (for example a spot
lamp).
2
Connect the AC adapter to the power socket at the
rear of the analyzer and to a readily accessible AC wall
socket.
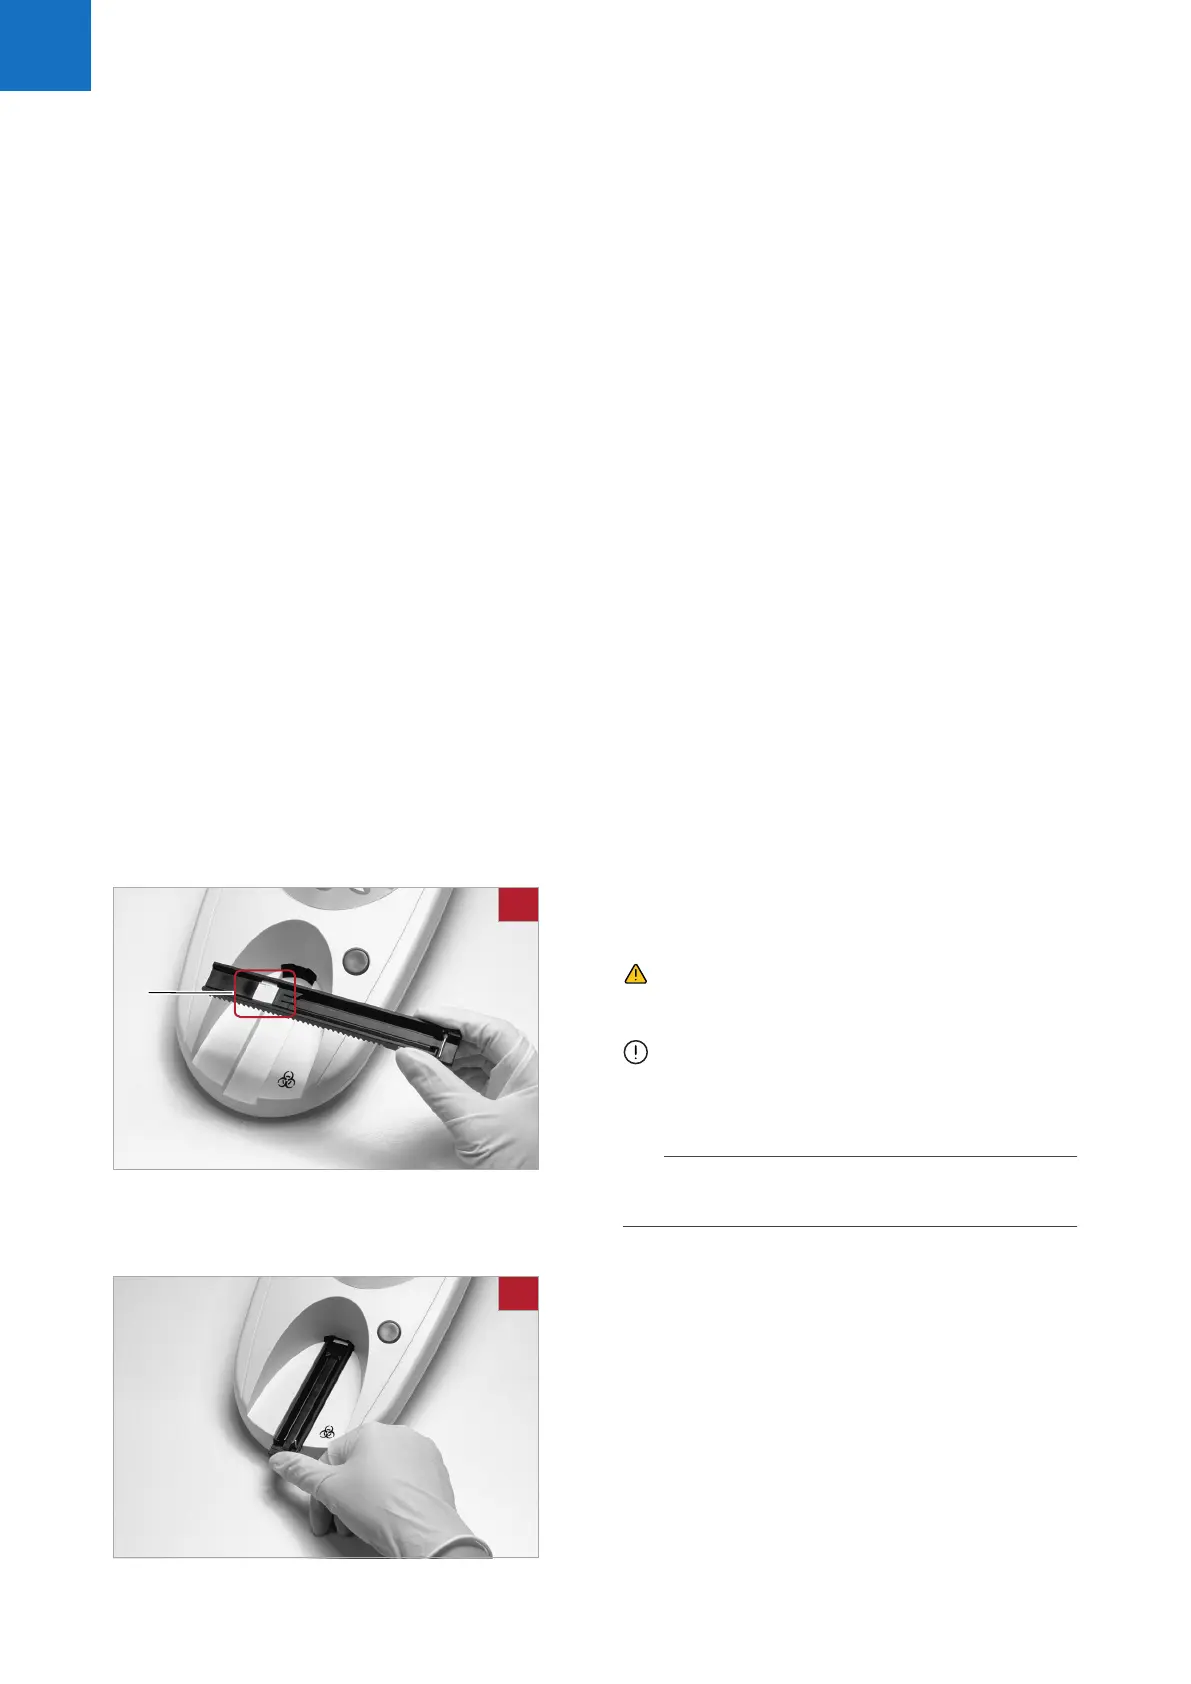
Inserting the test strip tray
r To insert the test strip tray
1
Pick up the test strip tray, Type “C”, and with the
retaining bar nearest to you pushed down.
CAUTION: Be careful not to touch the grey
reference pad (A). Contamination of the reference pad
may impair the quality of the results obtained.
ATTENTION: The test strip tray must be replaced
18 months after first date of use or if the
Urisys 1100
®
system cannot be calibrated despite
several attempts
q For more information see:
u 6. Calibration (29)
2
Slide the test strip tray into the slot below the function
keys, so that the near edge of the test strip tray is flush
with the near edge of the analyzer.
1
A
2

 Loading...


