Roche Diagnostics
Urisys 1100® · ≥5.7 · Operator's Manual · 9.0
30 6. Calibration
2
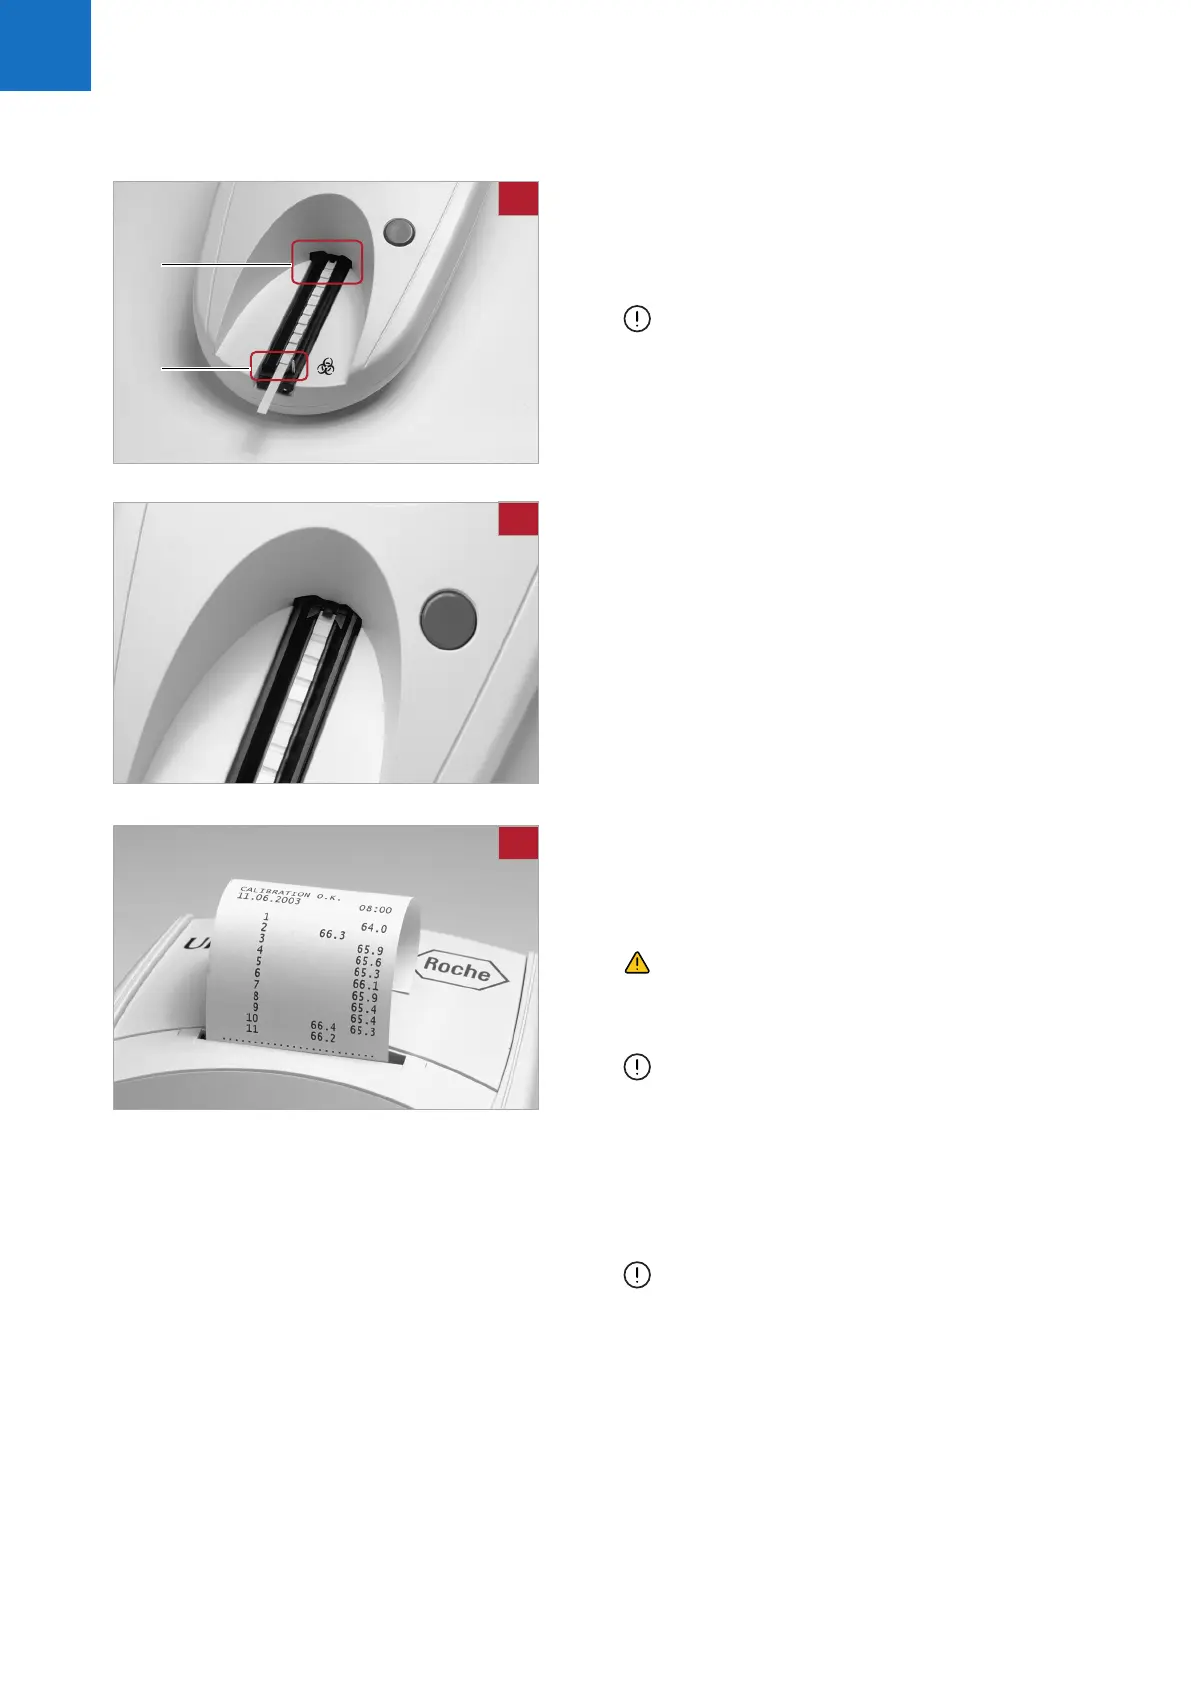
Place the calibration strip, with the test pads facing
upwards, on the test strip tray so that its leading edge
is held by the clip (A) at the front end of the insertion
slot. The retaining bar (B) must be open.
ATTENTION: It is very important that the
calibration test strip locks into the analyzer correctly in
order to ensure the quality of the calibration.
3
Press the START button.
I An acknowledging beep sounds.
f After warming up time, the test strip tray advances
slightly, the retaining bar closes, and the grey
reference pad on the test strip tray and the
calibration pads are read.
f The test strip tray is then transported back to the
start position, and the retaining bar opens.
4
Remove and dispose of the calibration strip.
I Use each calibration strip once only.
5
If the calibration is valid, the result is stored together
with the date and time, and printed.
Remove the calibration strip and discard properly
(follow test strip insert instructions).
CAUTION: Regular calibration is necessary to
ensure the quality of the results obtained. Roche
Diagnostics cannot warrant the correctness of results
if the analyzer is not calibrated regularly.
ATTENTION: You can recalibrate the analyzer at
any time, even if a week has not elapsed since the last
calibration, for example if a Combur10Test
®
UX test
strip has returned an implausible result. Start the
calibration procedure by pressing the left function key
(Calibr.) with the analyzer in Ready-to-Measure
mode. The message START CALIBRATION! appears.
Follow the calibration procedure described above.
ATTENTION: If you reply with No to the weekly
REPEAT CALIBRATION! reminder, for example
because you have used up your supply of Control-
Test
®
M calibration strips, the message REPEAT
CALIBRATION! is printed together with each patient
report from subsequent readings. Obtain a new pack
of Control-Test
®
M and recalibrate immediately.
2
A
B
3
5

 Loading...


