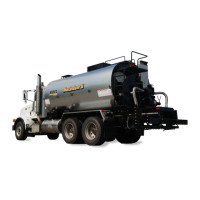
6-12 Rosco Maximizer 2B Asphalt Distributor
Operation
To prevent injury, use a wick type torch
to light pilot ame and burner. DO NOT use a match
or lighter.
14. Light the pilot light on the lower burner using a wick
type torch.
15. When the pilot ame is lit, open the shut-off valve
completely. The pilot valve contains an orice that
will allow sufcient fuel through to maintain the pilot
light.
16. Open the pilot valve to supply fuel to operate the
burner.
17. Repeat procedure for the upper burner.
18. Use the regulator to set the fuel pressure at 10 to 20
PSI.
High Temperature Limit Control
NOTE: This feature is designed as a safety feature only.
It is not to be used for thermostatic control.
This feature causes the burners to automatically shut
off when the high temperature limit is reached, (Figure
6-10). The burners will not restart until the material cools
to less than the set temperature limit. This feature helps
to prevent overheating the material.
NOTE: Burner Control switch is a momentary switch and
will return to the OFF position. An icon will display
on the screen when the Burner Control switch
has enabled the burner system controls.
DO NOT leave the unit unattended
while heating material. Monitor the Controller
display temperature, as well as the dial or pencil
thermometer, to insure that all equipment is
functioning properly and that the material does not
heat beyond the required spraying temperature,
(see Guideline Temperatures For Liquid Asphalts in
Section 4).
LPG Burner Manual Extinguishing
1. Close the tank valve and allow the fuel to ow to the
burners until they go out.
2. Close the pilot and shut-off valves in the lines.
3. Wait 5 minutes before relighting to insure there are
no fumes in the ue.
Hot material will turn water into steam
and can cause an explosion.
3. Be sure that ue tubes are covered by at least 8
inches of material. Read the tank dipstick. If the
amount in the tank is less than the recommended
amount in Table 6-3. Tank Contents Chart to
Ensure Flue Tube Coverage, do not use the
burners. Using the burners without enough material
in the tank will cause damage to the ue tubes and
could cause an explosion.
Never operate the burners if the ue
tubes are not covered with at least 8” (20.32cm)
of material. The ue tubes can become red hot and
ignite the vapors causing an explosion.
4. Do not load, unload, transport or spray while
burners are operating.
5. Start and run the engine at 1000 to 1200 RPM.
Engage PTO (if equipped). This provides power to
the asphalt pump.
6. Set the Plus One Controller Master switch ON to
activate the system, (Figure 5-2,1).
7. Set the Plus One Controller to required temperature
for the material being used, (Figure 6-10).
8. Push Plus One Controller Mode Selection control
to Tank Circulate Mode (Figure 6-1), (see Tank
Circulate Mode in Section 6).
Operating the burners without
circulating the product in the tank can create
explosive fumes. If the product can not be circulated
after 15 minutes of heating, the fuel to the burners
must be turned off, while leaving the blowers running
(15 minutes ON, 15 minutes OFF). Do not try to heat
material again for 30 minutes.
9. Set the asphalt pump to the forward position at a
ow of 75 - 100 GPM. (283.9 - 378.5 LPM)
10. Close pilot valves and shut-off valves.
NOTE: Burner Control switch is a momentary switch and
will return to the OFF position. An icon will display
on the screen when the Burner Control switch
has enabled the burner system controls.
11. Turn Plus One Burner Control switch ON.
12. Open the LPG tank valve to start the ow of propane.
13. Open the shut-off valve to the lower burner a little to
allow a small amount of fuel to ow to the burner.
Return to
Last Viewed
Return to
Thumb Index

 Loading...