16
FA ROTEX Solaris RPS4 - 06/2015
4 x Installation
3. Aligning the solar storage tank. The centre-to-centre distance
between the storage cylinders must be 830 mm. Note also the
recommended wall distance of 200 mm.
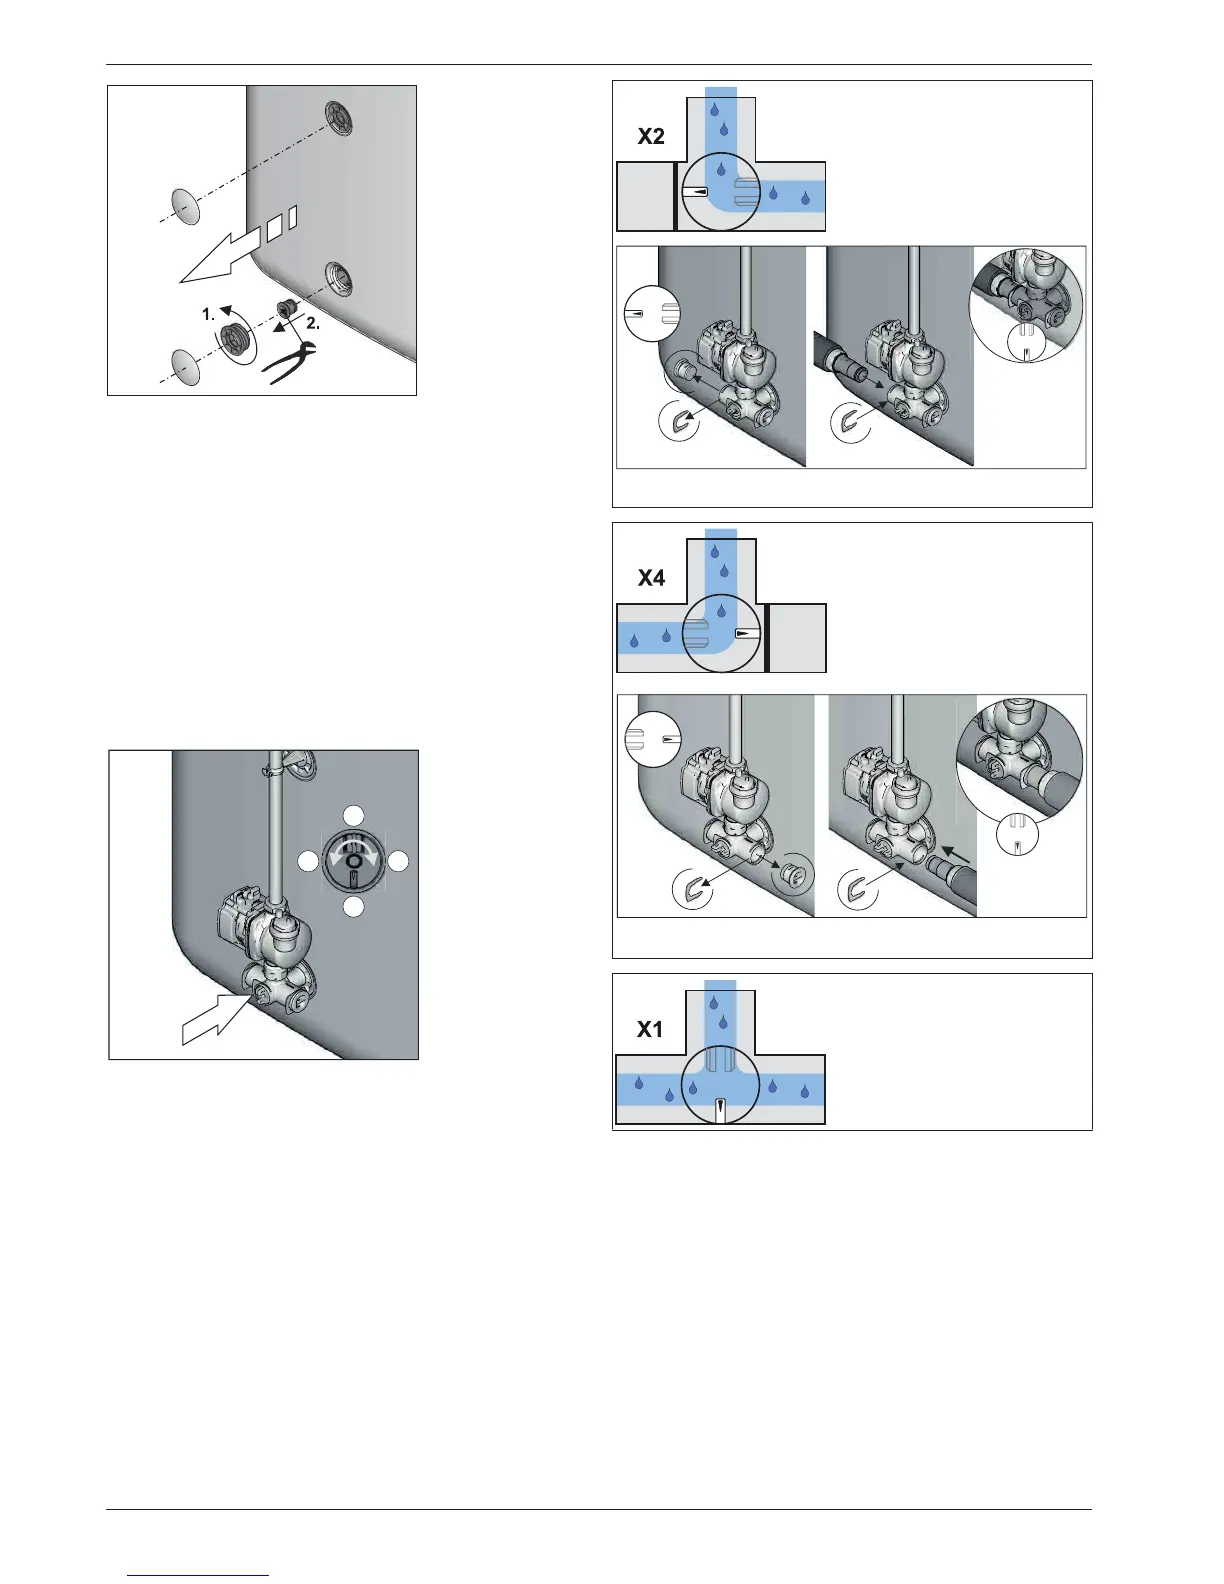
4. Preparation of the storage tank connection bracket (on the
Control and pump unit RPS4).
Ɣ Remove the holding bar on the extension side and
remove the ball valve or blind plug, depending on the
existing structure.
Ɣ Adjusting the desired operating position:
– X2: storage tank extension on the right-hand side,
fig. 4-38.
– X4: storage tank extension on the left-hand side, fig. 4-40.
– X1: without storage tank extension, fig. 4-42 (standard ex
works)
5. Mount the removed plug on the return connection line pre-
installed by ROTEX on the second storage tank connection
bracket.
6. Insert the return line, completed in this way, in the free outlet
of the storage tank connection elbow of the Control and pump
unit RPS4 using the free plug fitting (Ø 28).
7. Fix the return line to the return connection of the second hot
water storage tank.
8. Remove the lower covering lid on the relevant side from the
covering hood.
9. Fit the covering hood to the hot water storage tank
(see chapter 4.2.5).
10. Fit a FlowGuard (optional) to the solar flow connections on
the storage tank (see chapter 4.2.2).
Fig. 4-36 Work step 2
Fig. 4-37 Work step 4
4
3
2
1
Fig. 4-38 Operating position with
right-hand storage tank
extension
Fig. 4-39 Storage tank extension on the right-hand side
Fig. 4-40 Operating position with
left-hand storage tank
extension
Fig. 4-41 Storage tank extension on the left-hand side
Fig. 4-42 Operating position with-
out storage tank exten-
sion
4.
3.
1.
2.
X2
5.
4.
3.
1.
2.
5.
X4