Installation, Commissioning and Maintenance Manual
54
PM-GP-006 Page: 17/17
Component: Single-Acting actuator / Double-Acting actuator Task: Pneumatic cylinder and centre body seals replacement
Equipment, Tools, Materials:
Spare seals
Wrench
Lifting tools
Project documentation
Warnings:
Preliminary Operations: Removal from Valve
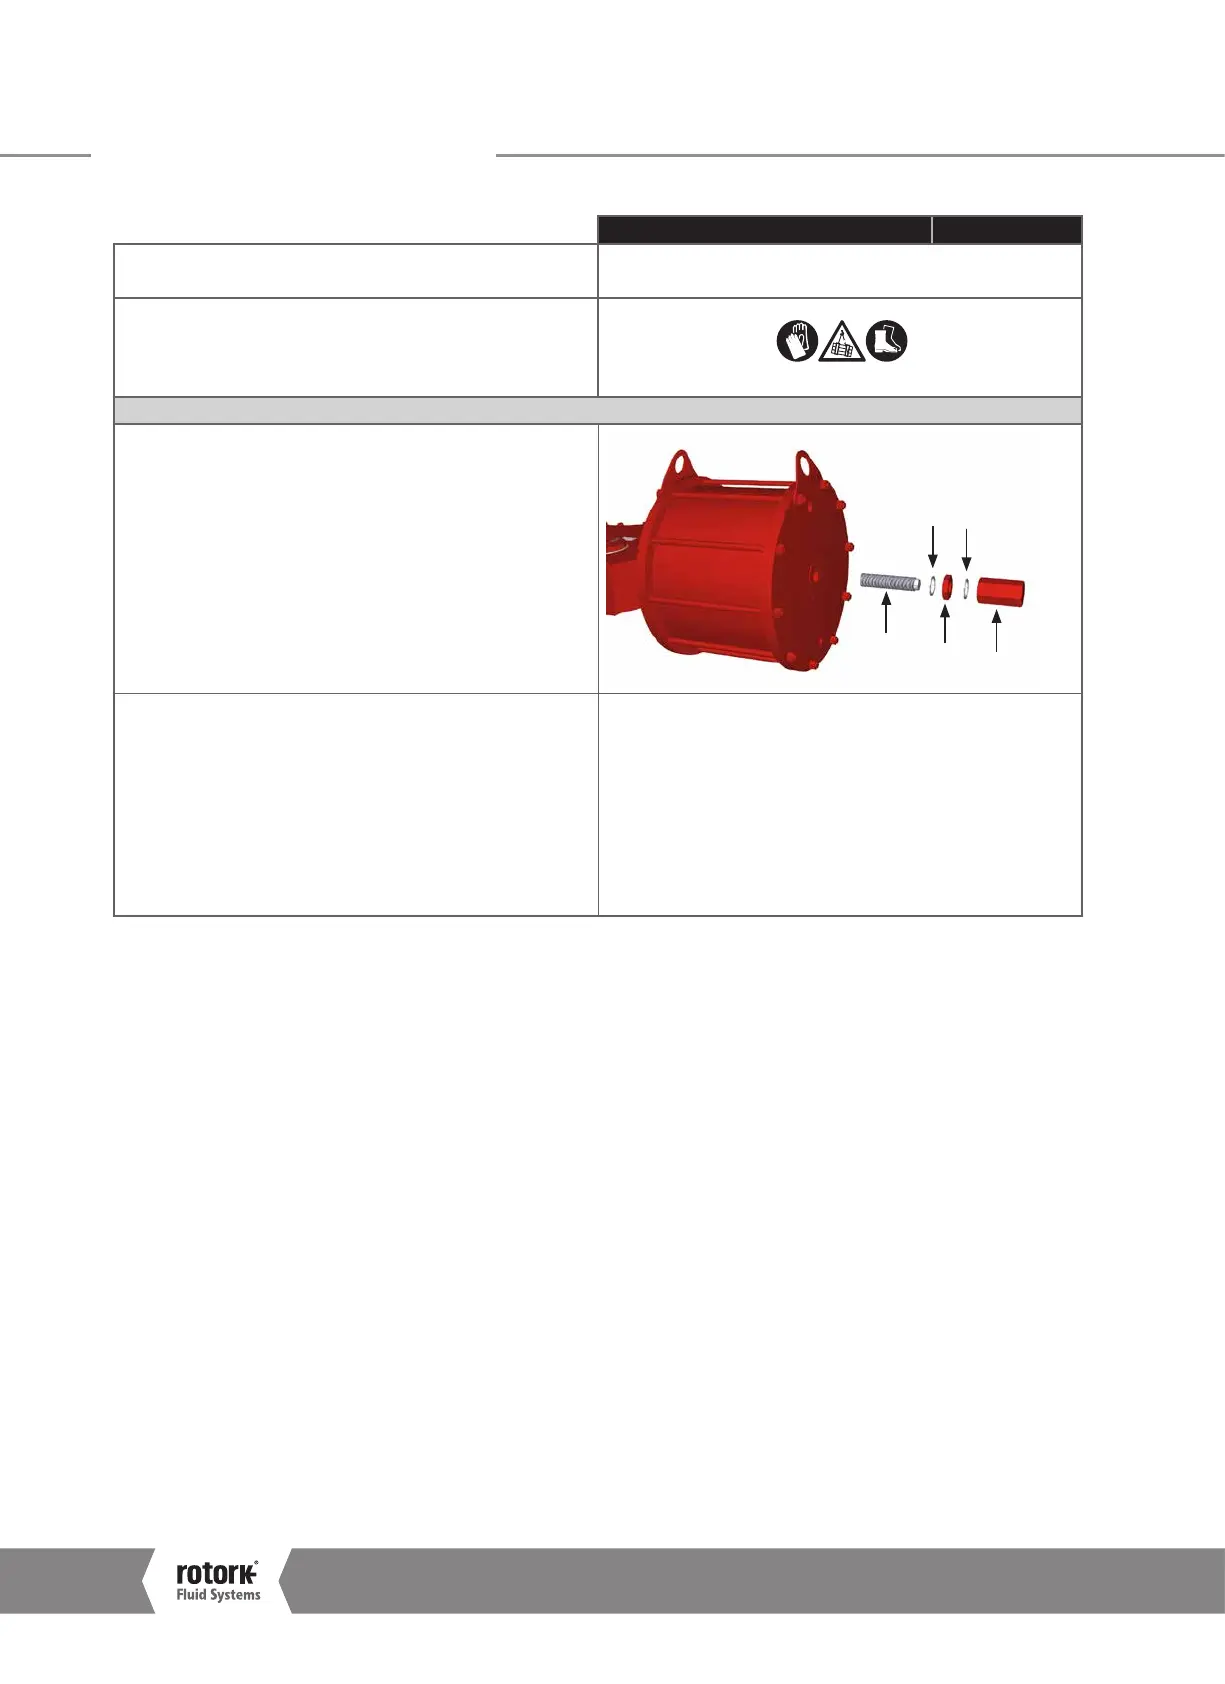
80. With the help of a wench, screw the stop bolt (7) into the
cylinder flange
81. Insert the seal washer (5) and, holding the stop bolt (7) with a
wrench, tighten the stop nut (6)
82. Insert the second seal washer (5) and tighten the cap nut (4)
83. Note: before tightening both the stop nut (6) and the cap nut
(4), always make sure the two washers (5) are correctly
positioned
Please refer to page 17 of the present document for the instructions
to regulate the stop bolt position.
7
6
4
5
5
84. Assemble the components on the centre body cover (if any)
85. Assemble the control panel, if any, on the central body
The actuator must be tested before it is assembled on the valve.
86. Place the actuator in a stable position, e.g. on a workbench
87. Connect the pneumatic supply to the actuator and cycle the
actuator several times, verify smooth functioning and absence
of leakages
88. Check painted parts, if necessary repaint them per the
applicable painting specifications
The actuator is now ready to be assembled on the valve.
16.0 Periodic Maintenance
A4US
US
A4
US A4
US
A4
 Loading...