Chapter 2 Periodic Inspection
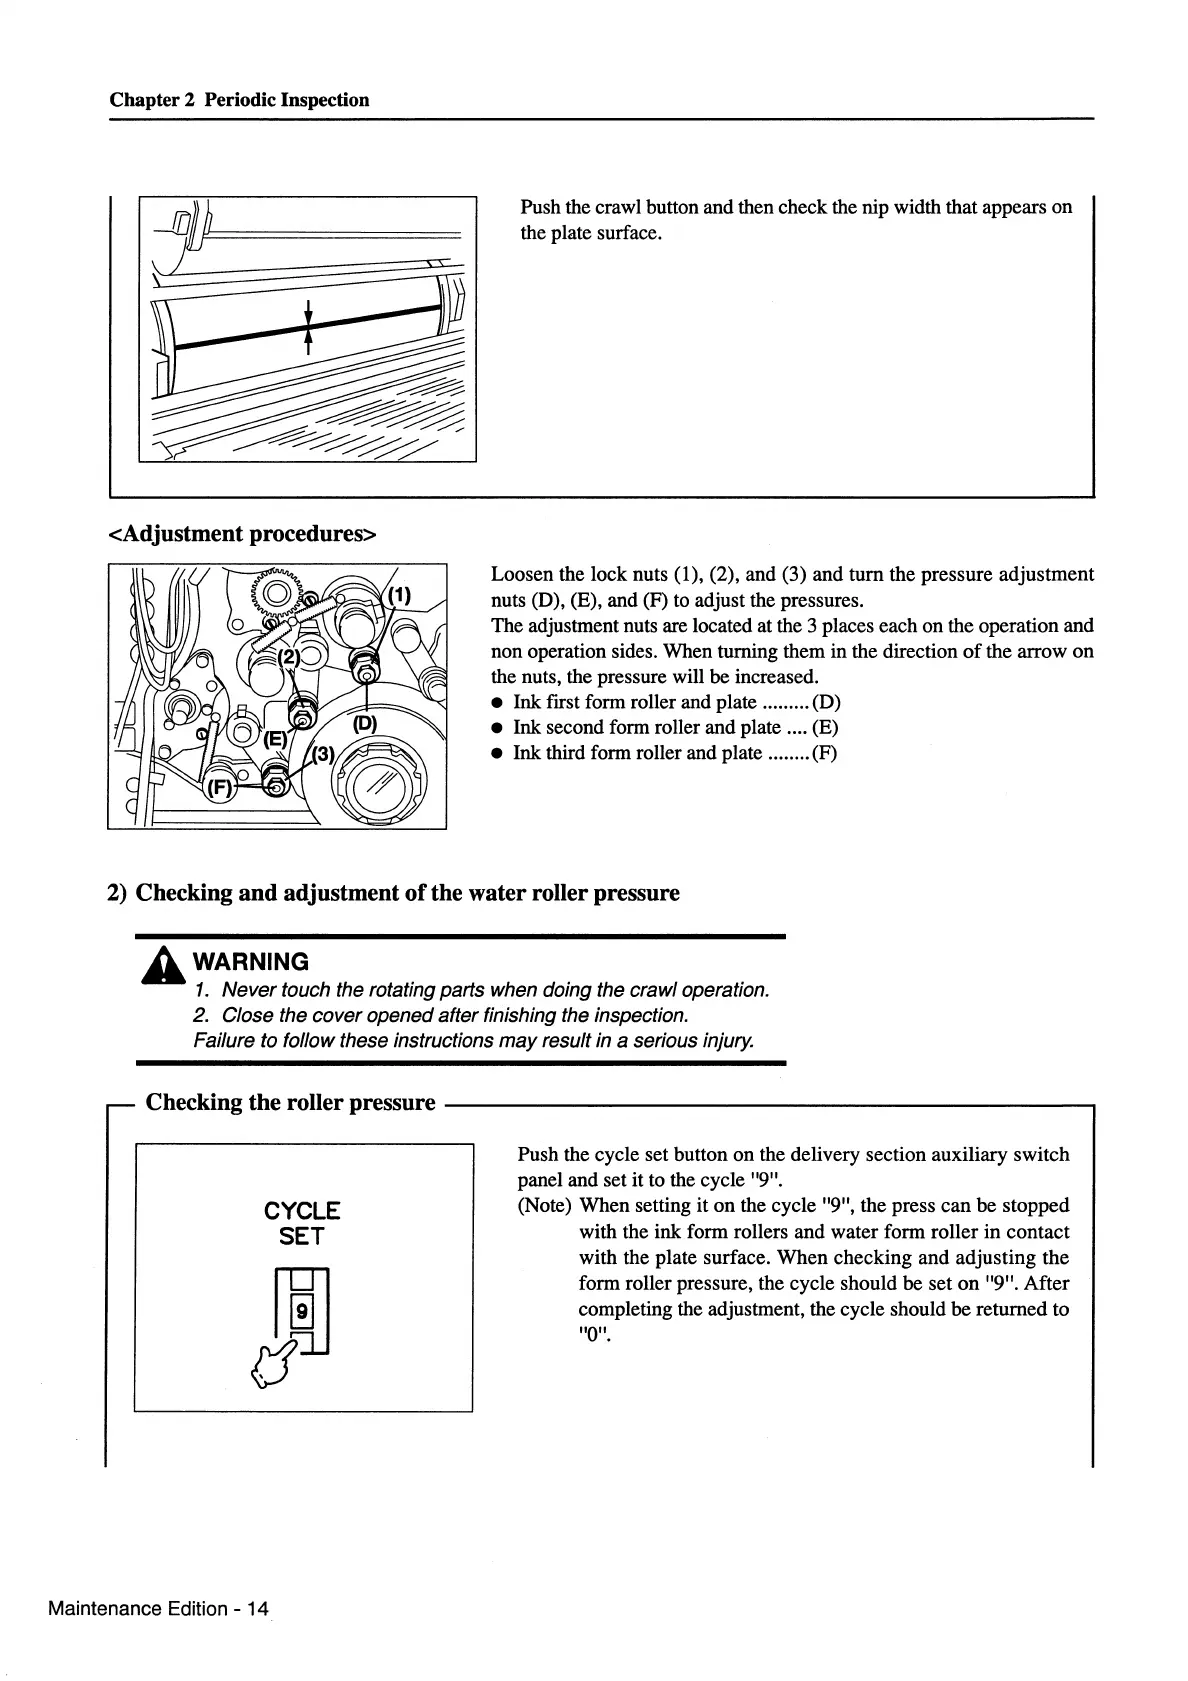
<Adjustment procedures>
Push the crawl button and then check the nip width that appears on
the plate surface.
Loosen the lock nuts (1), (2), and (3) and
tum
the pressure adjustment
nuts (D), (E), and (F) to adjust the pressures.
The adjustment nuts are located at the 3 places each on the operation and
non operation sides. When turning them in the direction
of
the arrow
on
the nuts, the pressure will be increased.
• Ink ftrst form roller and plate ......... (D)
• Ink second form roller and plate .... (E)
• Ink third form roller and plate ........ (F)
2) Checking and adjustment
of
the water roller pressure
A WARNING
1.
Never touch the rotating parts when doing the crawl operation.
2. Close the cover opened after finishing the inspection.
Failure to follow these instructions
may
result in a serious injury.
- Checking the roller pressure
----------------------------,
CYCLE
SET
Maintenance Edition - 14
Push the cycle set button
on
the delivery section auxiliary switch
panel and set it to the cycle "9".
(Note) When setting it
on
the cycle "9", the press can
be
stopped
with the ink form rollers and water form roller
in
contact
with the plate surface.
When
checking and adjusting the
form roller pressure, the cycle should be set
on
"9".
After
completing the adjustment, the cycle should
be
returned to
"0".
 Loading...