WARNING
Under abusive conditions, liquid may be
ejected from the batteries; avoid contact.
If contact accidentally occurs, ush with
water. If liquid comes in contact with eyes,
additionally seek medical help. Liquid
ejected from the battery may cause irritation
or burns.
10. Remove and set aside the battery
securing bracket off the batteries.
11. Remove and set aside the battery covers
for the battery or batteries being replaced.
12. Disconnect the battery or batteries that
need to be replaced.
13. Disconnect the negative (black) cable,
then the positive (red) cable. Be careful
not to short across the terminals.
14. Replace the battery or batteries as
needed and reconnect the cables.
Connect the positive (red) cable, then the
negative (black) cable. Be careful not to
short across the terminals.
15. Reinstall the battery covers and the
battery securing bracket.
16. Push the battery tray back inside the
mower just enough to allow you to
reconnect the battery quick-connect plug.
NOTE: To gain enough leverage to
reconnect, connect from the battery
compartment area rather than the area
under the seat.
17. Once the batteries are reconnected to the
mower, push the battery tray fully back
inside the mower.
18. Reinstall and securely tighten the flange
bolts and flange nuts to secure the outside
edge of the battery tray. Tighten securely.
19. Reinstall the hex head bolt to secure
battery tray in place.
20. Reinstall the battery compartment cover/
Reinstall and securely tighten the four
screws.
NOTE: Make sure that the tabs on the
battery compartment cover are seated
in the slots on the mower top and side
panels before tightening screws.
21. Reinstall wiring cover, and push down
until it snaps in place, then lower the
mower seat.
NOTE: Always ensure that the safety
interlock cable connection is still fully
seated when replacing the wiring cover.
NOTE: Always abide by the safety warnings
provided with the battery. Dispose of the
old battery according to local and state
regulations.
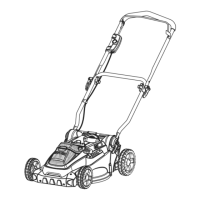
STORING THE PRODUCT
The following steps should be taken before
storing the product.
■ Park the mower on a level surface, and
engage the parking brake.
■ Remove any build-up of grass and leaves
on or around the motor cover. Wipe the
product clean with a dry cloth. Do not use
water to clean the product.
■ Plug the product to charge for the entire
time of storage.
NOTE: If it is not possible to leave the
mower charger connected during storage,
charge the batteries at least once a month
during storage.
■ Store the product in a clean, dry place that
is inaccessible to children. Do not store the
product near any appliance that operates
with flame such as a gas water heater,
clothes dryer, or furnace.
NOTE: Do not leave the start key in the
product during storage.
■ If the product must be stored outside, make
sure it is covered completely to protect it
from the elements.
■ Keep the product away from corrosive
agents, such as garden chemicals and de-
icing salts.
PREPARING FOR USE AFTER STORAGE
The following steps should be taken before
using the product after it has been stored:
■ Review maintenance chart.
■ Fully charge the batteries.
■ Check tyre pressure and inflate as needed.
■ Briefly drive the product and check all
systems and components to ensure that
they are functioning correctly.
37