- 6 -
1-5. Connecting the Power Supply
Use the optional Power supply for your printer.
WARNING:
Make sure that you use the attached Power supply or equivalent. Using an incorrect power
supply may cause fire or electrical shock.
CAUTIONS:
When connecting or disconnecting the power supply from the printer, make sure that the
power supply is not plugged into an electrical outlet. Otherwise you may damage the
power supply or the printer.
If the power supply’s rated voltage and your outlet’s voltage do not match, contact your
dealer for assistance. Do not plug in the power cord. Otherwise, you may damage the
power supply or the printer.
1. Make sure the printer is turned off.
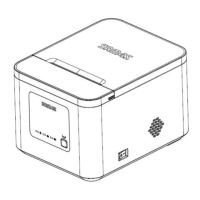
2. Pull the hole of the Cover-Wire to separate from the printer.
3. Plug the DC cord connector into the power jack on the printer.
4. If it is necessary to connect the interface, plug the interface connector into the
interface port on the printer.
5. If it is necessary to connect the drawer, plug the drawer connector into the drawer
port on the printer.
6. Put the two hooks into the two holes of the Case-Lower backward and close the
Cover-Wire until it locks firmly.
7. Plug the AC Adapter power cord into the wall outlet.
NOTES : To remove the DC cable connector, make sure that the
power supply’s power cord is unplugged; then grasp the
connector at the arrow and pull it straight out.
NOTES : If you want to turn the ELLIX20 off, press and hold the
power button until the POWER LED is off.