-25-
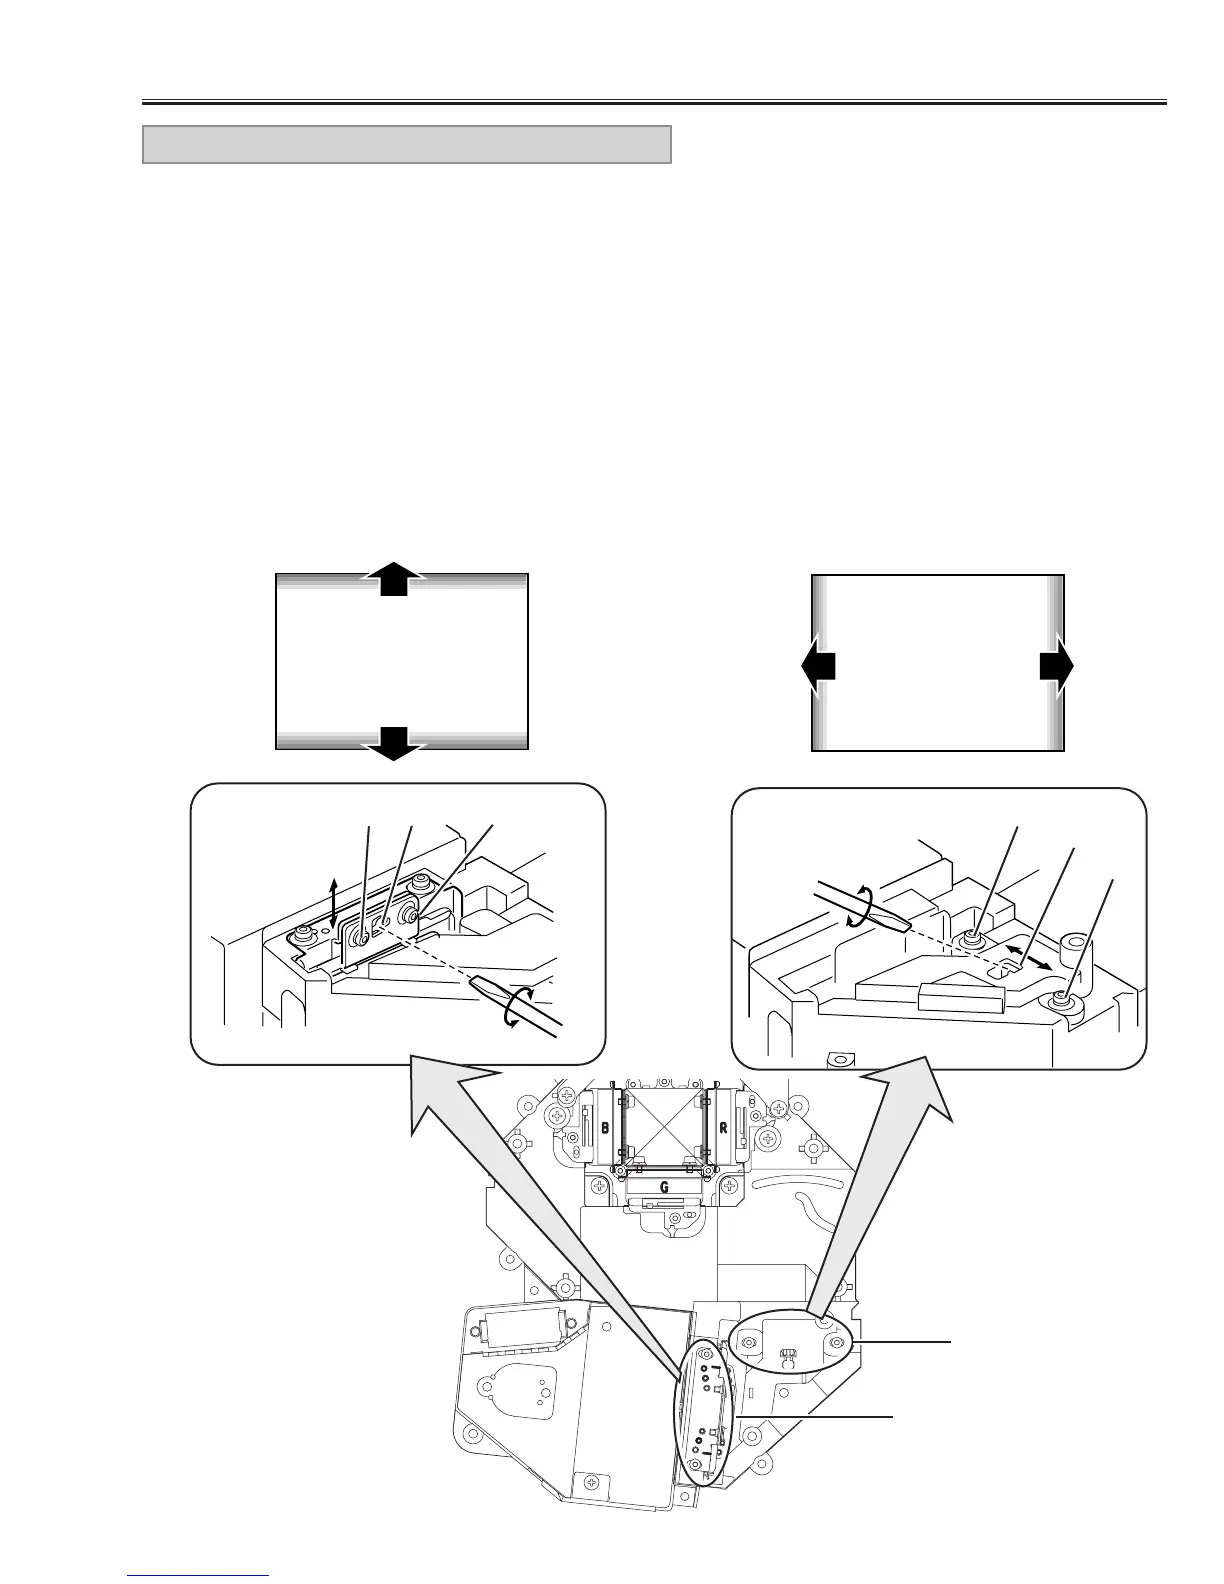
Optical Adjustments
[Adjustment]
1. Turn on lamp by a state of without FPC cable of LCD
panels.
2. Insert a light block sheet in front of the Blue panel to
block the blue light so that red and green light are pro-
jected.
3. Adjust the adjustment base of integrator lens-IN and
integrator lens-OUT to make color uniformity in yel-
low.
1) If the un-uniform color appears on the top or bot-
tom of the screen as shown in Fig.5-a, loosen 2
screws “A” (Fig.5-b) with hex driver and insert a
slot screwdriver into slot “B” and turn it to make
color uniformity in yellow.
2) If the un-uniform color appears on the left or right
of the screen as shown in Fig.5-c, loosen 2 screws
“C” (Fig.5-d) with the hex driver and insert a slot
screwdriver into slot “D” and turn it to make color
uniformity in yellow.
6. Tighten the 2 screws “A” or “C” to fix the integrator
lens-IN and OUT unit.
Slot B
Fig.5-b
Fig.5-a
Fig.5-c
INTEGRATOR LENS ADJUSTMENT
Yellow
A
A
Slot D
Fig.5-d
C
C
[Before Adjustment]
- Adjustment requires a 2.0mm hex driver and a slot screwdriver.
- Remove the cabinet top following to “Cabinet Disassemblies”.
- Disconnect AV sub board and connectors FPC cable of LCD panels on the main unit.
Yellow
Fig.5
Integrator Lens-IN
Integrator Lens-OUT