-19-
■ LCD Panel Replacement
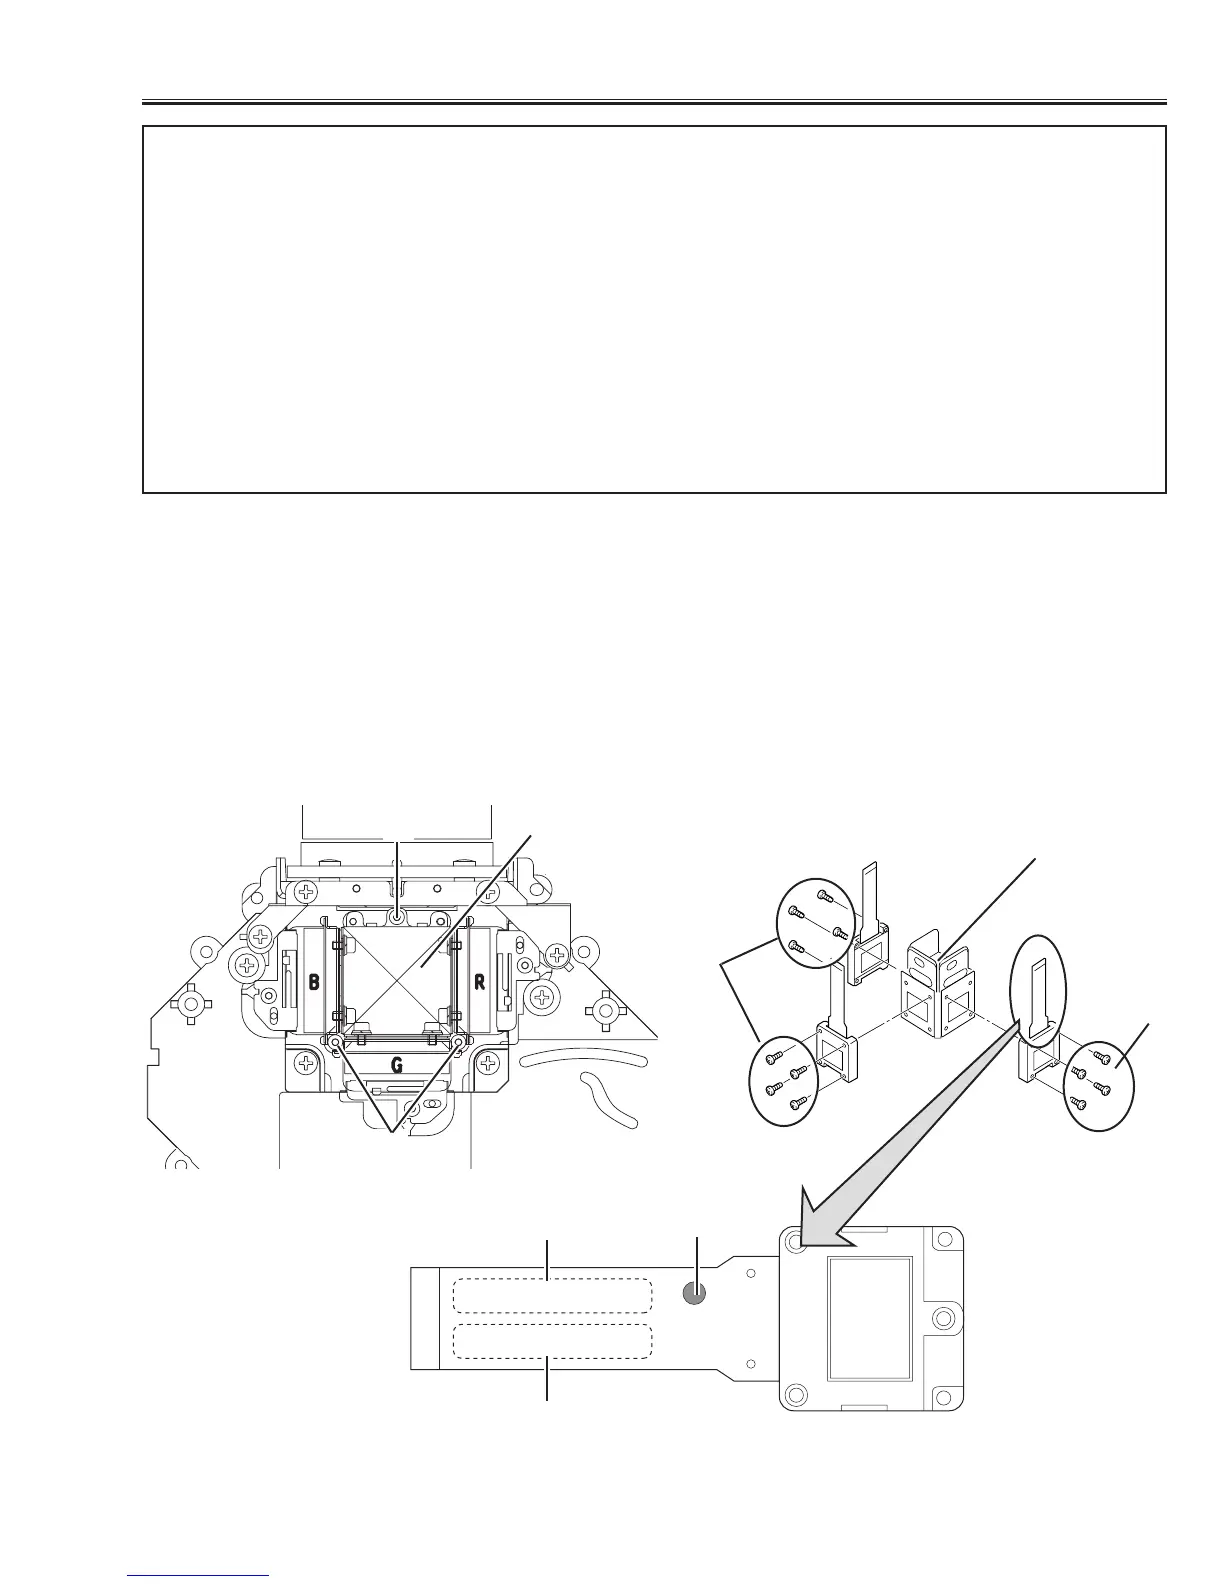
● LCD PANEL REMOVAL
1. Remove the cabinet top following to “Mechanical Disassemblies”.
2. Remove 3 screws (A) by using 2.0mm hex driver, and then pull the prism/panel ass’y out from the optical base.
3. Remove 4 screws (B) to take off the LCD panel from the prism/panel ass’y.
Caution: Do not remove 3 panels (R,G,B) at the same time as it is necessary the standard panel for adjustment.
Do not fasten the screws with excessive force when mounting the LCD panel, otherwise focus adjust-
ment may be shifted.
A
A
B
B
Prism Ass’y
B-LCD Panel
G-LCD
Panel
R-LCD
Panel
SEAL
PART NO.
LOT NO.
Prism Ass’y
P09SG210
1-A-1234A9
IMPORTANT NOTICE on LCD Panel Replacement
There are 2 types (Type A, Type B listed on next page) of LCD panels which they have a different characteristics
used for this model. As the only Type B LCD panels are supplied for the service spare parts, take care the follow-
ing notice when the LCD panel replacement.
1. When replacing the LCD panel, confirm the indication of the LCD panel, then replace the correct LCD panel.
Select either combination (1) or (2) listed on next page when in combine the R, G and B LCD panel, please
see the explanation “COMBINATION OF LCD PANELS”.
2. After replacing LCD panel, the specified adjustment [Video Adjustment] should be performed for obtaining bet-
ter performance, please see the explanation “REPLACED LCD PANEL ADJUSTMENT”. And also required to
adjustment the convergence and common center adjustments, and white uniformity adjustment if required.
(Refer to the Optical and Electrical adjustments.)