98
Chapter 8 Network capture functions
Error messages Cause and corresponding
Cannot be displayed as PJ is
under display.
Error when Start real time capture is executed. The other capture, viewer or
memory viewer function is now operating.
Wait until the communication function is available.
Cannot connect to PJ.
Cannot establish the connection with the projector when Capture transfer, Start
real time capture or Terminate capture is executed.
Check connection of the network cable.
Cannot transfer data to PJ.
Cannot transfer the data to the projector when Capture transfer, Start real time
capture or Terminate capture is executed. The time-out period is 10 seconds.
Check the connection of the network cable.
Invalid port number
When the parameter is set, the reserved port number is specified.
Check the parameter setting (p.92)
Error information
The Capture transfer is Windows-compliant, but non-Mac-compliant.
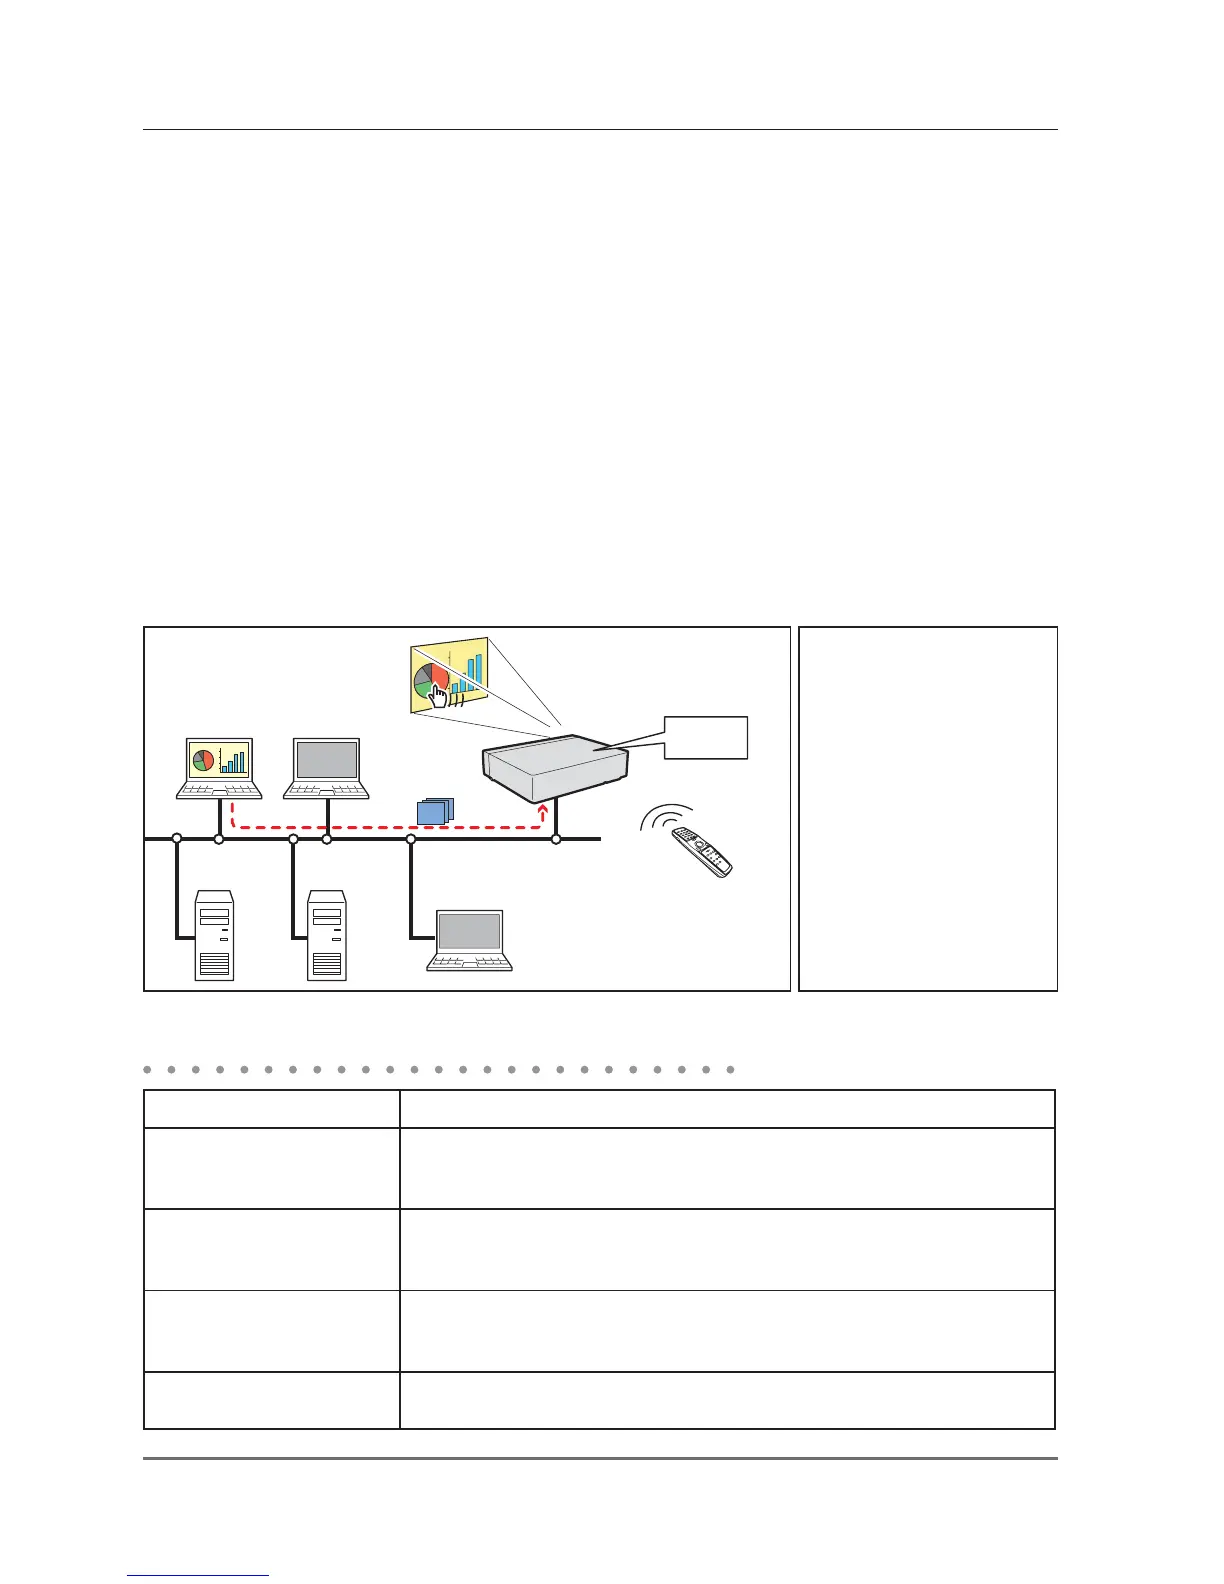
Example of advanced use
Displays the presentation data stored in the computer by using the wireless mouse function
from the projector.
1 Start capturing of the computer PC1 by using the projector.
Select “Network Capture” icon from the menu and select "PC1" and then select "Connect" ( p.96).
=> The Network Capture software installed in the selected computer will start capturing.
2 On the image of the PC1 projected on the screen, search a presentation file data stored in the PC1 by
using the wireless mouse function of the remote control supplied with the projector.
3 Select a desired file and double click with the remote control .
=> The application by which the document was created starts and the projector projects the presentation picture
on the screen.
4 Start the presentation.
=> By using wireless mouse function, control the page browsing and some other operations for the PC1.
For further instructions of the wireless mouse, please refer to the projector’s owners manual.
On the projected screen using with the network capture, the shape of the mouse pointer differs from the one on
the computer’s screen.
PC4PC3
Capture
PC5
PC2
PJ2
PC1
* PC provides the Network Capture.
* Controls PC1 with wireless mouse.
Project a screen
image of PC1
with PJ2.
Setting condition
Projector
Input mode: Network
Registering the connection:
The IP address of the
computer and proper
parameter must be set to
the PC1 ( p.92-93).
Mouse Display: "On"
( p.95)
Computer PC1
Software:
The Network Capture 5 is
activated.

 Loading...