3 BP recording
3.2 Applying the Cuff
Page 28
BR-102 plus / BR-102 plus PWA
Art. no.: 2.511076 Rev.: g
3.2 Applying the Cuff
The BR-102 plus is supplied with one of two cuff types. Both are
applied in the same way. The instructions detailed here give general
guidelines and apply to both types of cuffs:
1. Instruct the patient to remove upper clothing.
2. Select the appropriate cuff size according to the patient's upper
arm. Different cuff sizes are available dependent of type of cuff. To
determine the cuff size, measure the patient’s arm circumference
at the midpoint with a measuring tape.
3. Uncover the left upper arm of the patient. (The cuff is designed to
fit the left upper arm, but can be placed on the right arm if
required.)
4. Locate the brachial artery above the elbow bend inside the upper
arm.
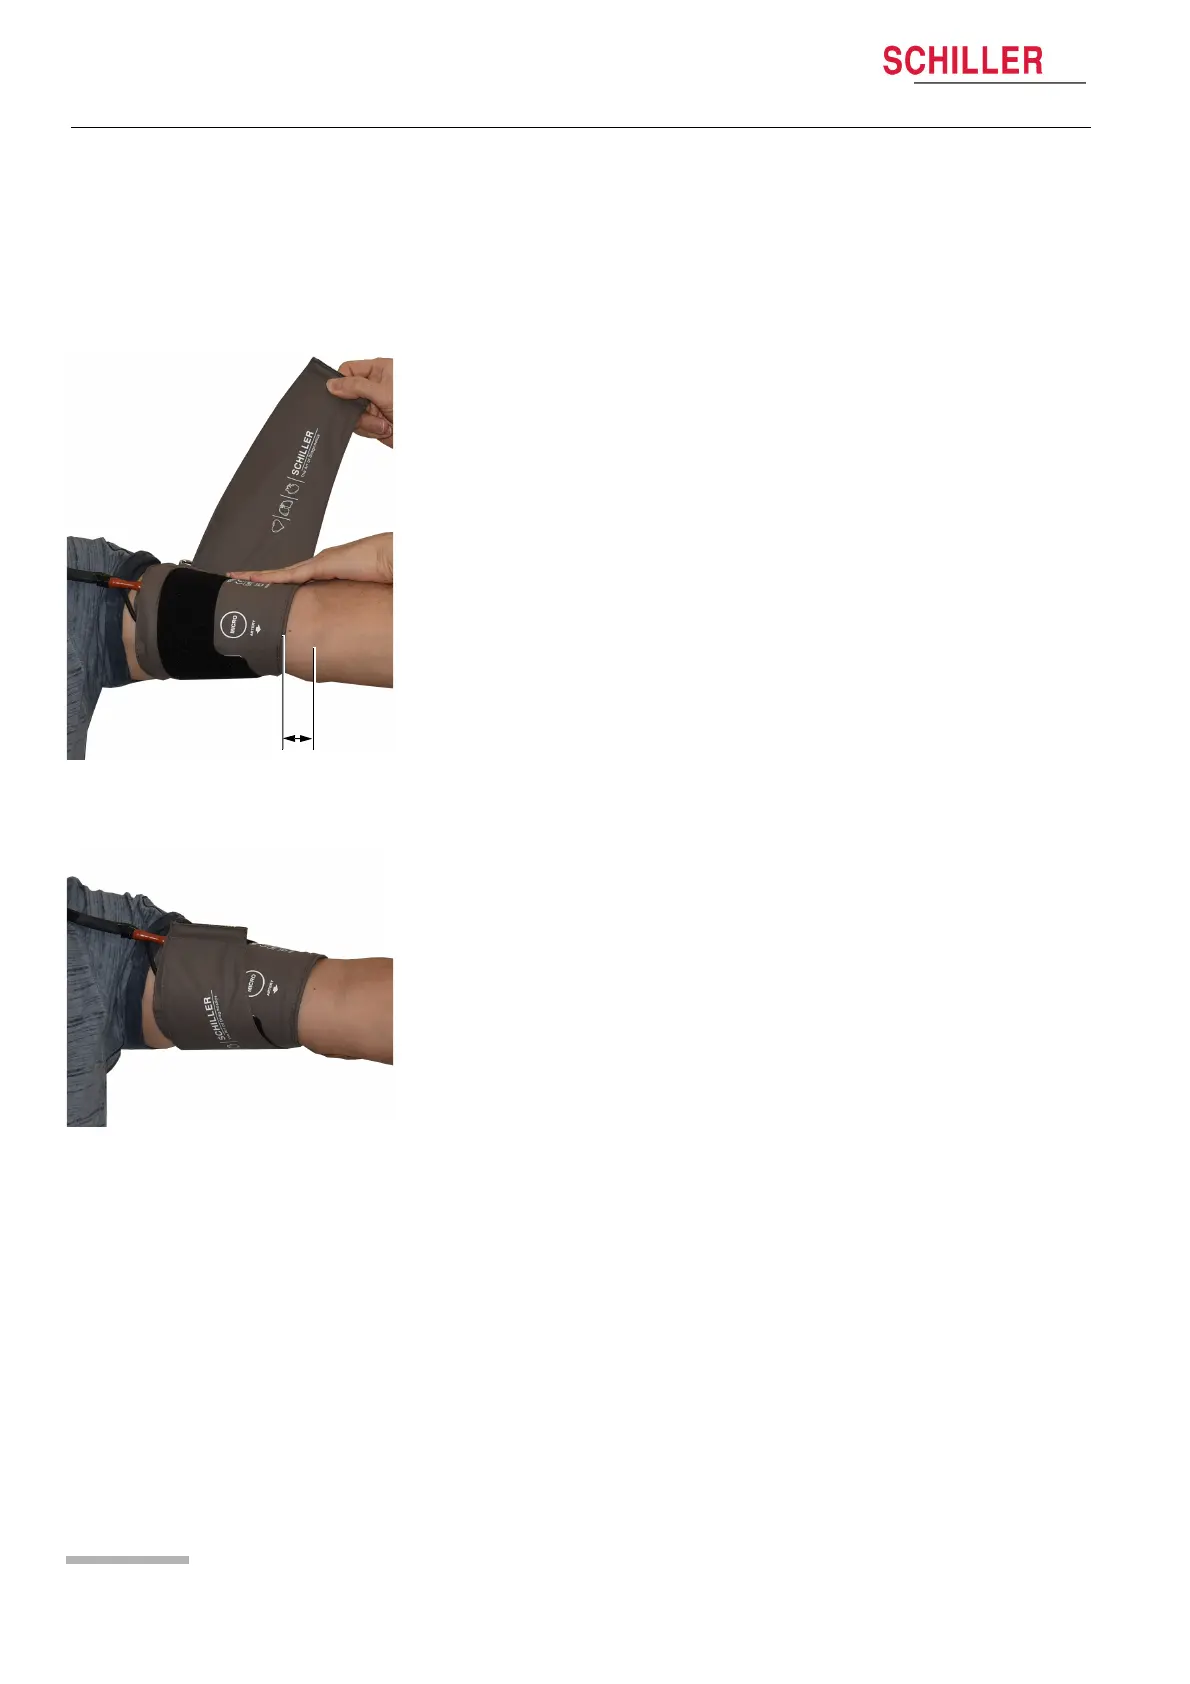
5. Position the microphone (marked Micro) over the brachial artery
and secure cuff.
– Wrap the cuff around the upper arm in such a way that the patient
can still bend arm (the bottom edge of the cuff should be 2 cm
away from the elbow bend).
– Tighten the cuff and secure with the velcro strip. The cuff must be
tightened to such an extent that it fits properly on the upper arm
and is prevented from moving.
– To avoid a venous congestion do not tighten the cuff too firmly.
– The pressure hose and microphone cable must point to the pa-
tient's shoulder.
6. Place the pressure hose so that it is loosely positioned behind the
patients neck.
7. Connect the pressure hose and microphone cable (if not already
connected) to the recorder (see Connecting the Pressure Hose
and Microphone, page 16).