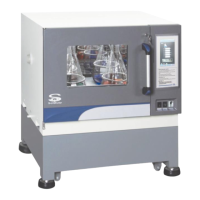
INCU-SHAKE Compact Stackable shaking Incubator Manual V2023.1
12
5.3.5 Lay down the unit, check and adjust the potions of the foot blocks and make
sure the tips of the blocks sits firmly in the holes. Make sure hands off the unit
before the unit is laid down! Do be careful of your hand!
5.3.6 Use a spanner to unscrew the adjusting bolt, raising the height of the flexible
block, until feeling some strength, and the tip of the bolt sits firmly in the hole.
5.3.7 Make sure the unit is elevated leveled and sits firmly on the four blocks. Try
setting the unit at its medium speed, e.g. 150rpm, slowly increase the speed
and adjust the adjusting bolt until no vibration is detected.
5.3.8 Finally screw the safety nut of the flexible block, lock up the adjusting bolt.
5.4 Preliminary Cleaning
Each new equipment was thoroughly cleaned prior to leaving the factory. It is recommended;
however, before installation, SciQuip recommends decontaminate all surfaces within the
interior chamber, outer door and gasket. They can be wiped down with a disinfectant of 70
percent alcohol or similar non-corrosive antimicrobial agent. After cleaning, dry all interior
components with a sterile cloth as necessary. Absolutely no chlorinated or halogen
materials are to be used in the chamber.
5.5 Electrical
Each unit is equipped with a trip switch to avoid power-related faults. Whereas, the electrical
supply circuit to the incubator must conform to all national and local electrical codes. Plug the
power plug securely into a grounded power source. VOLTAGE SHOULD NOT VARY MORE
THAN 10% FROM SERIAL PLATE RATINGS. A separate branch circuit is recommended to
prevent possible loss due to overloading or failure of other equipment on the same circuit.
5.6 Connect the Power Supply
Connect AC power via power wire, turn on the trip switch to start up the equipment after the
connected power supply meets the above stipulated requirements.
5.7 Installation of Flask Clamps (Applies P6040 predrilled tray)
The tray is predrilled with threaded holes for different sizes of Erlenmeyer flask clamps*. To
install the clamps onto the platform tray, please follow the instructions below,
⚫ Stop the unit from shaking and pull out the platform tray
⚫ Use the screw driver to fix the O clamps with screws onto the platform. (Flask
Clamp≥1000ml, 4 screws at corners, Flask Clamp<1000ml, 1 screw in the center)
⚫ Please make sure all screws are securely fastened before turning the unit back on.
* Only use SciQuip "O Clamps" for this tray.
⚫ Maximum loading capacity with P6040 predrilled tray

 Loading...