Do you have a question about the Seagull Models RV-8 and is the answer not in the manual?
Key technical specifications for the RV-8 ARF model, including dimensions and power requirements.
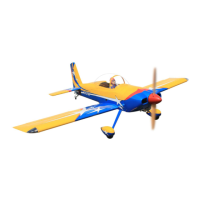
Welcome and overview of the RV-8 ARF 35-40cc model, highlighting its design and ease of use.
Important safety notice regarding the model's operation and user responsibility for potential risks.
List of all parts included in the RV-8 ARF 35-40cc kit for assembly.
List of items not included but necessary for assembly and operation of the model.
List of tools and supplies recommended for building the RV-8 ARF 35-40cc model.
Instructions for securely attaching flaps using hinges and C/A glue, ensuring proper alignment.
Instructions for properly hinging the ailerons to the wing panels using C/A glue.
Procedure for installing the wing tip lights, including wiring and voltage considerations.
Steps to prepare and attach control horns to the ailerons, ensuring correct fit and alignment.
Method for installing control horns onto the model's flaps, ensuring a secure bond.
Guide to fitting and securing aileron servos within the wing, including lead routing.
Continues the process of installing aileron servos and securing them with mounting hardware.
Steps for connecting the aileron control horns to servos via pushrods.
Instructions for installing the flap servo into its designated location.
Process for connecting flap control horns to servos using pushrods.
Instructions for hinging the horizontal stabilizer and elevator components to the fuselage.
Steps for preparing and attaching control horns to the elevator surfaces.
Continued steps for installing elevator control horns and servos, including linkage adjustments.
Procedure for hinging the rudder and fin components, ensuring proper movement.
Steps for attaching the control horn to the rudder, ensuring correct alignment.
Instructions for mounting the horizontal stabilizer assembly to the fuselage.
Guide for installing the pushrods connecting elevator servos to control surfaces.
Steps for connecting the rudder servo and its cable for directional control.
Detailed process for routing and securing the rudder control cables through the fuselage.
Continued steps for routing and securing rudder cables, ensuring proper tension.
Step-by-step guide for attaching the tailwheel assembly to the aircraft's tail.
Final steps for mounting the tailwheel assembly to the fuselage, ensuring stability.
Instructions for attaching the main landing gear struts to the fuselage.
Steps for fitting the wheels onto the landing gear struts and securing them.
Securing the landing gear fairings to the fuselage for improved aerodynamics.
Procedure for installing the receiver power switch into the fuselage.
Steps for installing the engine power switch into the fuselage.
Guide for installing the fuel tank and its lines into the fuselage.
Initial steps for preparing to mount the engine, including using a template.
Detailed instructions for drilling and securely mounting the engine to the firewall.
Guide for installing the throttle servo and connecting its linkage to the carburetor.
Final steps for installing and adjusting the throttle servo and horn for accurate control.
Procedure for connecting the ignition module to the engine's pickup line.
Steps for connecting the ignition module to the engine and securing ignition wires.
Instructions for fitting, drilling, and securing the engine cowl to the fuselage.
Recommendations for items needed for electric conversion and initial setup steps.
Attaching the motor box to the firewall and mounting the electric motor securely.
Installing the speed control and connecting it to the motor, ensuring lead clearance.
Steps for attaching the spinner backplate, propeller, and spinner cone.
Guide for installing the scale pilot figure and the canopy onto the fuselage.
Connecting servos and switch leads to the receiver and battery pack.
Instructions for securing the wing assembly to the main fuselage using the wing tube.
Tips for applying decals to the model for proper placement and appearance.
Critical procedure for achieving the correct center of gravity for safe flight.
Recommended control surface throws for optimal flight characteristics, including rates.
Guide to checking control surface operation and radio system setup before flight.
Essential checks to perform before the first flight for safety, security, and performance.
| Brand | Seagull Models |
|---|---|
| Model | RV-8 |
| Category | Toy |
| Language | English |