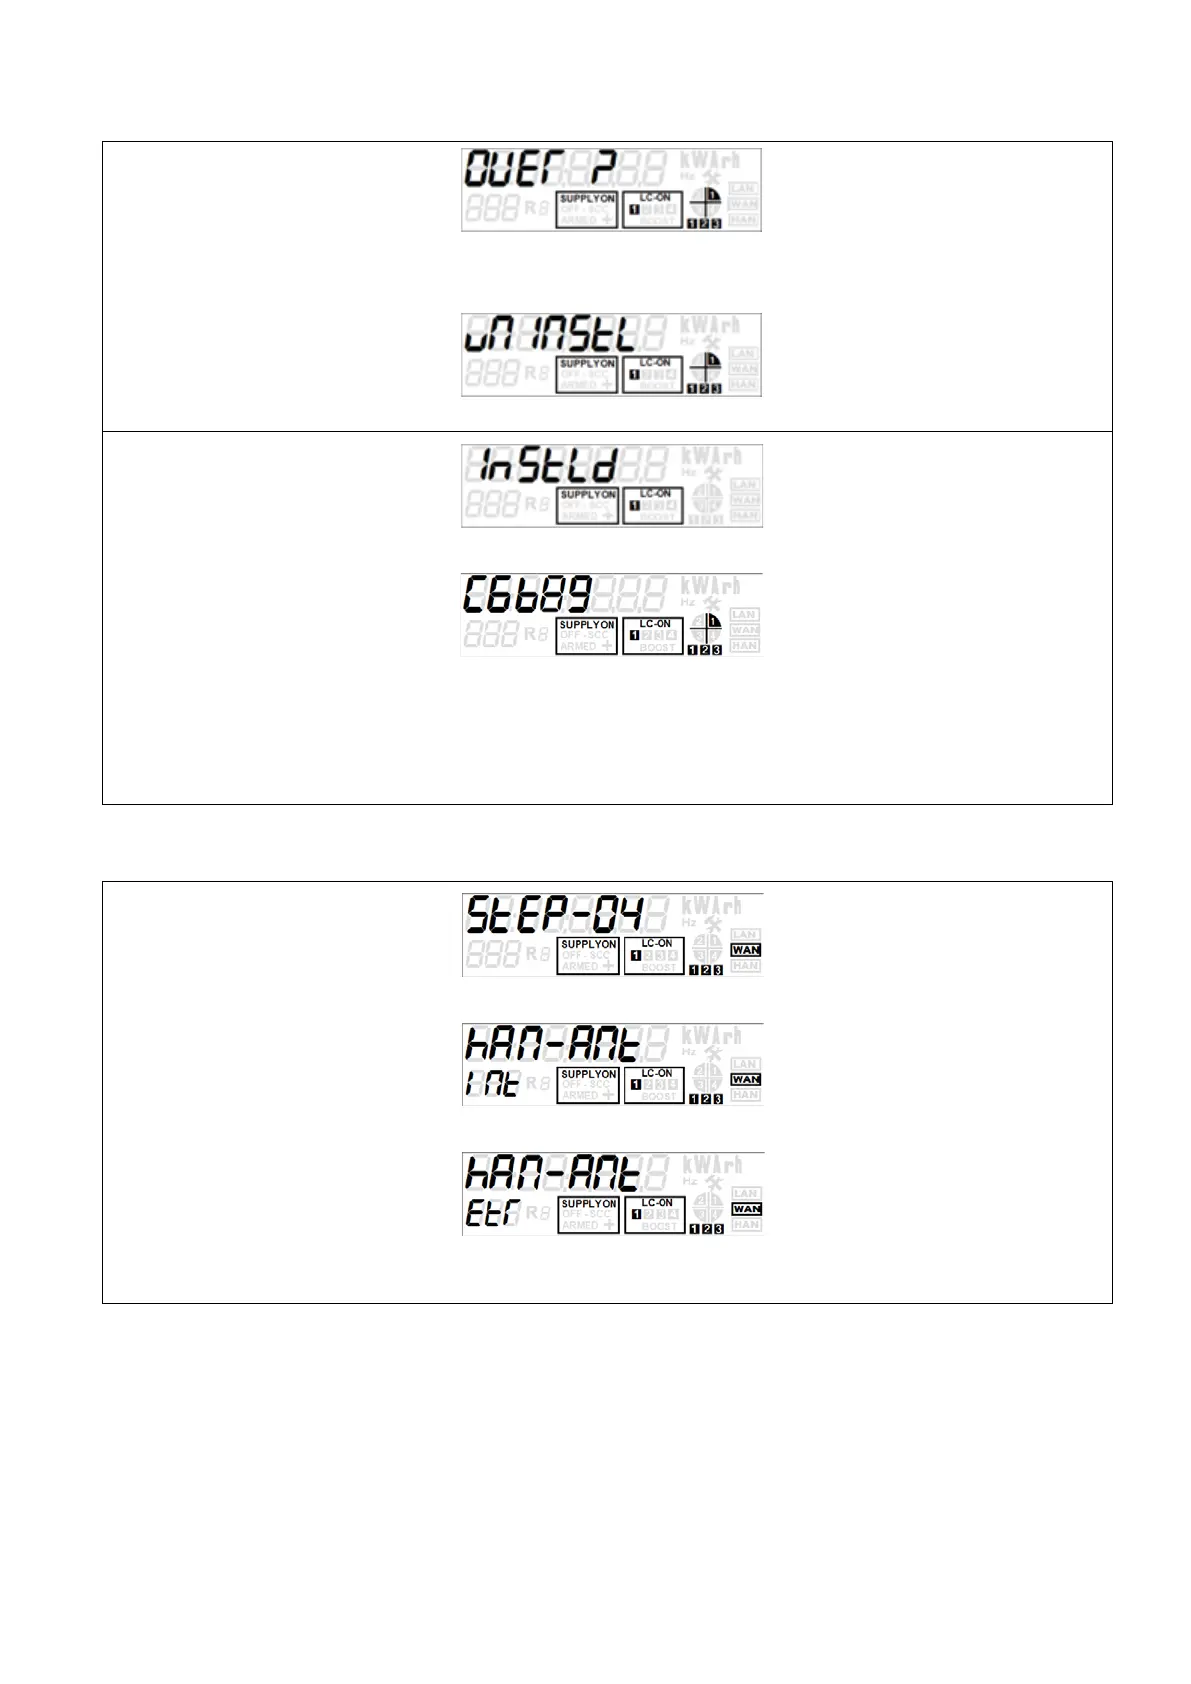
complete the installation process or
press the right push button to exit
the commissioning mode.
This display is shown when the right
push button is pressed in the
previous step and indicates that the
installation process is not yet
complete.
ahead with completion of the
installation process or exit the
commissioning mode.
Note: This display appears only for
2 seconds, at the end of which, the
commissioning process is
terminated and the display returns
to the default display sequence. To
re-enter the comissioning mode,
long press the left push button.
Step 7: Installation completion
This display is shown when the left
push button is pressed in the
previous step. The display indicates
that the installation is successfully
completed.
The Install code is displayed for 4
minutes.
The display returns to the default
display sequence at the end of the
timeout duration or if any buttton is
pressed.
Followed by
Once installed, the Auxiliary switch
(LC-1) functions as per the Active
tariff configured in the meter.
6.2 ‘With WAN’ Scenario
Press the left push button to scroll
through the HAN antenna selection
displays.
Press the right push button on the
required display to select the HAN
antenna and move to the next
display.
Followed by
Or
Note: The HAN antenna displays
appear only if the communication
module supports the HAN function.
If HAN is not supported, go to Step
6 directly.
Note:
Before switching to the external
HAN antenna, make sure that it is
physically connected.
HAN Icon flashes when HAN
pairing is enabled.
BGX701-160-R01
Sprint 211 Installation Manual Page 39 of 48