Doc. No. 702202-252-01 rev. 00
Swarm®S2 Installation and User Manual
© Sensorlink Swarm AS 2021
6.4.4.1 Temperature probe connection
For the UHT version, the temperature probe needs to be inserted through the cable gland in the bottom lid. This should
be performed before the instrument is brought into the field.
Make sure the battery is not connected, or
disconnect the battery as described in Section 6.4.5.
Open the bottom lid by opening to two hex bolts.
These are loose and will fall out from the lid when
open.
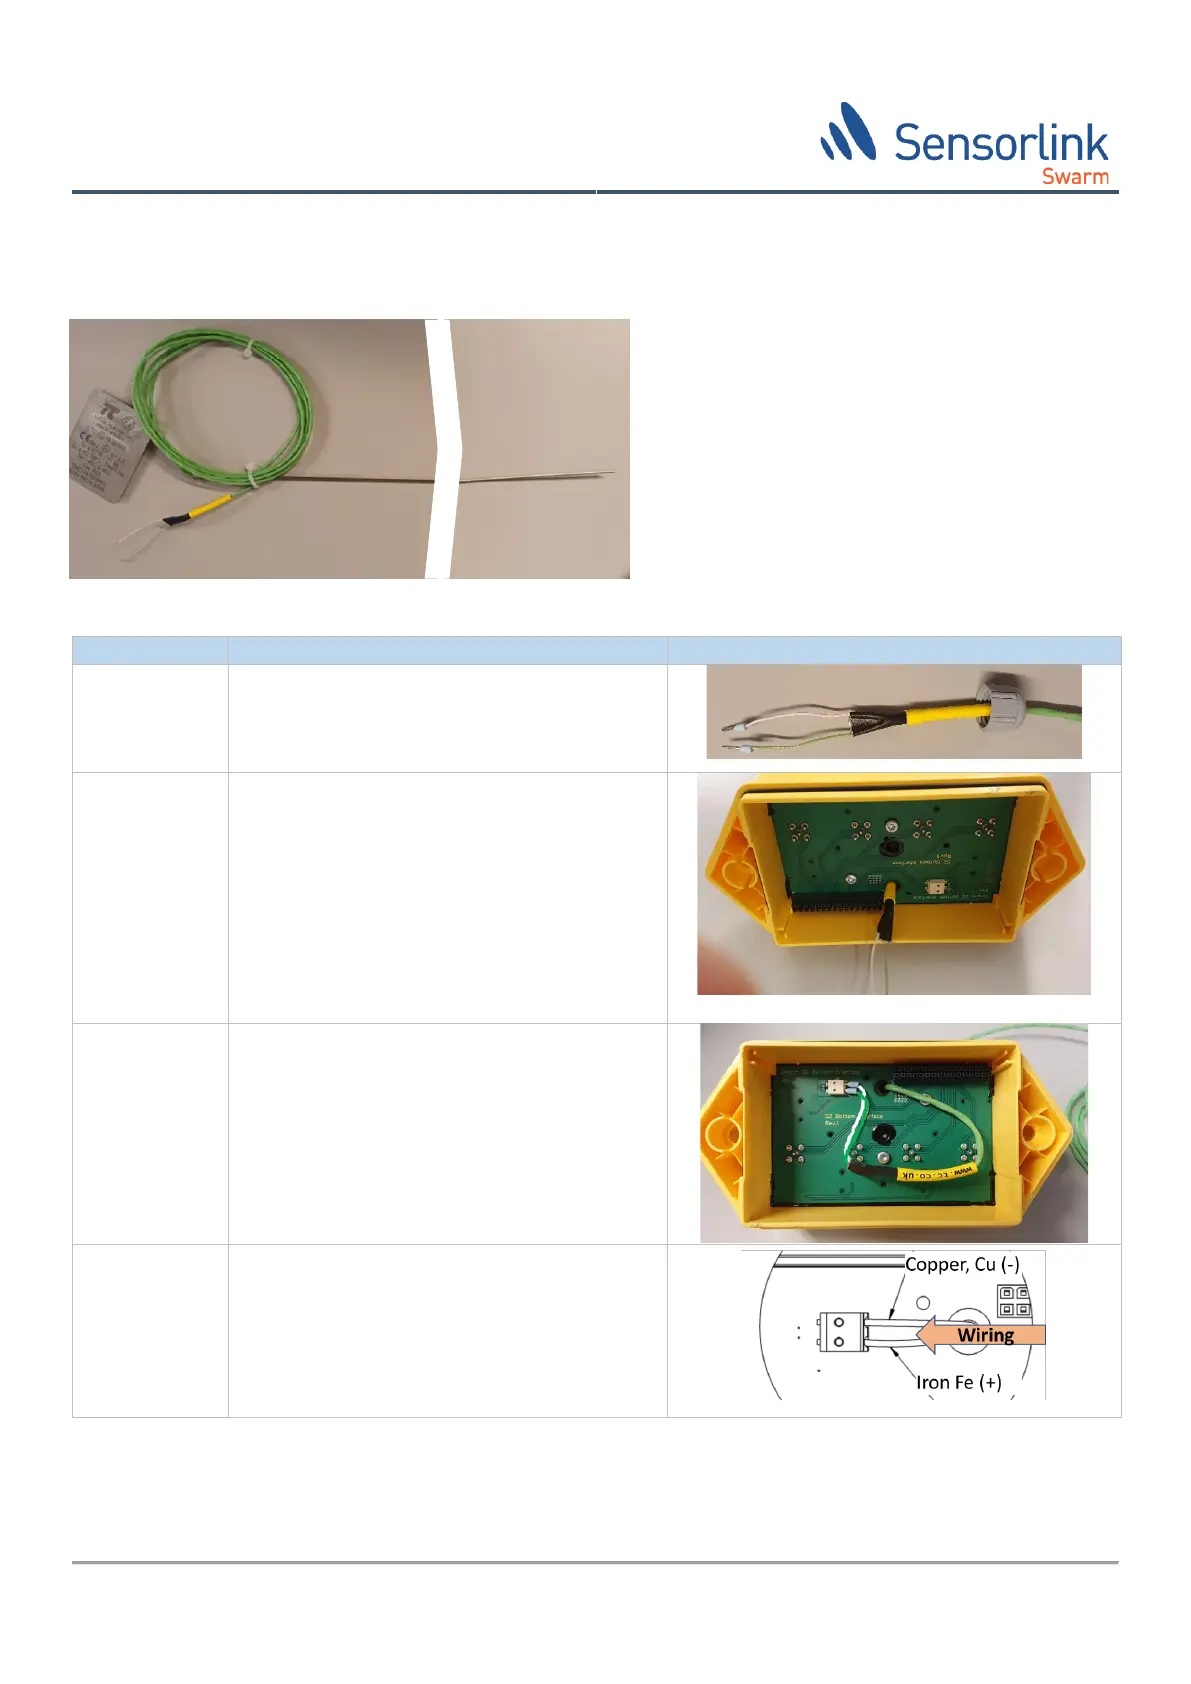
Prepare the temperature wire probes ends
with crimp terminals as shown.
Make sure to thread the gland cap and rubber
seal onto the wire before the next step
Pull the wires through the bottom lid. This
may be a bit challenging if the plastic crimp of
the temperature probe is rigidi but squeeze it
flat with your fingers and push it through.
Arrange the wires as shown and connect the
temperature probe as shown and pay
attention so the wire does not interfere with
the interface connector.
Make sure the connection is as indicated.
+ Iron = Green
÷ Copper = White
Figure 9 The Temperature probe