CDHD Installation
User Manual 15
3 Installation
3.1 Installation Overview
Perform the following steps to install and setup a CDHD system.
1. Mount the CDHD.
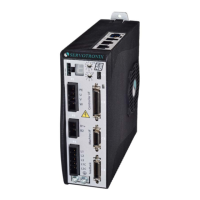
2. Connect the motor to P2.
3. Connect safe torque off (STO) to P1, or use the pre-wired jumper connector,
which is supplied with the drive.
4. Connect regen resistor to P3, if required.
5. Connect motor feedback to C4.
6. Connect machine I/Os to C3 and/or controller I/Os at C2.
7. Set the drive address using the rotary switches.
8. Connect the drive to the PC.
9. Connect AC input voltage to P4.
10. Power up the drive and the PC.
11. Install ServoStudio software.
12. Using ServoStudio, configure and test the drive.
3.2 Preparation
3.2.1 Hardware Requirements
The following hardware is required for installation.
Mating connectors and the associated crimp pins for interfaces P1, P2, P3
and P4; these are supplied with the CDHD drive. The mating connector for
P1 (STO) is supplied pre-assembled with e STO bypassed via wire jumpers.
Mating connectors for interfaces C2, C3 and C4:
Connector C2 (Controller I/O):
Plug 3M 10136-3000PE and shell 3M 10336-52F0-008
Connector C3 (Machine I/O):
Plug 3M 10120-3000PE and shell 3M 10320-52F0-008
Connector C4 (Motor feedback):
Plug 3M 10126-3000PE and shell 3M 10326-52F0-008
Wires for gauges:
Connector P1 (STO): 26–30 AWG.
Connectors P2 (Motor Power), P3 (Regen) and P4 (AC Input):
14–16 AWG.
Connectors C2 (Controller I/O), C3 (Machine I/O) and C4 (Motor
Feedback): 24–28 AWG.