MX-M264U MX-FN23 (FINISHER) 7 – 4
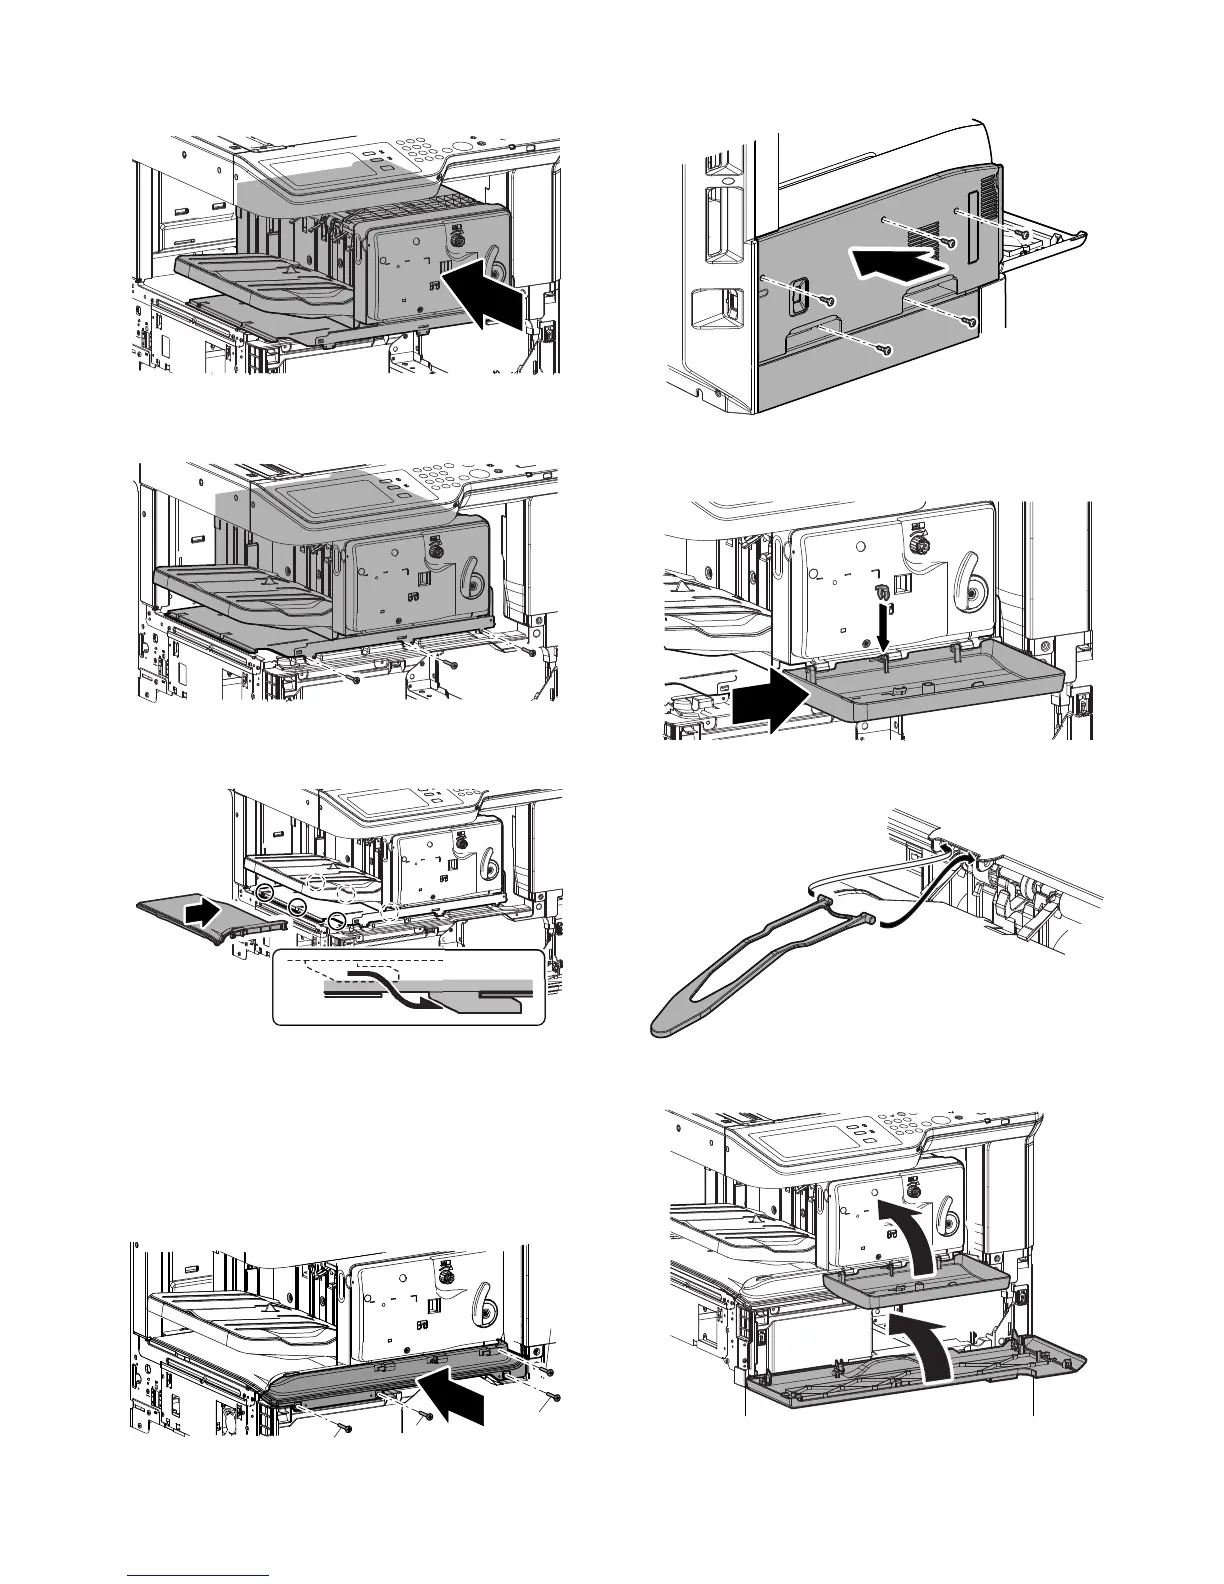
18) Press the finisher from the front to slide to the rear together
with the connection plate.
19) Fix the connection plate from the front with the M3 screw which
are packed with the finisher.
20) Install the finisher connection cabinet from the left. (A hook
pawl is provided on the back. Be careful not to float.)
21) Install the finisher front cabinet lower with screw. (First attach
the A screw.)
A: M3 round-head screw
Use the screw which was removed from the FIN connection
unit.
B: M4 P tight screw
Use the screws which were removed from the paper exit tray
of the machine.
22) Install the left cabinet to the original position.
23) Install the finisher front cover from the left side by sliding, and
fix the center of the fulcrum point with the resin clip.
24) Install the paper holding arm.
25) Close the finisher front cover and the machine front cover.