MX-M700N MANUAL PAPER FEED SECTION E – 5
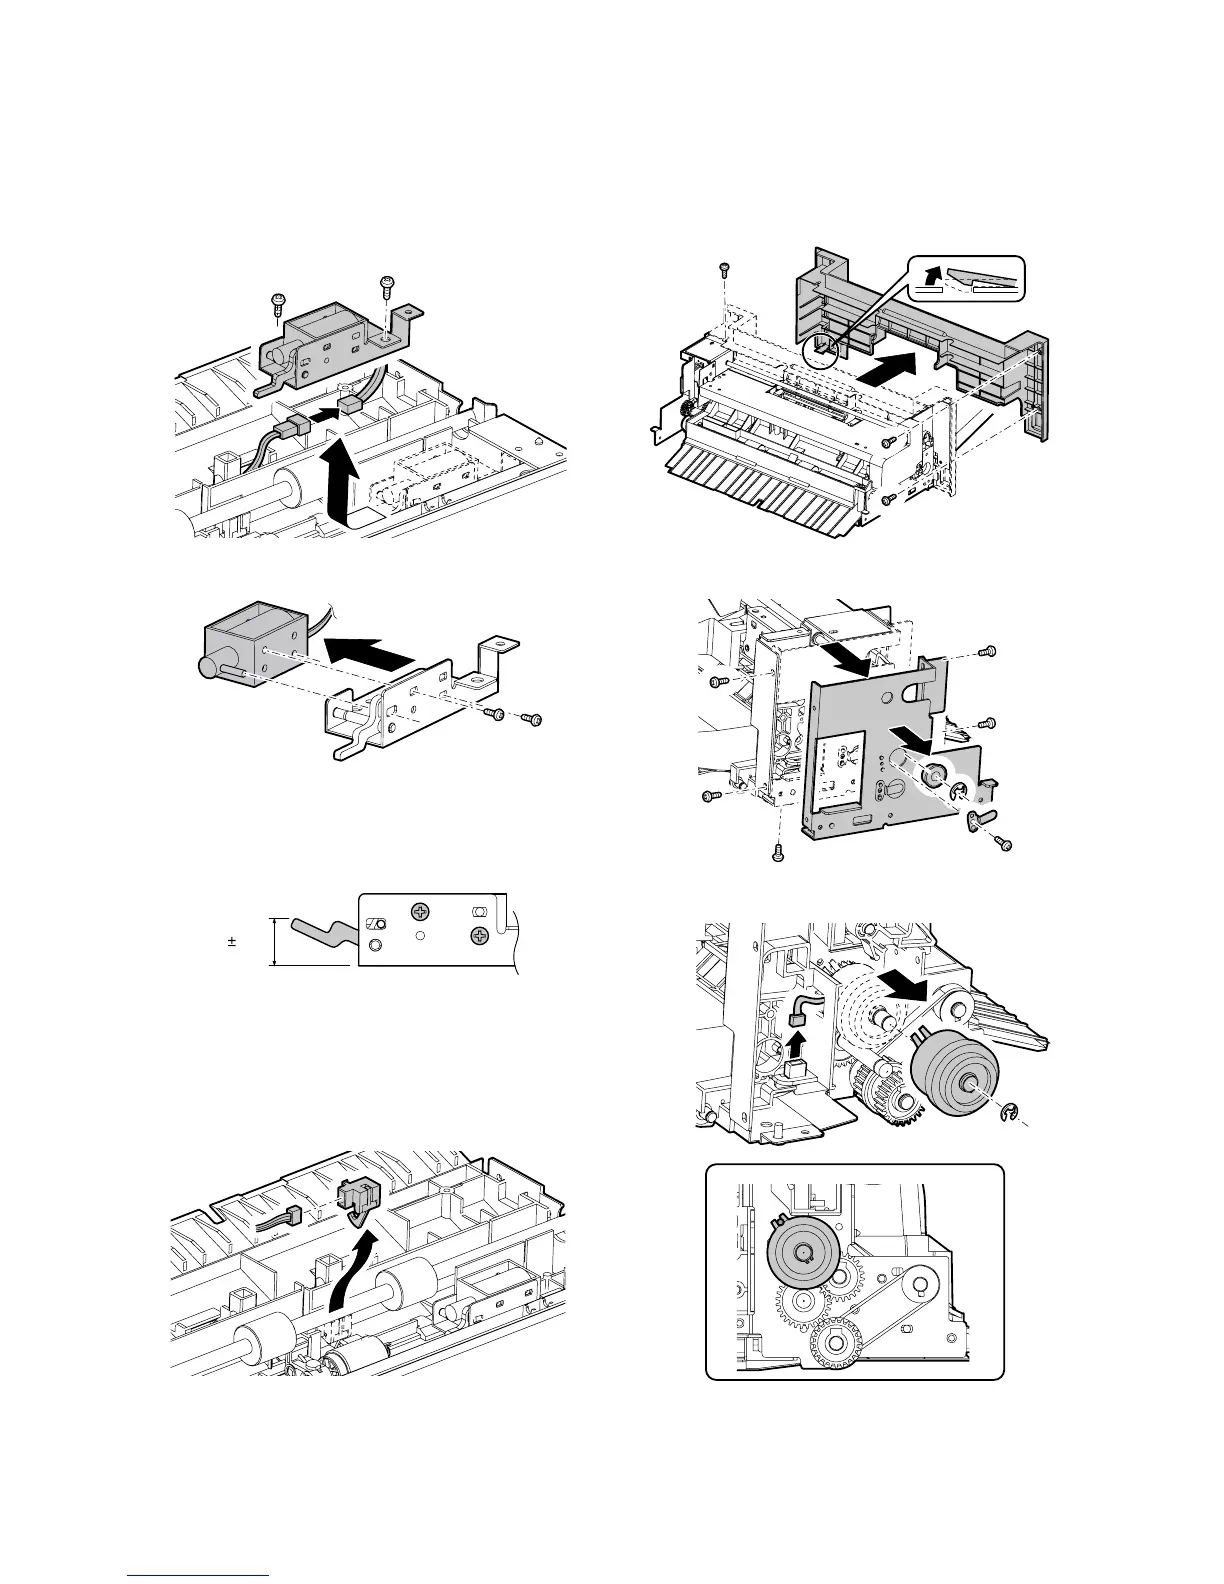
(7) Manual feed gate solenoid
1) Remove the multi manual paper feed tray unit.
(See "A. Multi manual paper feed tray unit")
2) Remove the bottom cover. (See "A-(4) Torque limiter")
3) Disconnect the connector, and remove the manual paper feed
gate solenoid unit.
4) Remove the manual gate solenoid.
* When assembling, tighten the screw so that the lever tip is at
13 r 0.5mm from the frame edge with the solenoid plunger
pulled.
(8) Manual feed paper pass detector 1
1) Remove the multi manual paper feed tray unit.
(See "A. Multi manual paper feed tray unit")
2) Remove the bottom cover. (See "A-(4) Torque limiter")
3) Disconnect the connector, and remove the manual paper feed
paper pass detector 1.
(9) Paper feed clutch
1) Remove the multi manual paper feed tray unit.
(See "A. Multi manual paper feed tray unit")
2) Remove the upper cover. (See "A-(1) Pickup roller")
3) Remove the front cover.
4) Remove the interface pass earth plate, the E-ring, and the
bearing, and remove the manual paper feed mounting plate.
5) Remove the connector and E-ring, and remove the paper feed
clutch.
* When assembling, fit the rotation stopper of the paper feed
clutch with the clutch fixing screw.
13 5mm