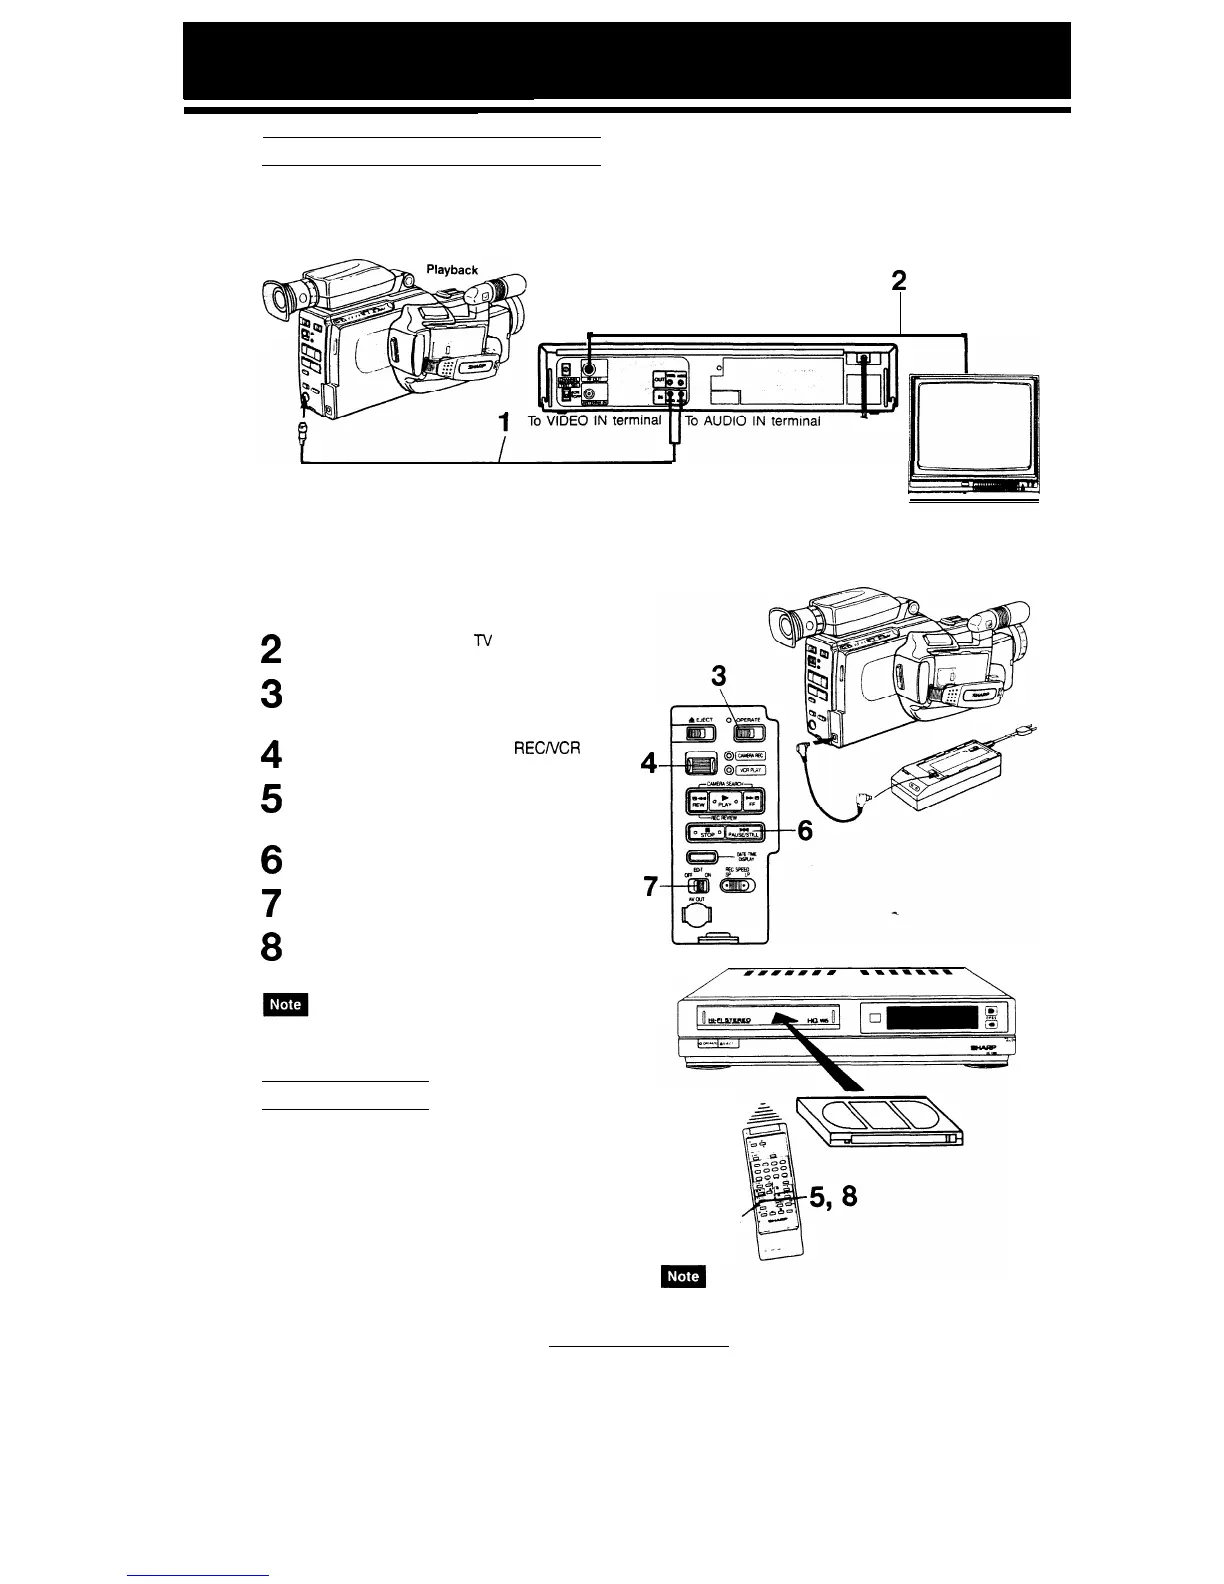
RECORDING TO ANOTHER VCR
Your SHARP Camcorder can be connected as the playback source deck for dubbing and editing a tape with
another VCR. Unnecessary scenes can be removed, the overall length shortened, scenes moved and rearranged,
and other effects added to make your tapes more effective and enjoyable.
I
2
3
4
5
6
7
8
Recording
2
Monitor
To RF in
To
RF OUT terminal
(antenna in)
r
AV OUT terminal
Plug the A/V OUTPUT cable into the AV out
terminal on the rear of the Camcorder. Plug the
VIDEO OUT and AUDIO OUT connectors into
the VIDEO IN and AUDIO IN terminals on the
rear of the VCR.
Monitor recording on a
IV
connected to the
VCR.
Connect a power source to the Camcorder and
slide
the OPERATE switch to ON. Now turn on the
VCR too.
Slide the Camcorder CAMERA
RECNCR
PLAY
switch to “VCR PLAY” and insert a recorded tape.
Insert a cassette tape with erasure protection
tab intact into the VCR and put it into REC
PAUSE mode.
Locate the scene to be copied from your Cam-
corder and press the PAUSE/STILL button.
Slide the EDIT switch to ON.
Press the PAUSE/STILL button on your Cam-
corder and on the VCR to begin playback and
dubbing.
Picture quality inevitably deteriorates with each copy. The
standard tape speed (SP) mode is therefore recommended
on the recording VCR when dubbing a tape.
EDIT CONTROL
Picture quality inevitably deteriorates each time you
dub from the Camcorder to a VCR. Slide the EDIT
switch on to minimize deterioration of picture quality.
Use this while you edit your videos.
28
4
7-
PAUSE/STILL
button
l Normally, the EDIT switch should be off.