Chapter 4 Basic Operation
4-12
AA-6800/6650 Instruction
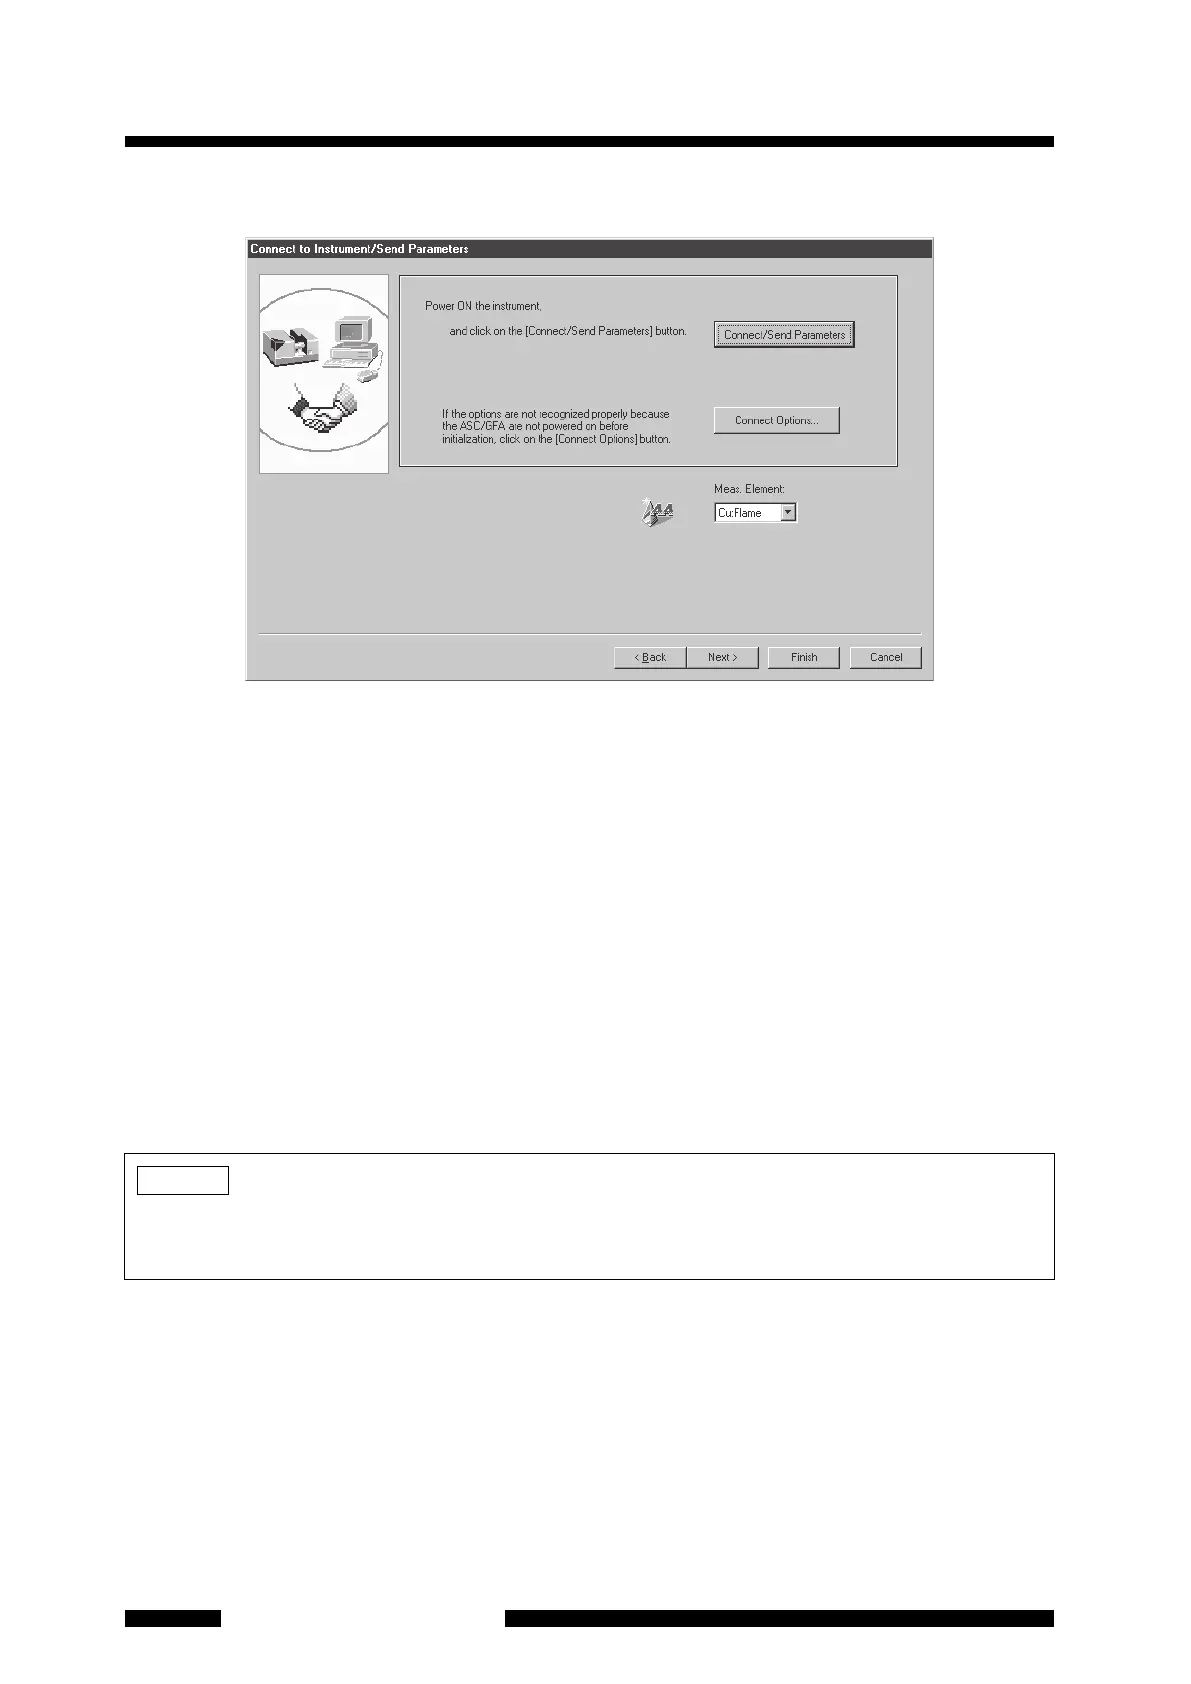
4.2.1.7 Connect to Instrument/Send Parameters
Figure 4.12 [Connect to Instrument/Send Parameters] Page
Check that the power of the AA is already ON and click on [Connect/Send Parameters]. The [Initialize] dialog
box is opened and AA main unit is initialized.
At the step of [Start Leak Check], the following message appears.
"Gas leak check will be started. Press the EXTINGUISH button on the instrument."
According to this instruction, press the EXTINGUISH button on the right side of the combustion chamber and
click on [OK] to close the message. The instrument automatically starts the gas leak check for 10 minutes.
During this time, a flame cannot be ignited. If the fuel gas is not supplied, the following message appears.
"Gas pressure was too low to execute gas leak check. Please check that the fuel gas supply pressure and
perform the gas leak check."
Supply the fuel gas and press the EXTINGUISH button then click on [Retry]. On the other hand, when you
ignore the message and click on [Cancel], the message box is closed and the initialization is finished without
executing the gas leak check. If the gas leak check is not executed at the time of initialization, the instrument
starts the 10-minute gas leak check automatically when the fuel gas is supplied. And after the 10 minutes, if a
gas leak was not detected, you can ignite a flame.
After completing the initialization, click on [OK] to close the [Initialize] dialog box. Then, click on [Next] in the
[Connect to Instrument/Send Parameters] page to proceed to the [Optics Parameters] page.
NOTE
If the EXTINGUISH button is not pressed according to the message, the gas leak check may not be
executed correctly. It may judge that a gas leak is detected even if the instrument is working properly. When
supplying the fuel gas after the initialization, this does not occur.




 To Next Page