14
Character Name, Function, Setting range Default value
Auto/Manual start
Auto start
• Selects either auto or manual start of the limit control action. (Refer to Section 7.3)
• Selection range:
: Auto start
: Manual start
EXCEEDED indicator lighting duration time unit
Hour.Minute
• Selects unit of “EXCEEDED indicator lighting duration time”.
• Selection range:
: Hour.Minute
: Minute.Second
Sensor correction function
This corrects the input value from the sensor. When a sensor cannot be set at the exact location where
control is desired, the sensor-measured temperature may deviate from the temperature in the controlled
location. When using multiple controllers, sometimes the measured temperatures do not concur due to
differences in sensor accuracy or dispersion of load capacities. In such a case, the control can be set at the
desired temperature by adjusting the input value of sensors.
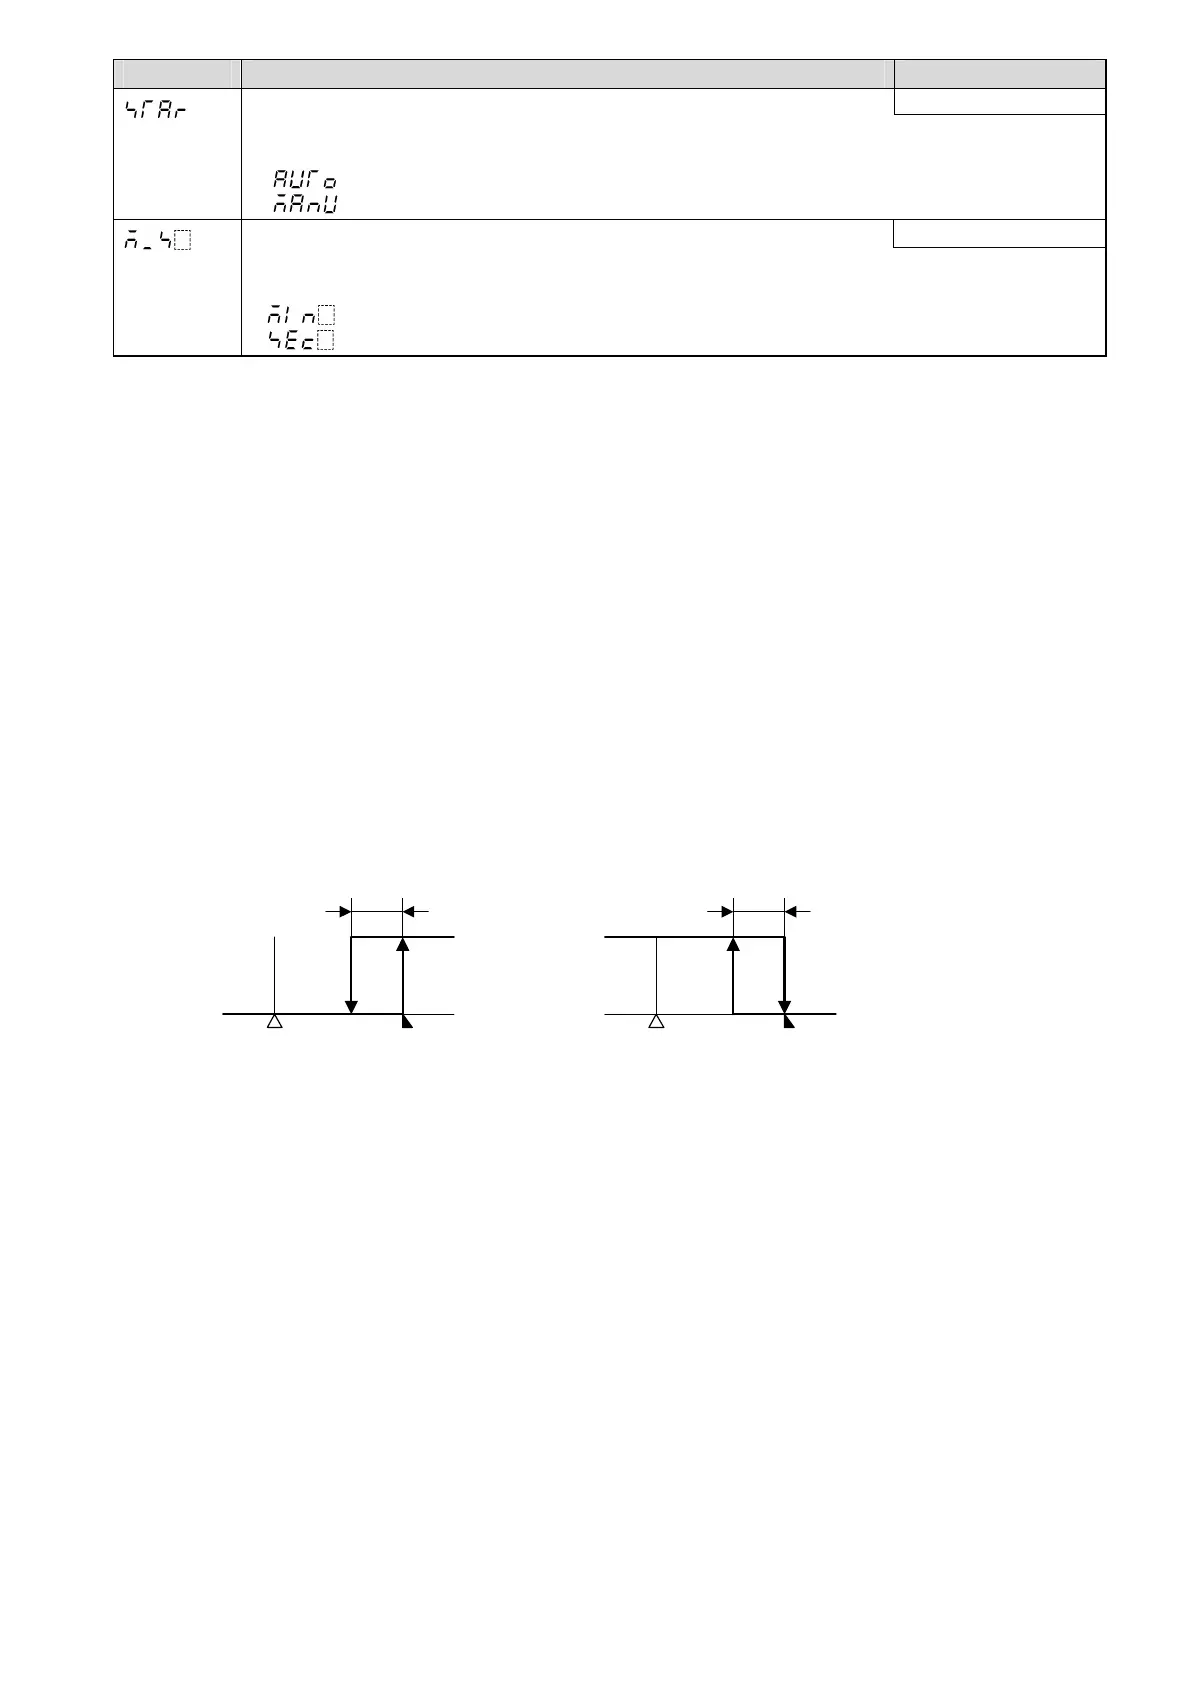
Energized/De-energized
When A1/A2 Energized is selected, the A1/A2 output (terminals 3-4, or 5-6) is conducted (ON) while the
A1/A2 indicator is lit.
The A1/A2 output is not conducted (OFF) while the A1/A2 output indicator is not lit.
When A1/A2 De-energized is selected, the A1/A2 output (terminals 3-4, or 5-6) is not conducted (OFF)
while the A1/A2 indicator is lit.
The A1/A2 output is conducted (ON) while the A1/A2 indicator is not lit.
High limit alarm (when Energized is set) High limit alarm (when De-energized is set)
(Fig. 5.5-1) (Fig. 5.5-2)
6. Running
After the unit is mounted to the control panel and wiring is completed, operate the unit following the
procedure below.
(1) Switch power supply to the BCS2 ON.
Switch power supply to the BCS2 ON.
• For approx. 3sec after the power is switched ON, the sensor input characters and the temperature unit
are indicated in the PV Display and input range high limit value is indicated in the SV Display. See
(Table 5-1). (If any other value has been set in [Scaling high limit], the value is indicated in the SV
Display.) During this time, all outputs and LED indicators are in OFF status.
• After that, limit control starts, indicating PV (process variable) in the PV Display, and SV (desired
value) in the SV Display.
(2) Input each set value.
Input each set value, referring to “5. Settings”.
(3) Turn the load circuit power ON.
Limit control action starts.
OFF
ON
A1 hysteresis
SV setting + A1 set point
OFF
ON
SV setting
+ A1 set point
A1 hysteresis

 Loading...