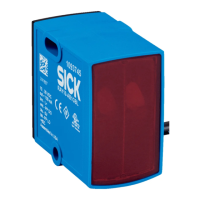
8.2.2 Status indicators
3 LEDs are arranged on the control panel. The two outer LEDs light up yellow and the
cent
er LED in g
reen.
The table below describes the individual function displays. The actual behavior of the
LEDs durin
g operation represents a combination of these function displays.
Table 9: Function of the LEDs
Sensor
condi‐
t
ion
LED 1 (Q1) LED 2 (PWR) LED 3 (Q2)
Display Meaning Display Meaning Display Meaning
SIO
1
O
Li
ghts
up
Q1 high
O
Li
ghts
up
Power ok
O
L
i
ghts
up
Q2 high
o
D
oe
s
not light
up
Q1 low
o
Does
not light
up
Q2 low
IO-Link
2
O
L
i
ghts
up
Q1 high
F
Fla
sh‐
ing
IO-Link active
O
L
i
ghts
up
Q2 high
o
D
oe
s
not light
up
Q1 low
o
Does
not light
up
Q2 low
Error No error display via LEDs
Teach
This table only lists the LED behavior during operation.
T
he LED be
havior during teach-in can be found in chapter 8.3.
1
If LED 1 (Q1), LED 2 (PWR) and LED 3 (Q3) light up at the same time, Q3 is active.
2
•
Dur
in
g position measurement via IO-Link, only LED 2 (PWR) flashes
•
Up to 16 switching points can be taught in via IO-Link. Only the first 3 switching points are shown
via LEDs as in SIO mode.
8.3 Teach-in mode
Table 10: Teach behavior
Teach-in mode Dynamic Teach
Aut
omated switching point teach-in
Manual Teach
Manual switching
point teach-in
Number of switching
point
s
2 s
witching points
When 2 x speed v
1
= 0
is detected during
teach-in.
3 switching points
When 3 x speed v
1
= 0
is detected during
teach-in.
3 switching points
Between 1 and 3
switching point (Qints)
can be manually
taught in indepen‐
dently of each other.
OPERATION 8
8025942/2020-07-16 | SICK O P E R A T I N G I N S T R U C T I O N S | MPS-G with 2 / 3 switching points and IO-Link (up to 16 switching points)
27
Subject to change without notice
 Loading...