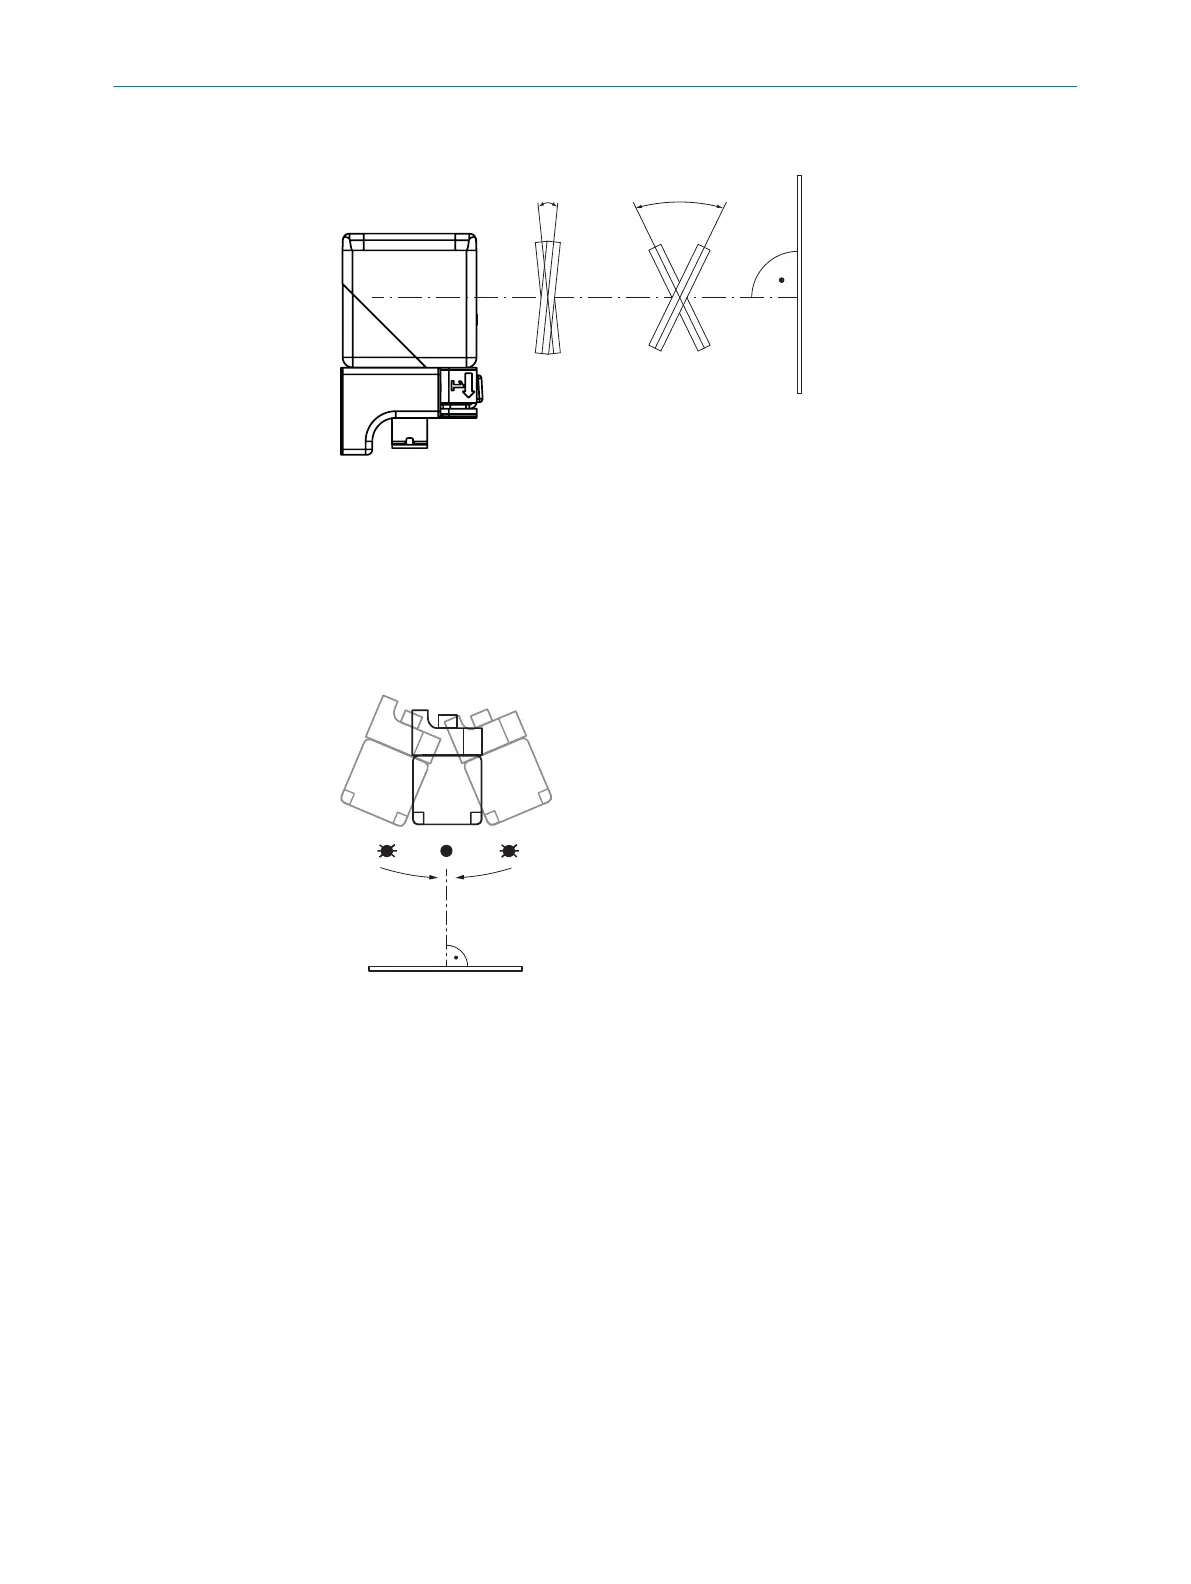
5.3 Alignment of the device
Figure 2: Aligning the device for smooth and rough surfaces
1
Smooth surface: Angle ≤ 90° ± 3° between the sensor axis and object surface
2
Rough surface: Angle ≥ 90° ± 3° between the sensor axis and object surface
5.4 Aligning device with alignment aid
Overview
The alignment aid can be used to align the device with the object during mounting.
O = lit up; Ö = flashing.
Approach
1. Loosely fasten the device at the installation location so that the device remains
movable.
2. Briefly press the T2 pushbutton to start the alignment aid.
✓
LED 3 flashes green. The faster LED 3 flashes, the stronger the received signal.
3. Align the device at the object at different angles for up to 10 seconds so that the
device can determine the maximum signal level.
✓
LED 3 flashes or permanently lights up green.
4. Align the device so that LED3 permanently lights up green.
✓
LED 3 permanently lights up green.
5. Fasten the device in this position.
6. To end the alignment aid, press T2 briefly or wait 120 seconds.
✓
LED 4 flashes orange twice.
✓
The device switches back to normal operation.
5 MOUNTING
14
O P E R A T I N G I N S T R U C T I O N S | UC40 8027772//2022-08-11 | SICK
Subject to change without notice

 Loading...