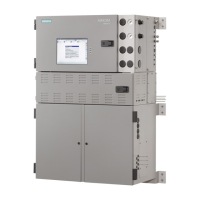
3.1 Replacing a TCM
Removing the TC-DPM
See the illustration
Temperature Control Personality Module Connections
for connector and
module locations.
1. Back up and shut down the unit using the
General Analyzer Shutdown Procedure
in the
Maxum Edition II Analyzer General Maintenance Manual (A5E42019842001) from the
Siemens web site (http://support.industry.siemens.com/cs/products?
dtp=Manual&pnid=17741).
2. Open the electronics enclosure door.
3. Disconnect the RTD temperature input cables (top rear of unit, if present).
4. Remove the nut on the bottom-front of DPM bracket.
5. Slide the unit forward to disengage the rear mounting lug.
6. Lift the unit up and part way out of the enclosure.
7. Disconnect the I
2
C/power cable and temperature control output cables from the rear edge
of the board.
8. Remove the unit from the analyzer and place on ESD-safe work surface.
9. Unscrew the mounting screw for the temperature setpoint module stack using the access
hole near the center of the metal plate.
10.Unplug the temperature setpoint module stack from the left side of the board.
11.Remove the two mounting screws near the upper corners and remove the old unit from the
cage.
Configuring the New TC-DPM
Set the location ID switch on the replacement unit to match the unit being removed.
Installing the Replacement TC-DPM
1. Install the new unit into the DPM cage. Insert the bottom edge into the slot in the plastic
DPM mounting rail on the DPM cage, and secure with the two screws removed from the
old unit.
2. Plug the temperature setpoint module stack onto its mount on the left side of the unit.
3. Reinstall the screw to secure the temperature setpoint module stack through the access
hole on the right side of the unit.
4. Insert the rear lug into the slot at the rear of the DPM mounting position with the mounting
stud at the front inserted through the slot in the DPM bracket.
5. Slide backward to lock the rear mounting lug into the slot.
6. Reinstall the nut on the threaded stud to secure the DPM.
7. Reconnect the I
2
C/power cable and temperature control output cables from the rear edge
of the board.
Temperature Control Module (TCM)
3.1 Replacing a TCM
Maxum II Valves and Oven Components
24 Service Manual, 10/2018, A5E42019844001

 Loading...


