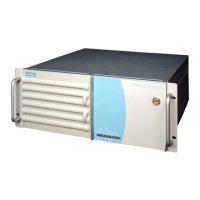
Configuring the SIMATIC Rack PC 840
5-3
SIMATIC Rack PC 840 Manual
A5E00104826-03
Screen Display Following Power On
With the default setting of your PC, the display shown below appears following
power-on:
Phoenix BIOS 4.0 A5E000xxxxx–ES0x
Copyright 1985-2000 Phoenix Technologies Ltd.
All Rights Reserved.
SIMATIC Rack PC 840 V10.01.02
CPU = Intel PentiumIII 866MHz
640K System RAM Passed
127MB Extended RAM Passed
0256K Cache SRAM Passed
System BIOS shadowed
Video BIOS shadowed
Mouse initialized
Fixed Disk 0: xxxx
ATAPI CD-ROM: Txxx
Press <F2> to enter SETUP
If you press the F2 key while the above display is shown, you select the
ROM-based BIOS setup program. In this program, you can set a number of
system functions and hardware configurations of your programming device.
The default settings are effective on delivery. You can change these settings using
the BIOS setup. The modified settings become effective when you have
saved them and terminated the BIOS setup.
The following screen shots may differ from what is shown here, depending on the
device configuration. The following screen form appears when you start the BIOS
setup:
PhoenixBIOS Setup Utility
Item Specific Help
System Time:
ESC Exit
<Tab>, <Shift-Tab>, or
System Date:
Select Item
Select Menu
+ / –
Select
Change Values
Sub-Menu
F9
F10
Setup Defaults
Save and Exit
<Enter> selects field.
Diskette A: [Disabled]
Primary Master [20496MB]
Primary Slave [None]
Memory Cache:
Boot Options
Keyboard Features
[Write Back]
Hardware Options
System Memory:
Extended Memory:
Secondary Master [CD-ROM]
Secondary Slave [None]
[ 01/08/2001 ]
640 KB
62976 KB
Example:
Hour/Minute/Second
Month/Day/Year
Enter
Help
F1
Advanced Security Power Boot Sequence Version ExitMain
[ 15:35:32 ]
Menu bar
Header
Selectable
submenu
Operation line
Help window
Figure 5-1 SETUP Main Menu (Example)