DUO Operating manual - English
30 Copyright Silca 2 010
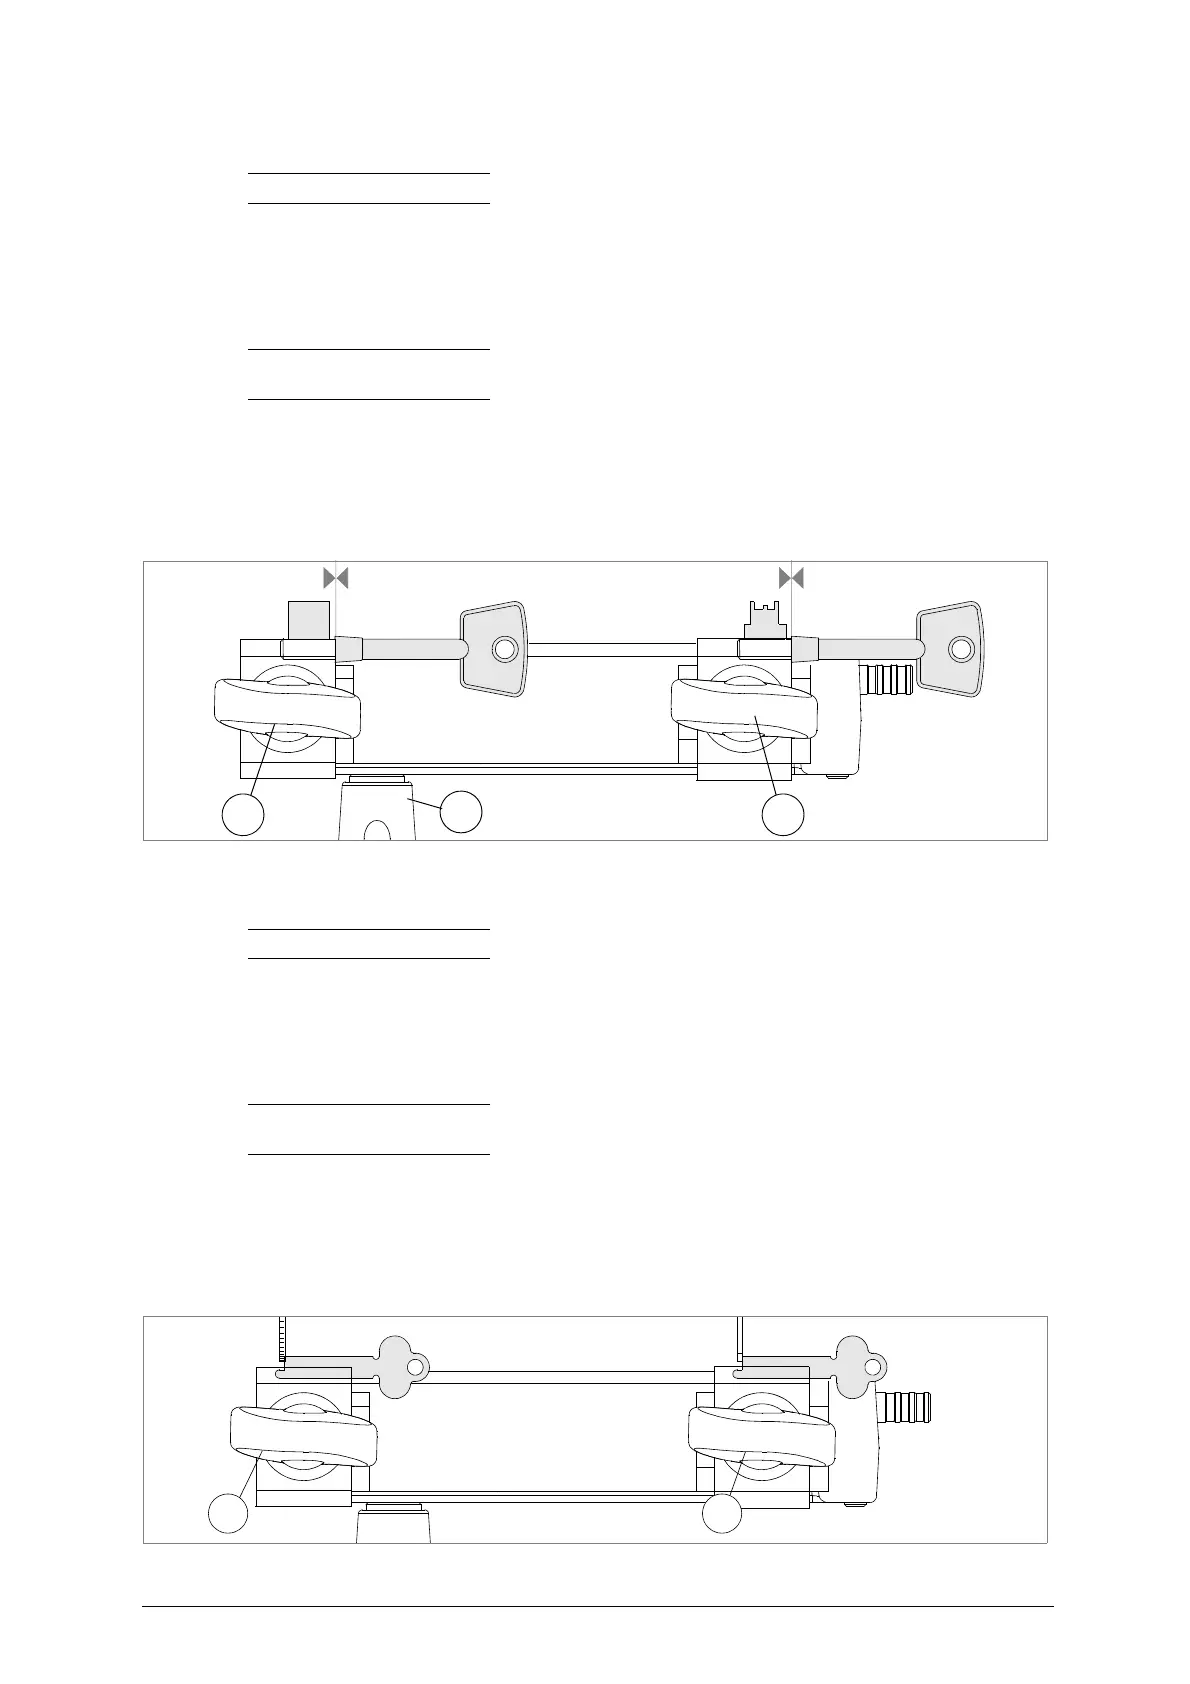
8.3.2 Cutting keys with central stop
Note: check that the clamps are locked into the fixed position.
1) Prepare the clamps with the required side facing the cutter and tracer point.
2) Loosen the clamp handles slightly to allow the keys to enter.
3) Insert the original key into the right-hand clamp with the central stop up against the clamp (left-hand
side) and the bit parallel to the clamp; tighten the knob (K) to secure the key.
4) Insert the key to be cut into the left-hand clamp with the central stop up against the clamp (left-hand
side) and the bit parallel to the clamp; tighten the knob (K) to secure the key.
Note: choose a translation system with fixed or free carriage (chap.8.1.3, page 21) (Attention:
not available on Duo Brazil version).
5) Start the machine and proceed with cutting.
6) Raise the carriage with the handle (H) and take the cut key into contact with the tracer point to com-
plete cutting.
7) Take the carriage back with the handle (H), go on to the next cutting position and continue from point
6.
8) When cutting is finished, turn off the switch (U) and remove the keys.
Fig. 42
8.3.3 Cutting mail box keys
ATTENTION: only on DUO and DUO BRAZIL versions.
Note: check that the clamps are locked into the fixed position.
1) Prepare the clamps with the required side facing the cutter and tracer point.
2) Loosen the clamp handles slightly to allow the keys to enter.
3) Insert the original key into the right-hand clamp, using the end of the bit (towards the tip) as a refer-
ence against the tracer point (fig. 43).
4) Insert the key to be cut into the left-hand clamp, using the end of the bit (towards the tip) as a refer-
ence against the cutter.
Note: choose a translation system with fixed or free carriage (chap.8.1.3, page 21) (Attention:
not available on Duo Brazil version).
5) Start the machine and proceed with cutting.
6) Raise the carriage with the handle (H) and take the cut key into contact with the tracer point to com-
plete cutting.
7) Take the carriage back with the handle (H), go on to the next cutting position and continue from point
6.
8) When cutting is finished, turn off the switch (U) and remove the keys.
Fig. 43