6 - 7
BATTERY SERVICE
Disconnecting the Battery Cables
For many service procedures, disconnecting the nega-
tive battery cable is recommended. This prevents acci-
dental starting and accidental short-circuiting of electrical
components. If desired, the positive cable may also be
disconnected; however, for normal service this is not
necessary.
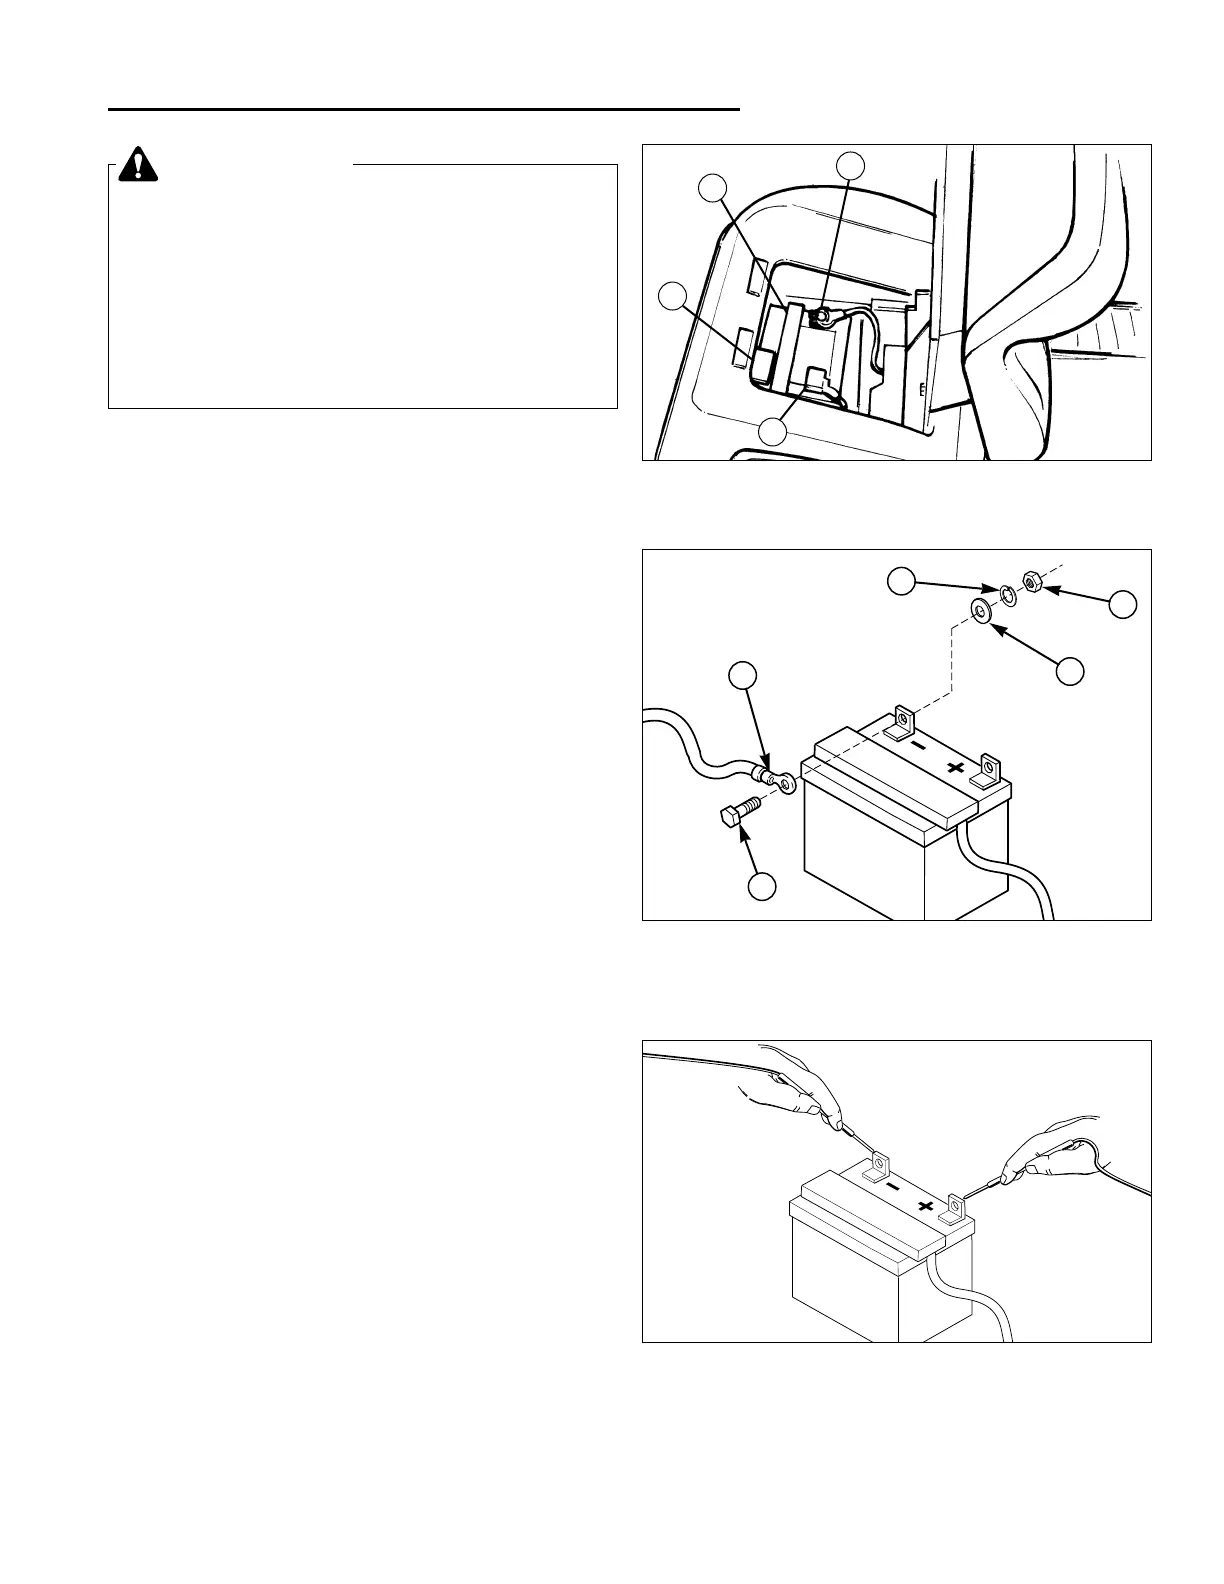
1. Tilt the seat forward to access the battery compart-
ment.
2. Remove the capscrew (E, Figure 17), washer (C),
lockwasher (B), and nut (A) securing the NEGATIVE
(-) battery cable (B, Figure 16).
3. Secure the negative cable away from the negative
battery post.
Removing & Installing the Battery
1. Disconnect the battery cables, negative (-) cable (B,
Figure 16) first. (see previous section).
2. Remove the battery clamp (D, Figure 16).
3. Lift the battery out of the battery compartment.
4. Set the new battery in the battery compartment.
5. Secure the battery using the battery clamp (D,
Figure 6).
6. Connect the red positive (+) battery cable to the posi-
tive battery post. Secure using the hardware shown
in Figure 17.
7. Connect the black negative (-) battery cable to the
negative battery post. Secure using the hardware
shown in Figure 17.
Checking Battery Voltage
A voltmeter can be used to determine condition of bat-
tery. When the engine is off, the voltmeter shows battery
voltage (normally 12 volts). When the engine is running,
the voltmeter shows the voltage of the charging circuit
(normally is 13 to 14 volts).
Figure 17. Battery Cable Hardware
A. Hex Nut D. Cable
B. Lockwasher E. Capscrew
C. Plain Washer
6 Common Service Procedures
Battery Service
Figure 16. Battery Compartment
A. Positive Battery Terminal C. Battery Cap
B. Negative Battery Terminal D. Battery Clamp
C
D
A
B
WARNING
Be careful when handling the battery. Avoid
spilling electrolyte. Keep flames and sparks away
from the battery.
When removing or installing battery cables,
disconnect the negative cable FIRST and reconnect
it LAST. If not done in this order, the positive
terminal can be shorted to the frame by a tool.
A
B
C
D
E
Figure 18. Check Battery Voltage
A dead battery or one too weak to start the engine may
not mean the battery needs to be replaced. For example,
it may mean that the alternator is not charging the bat-
tery properly.
 Loading...