7 Electrical System Service
Component Location & Replacement
7 - 14
COMPONENT LOCATION
AND REPLACEMENT
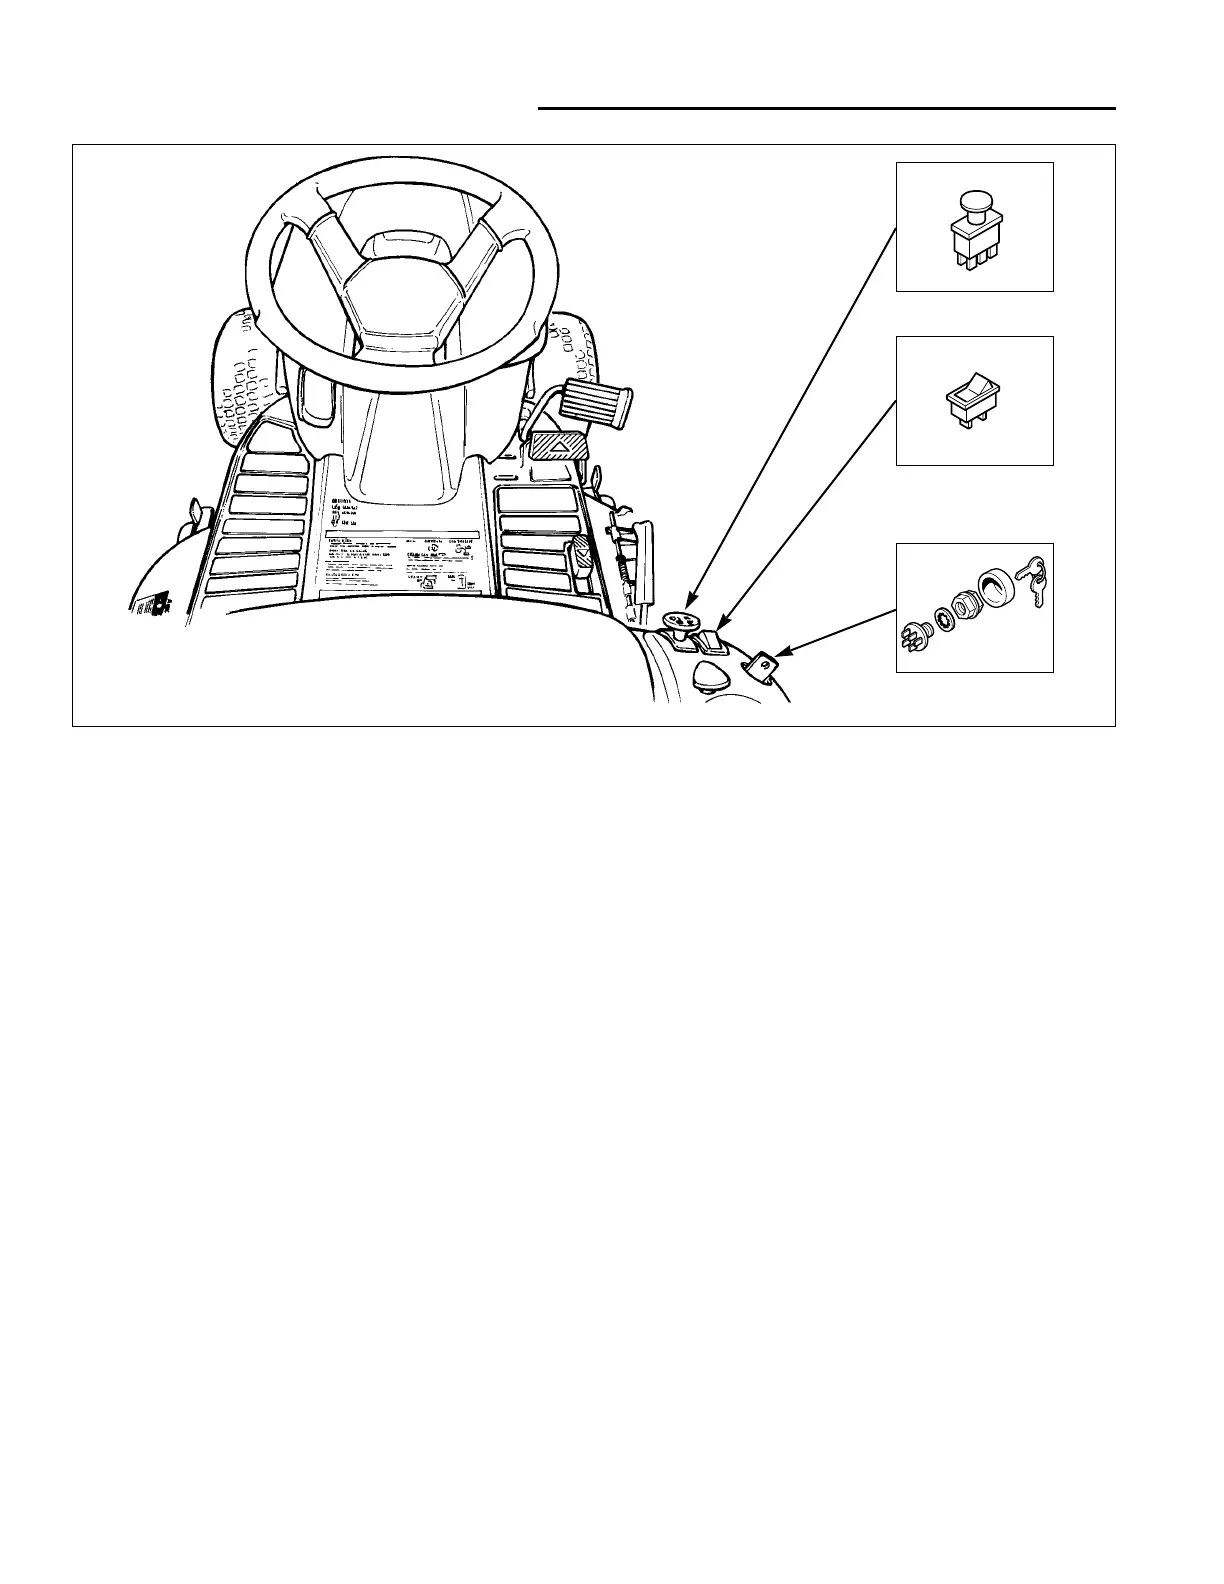
PTO Switch & Headlight Switch
See Figure 1.
1. Disconnect and secure the negative battery cable.
See DISCONNECTING THE BATTERY CABLES,
Section 6.
2. Remove the plastic cover from the back of the control
panel. The cover snaps into place.
3. Unplug the wire harness from the back of the switch.
4. Squeeze the locking tabs on the back of the switch
and push it out the the control panel.
5. Fully insert the new switch into the control panel.
The switch will lock into place.
6. Connect the wire harness to the back of the switch.
7. Reinstall the cover removed in step 2.
Figure 1. PTO, Headlight, and Key Switch Location
PTO Switch
Headlight
Switch
Key Switch
Key Switch
See Figure 1
1. Disconnect and secure the negative battery cable.
See DISCONNECTING THE BATTERY CABLES,
Section 6.
2. Remove the wire harness from the back of the
switch.
3. Note the orientation of the key and switch body to the
control panel.
4. Remove the large hex nut and washer securing the
switch body.
5. Push the switch back through the control panel
6. Insert the new switch through the control panel.
7. Orient the key and switch body as noted in step 3.
8. Secure the switch using the large washer and hex
nut.
9. Reattach the wire harness.