10
Operaling lhe machine
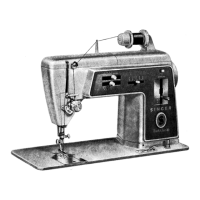
Connecting the machine
Push plug (1) into lhe
receptacle
(2) at lhe
r
ight
end 01 the machine. Then
connect
plug
(3) to
your
socket
outlet.
Running the machine
To turn on mach ine and
sew
ing Iight, press
upper
portion 01
power
switch
(4). To turn
off
mach
ine and light,
press
lower
portion "O"
01
powe
r switch.
To run the
machine
and control speed , press
the
loot
control (5) with
your
1001.
The
harder
you press, the
laster
the mach ine will sew.
To stop
mach
ine, remove
loot
Irom control.
Note: Do not operate
mach
ine without
labr
ic
under
the
presser
loot
as this may
damage
the leed and lhe presser 1001.
Choosing and changing
needles
Important: For best results Irom
your
sew
ing
mach
ine, use
only
SINGER-needles.
Check
the need le package, and lhe Fabr ic, Thread
and Needle Table on page
16
lor
lhe
correct
needle and
labr
ic combination.
• Raise needle to its
highest
position.
• Loosen needle
clamp
screw
and remove
needle.
• With flat side
01 needle to the
back
, insert
new needle up into
clamp
as
lar
as it will
go.
• Tighten need le
clamp
screw
securely.
Manejo de la máquina
Conexión de la máquina
Inserte el
enchule
(1) en el receptáculo (2)
colocado
a la derecha de la máquina. Luego
conecte
la clav ija (3) en la toma de corriente .
Accionamiento de la
máquina
Para poner la máqu ina en marcha y
encender
la luz. presionar sobre la parte supe rior dei
interruptor
(4). Para apagaria presionar la
parte inlerior "O" de d
icho
interruptor.
Para
accionar
la máqu ina y controlar la
veloc
idad , presionar con el pie el
controlador
de velocidad (5). A mayor presión, mayor
velocidad de
costura
. Para parar la máqu ina,
quite el pie dei controlador.
Nota: No
sec
ionar la
máquina
sin tejido
debajo dei prensatelas ya que puede da üarse
el arrastre y el prensatelas.
Selección y cambio de
agujas
Importante: Para los me
jores
resultados de
su máquina de
coser
, util
ice
s
ólo
agujas
SINGER. Revise el paquete de agu jas y la
tabla de tejidos, hilos y
agujas
de la página
17 , para la
combinación
correcta
de
aguja y tejido.
• Eleve la aguja a su
posic
ión más alta.
• Afloje el tornillo y
saque
la aguja.
• Con la parte plana de la aguja mirando
hacia
atrás, inserte la nueva aguja hasta
lIegar a su tope .
• Ajuste el torn illo luertemente.