EasyManua.ls Logo

Singer XL-6000 - User Manual

Singer XL-6000
136 pages
Print Icon
To Next Page IconTo Next Page
Loading...
INSTRUCTION MANUAL
Printed in JapanPart No.AE60SZS0B0A Eng.
’04. 3

Table of Contents

Other manuals for Singer XL-6000

Questions and Answers

  • L
    Lisa Johnson MDAug 16, 2025
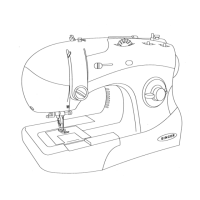
    What to do if the fabric is not feeding through my Singer Sewing Machine?
    • S
      Scott FreemanAug 16, 2025
      If the fabric isn't feeding through your Singer Sewing Machine, it might be because the stitch length is set to 0 (zero), a soft fabric like a towel is being used, or the drop-feed knob is set to the right position. To resolve this, re-select a pattern, which will specify the appropriate stitch length, or manually set the stitch length to 3 to 4. Also, ensure the drop-feed knob is set to the left position.
  • S
    stephen29Aug 19, 2025
    Why is my Singer XL-6000 Sewing Machine failing to automatically wind a bobbin?
    • K
      Katherine AllenAug 20, 2025
      If your Singer Sewing Machine fails to automatically wind a bobbin, it might be because the main body of the sewing machine is not properly threaded, the retaining plate is not properly threaded with (embroidery) thread, or parts related to bobbin winding are tangled with thread waste or thread. To fix this, check the threading sequence of the machine head and re-thread it properly. Open the thread retaining cover to check that the retaining plate is properly threaded, and re-thread the retaining plate using the bobbin winder guide. Remove any thread waste or thread using a pair of tweezers.
  • R
    rmarksAug 23, 2025
    Why is the needle breaking on my Singer XL-6000?
    • D
      Dustin ThomasAug 25, 2025
      Needle breakage on your Singer Sewing Machine can be attributed to several factors. A thin needle might be used for heavy-weight fabric, the needle may not be fully inserted in the needle clamp, the needle clamp screw might not be securely tightened, or the presser foot used does not match the selected patterns. To fix this, check the relationship among the fabric, sewing thread, and sewing needle. Verify how the needle is attached and ensure the needle clamp screw is securely tightened. Also, check the relationship between the pattern selected and the presser foot used.
  • D
    derrickmarshAug 27, 2025
    What to do if Singer Sewing Machine will not start even when start/stop button is pressed?
    • H
      Heather BushAug 27, 2025
      If your Singer Sewing Machine will not start even when the start/stop button is pressed (and the lamp lights up), it could be because the presser foot is improperly installed, causing the needle to come into contact with the presser foot. Alternatively, the sewing machine might be started even though the needle has come off and dropped in the hook. To resolve this, replace the presser foot with one that matches the selected stitch pattern. Also, remove the needle from the hook.
  • D
    Dana LoganAug 31, 2025
    What to do if my Singer Sewing Machine will not run even when it has started?
    • W
      Walter ParkerAug 31, 2025
      If your Singer Sewing Machine won't run even after starting, it could be due to several reasons: the needle thread might have run out, the bobbin winder shaft might be shifted to the left, the lever is not lowered at the time of buttonholing or the thread retaining plate cover might be opened. To solve this, properly thread the machine head and press the start button. Move the bobbin winder shaft fully to the left until it will go no further. Lower the buttonhole lever and close the thread retaining cover.
  • H
    Hannah LewisSep 4, 2025
    Why is seam puckering occurring on my Singer Sewing Machine?
    • K
      Katherine WallaceSep 4, 2025
      Seam puckering on your Singer Sewing Machine may occur if the stitch length is too large for the light-weight fabric being sewn, or if the needle has a blunt tip. To resolve this, decrease (shorten) the stitch length and replace the needle with a normal one.
  • K
    Kerry MckenzieSep 7, 2025
    Why does my Singer XL-6000 produce too low or high operating noise?
    • M
      Mark LoganSep 7, 2025
      Excessive or unusual noise from your Singer Sewing Machine can be caused by dust accumulated in the feed dog or thread waste accumulated in the hook. Performing regular maintenance to clean up the sewing machine can resolve this issue.
  • M
    Michele MillsNov 11, 2025
    Why does the thread keep breaking on my Singer XL-6000 and stitches skip?
    • J
      Joshua OneillNov 11, 2025
      Thread breakage and skipped stitches on your Singer Sewing Machine can occur due to several reasons. The machine might be incorrectly threaded, or the thread may have kinks or knots. The thread tension might not be properly adjusted, the needle could be bent or have a blunt tip, or it may be incorrectly attached. Also, the rotating hook bobbin case holder might be incorrectly threaded, or the bobbin may not rotate smoothly. Finally, the needle might not match the thickness of the thread, or the thread take-up lever may not be threaded. To resolve this, check the threading sequence and re-thread the machine head correctly. Remove any kinks or knots from the thread. Check the relationship between the stitch pattern selected and the sewing thread used, and then properly adjust the thread tens...

Summary

Important Safety Instructions

Electric Shock Precautions

Precautions to reduce the risk of electric shock from the appliance.

Burn, Fire, Shock, Injury Warnings

General warnings to prevent burns, fire, electric shock, or injury during use.

Principal Parts Identification

Machine Connection and Basic Operation

Automatic Needle Threading Procedure

Thread Exchanger Operation (Standard Machine)

Thread Exchanger Setup and Usage

Instructions for installing and using the thread exchanger.

Automatic Bobbin Winding (Wind-In-Place)

Setting Up and Performing Bobbin Winding

Guide on how to set up and perform automatic bobbin winding.

Trial Sewing Procedure

Automatic Thread Trimming and Reverse Stitching

Automatic Thread Trimming

How the machine automatically trims threads upon completion of sewing.

Reverse Stitching (Back Tacking)

Instructions for using reverse stitching to secure seams.

Changing Presser Feet

Adjusting Stitch Length (Manual Control)

Manual Stitch Length Adjustment and Ranges

Guide on manually adjusting stitch length and its available ranges.

Adjusting Zigzag Width and Needle Position

Zigzag Width Adjustment

Steps for manually adjusting the zigzag stitch width.

Needle Position Adjustments

How to adjust needle position for straight stitches and blindhemming.

Adjusting Thread Tension (Manual Control)

Manual Thread Tension Adjustment and Balance

Guide on manually adjusting thread tension and achieving balance.

Fabric, Thread, and Needle Selection Guide

Needle Replacement Procedure

Step-by-step guide for removing and inserting sewing machine needles.

Straight Stitch Operation

Advanced Straight Stitch Techniques

Automatic Back Tacking

How to automatically tack seams at the beginning and end.

Zigzag Stitch Applications and Adjustment

Zigzag Width and Length Control

Guide to adjusting zigzag width and stitch length.

Overcasting Stitches

Blindstitching for Hem Finishing

Automatic Buttonhole Creation

Buttonhole Types and Creation Process

Instructions for double bartacking, eyelet, and automatic buttonholes.

Buttonhole Sequence and Finishing Steps

Steps for buttonhole sequence, opening, and finishing.

Special Buttonhole Stitches: Purl and Corded

Bartacking for Seam Reinforcement

Zipper Insertion Techniques

Side Placket Zipper Insertion

How to insert a zipper into a side placket of a garment.

Center Zipper Insertion

Instructions for inserting zippers in the center of garments, bags, or covers.

Button Sewing Foot Operation

Manual Buttonhole Creation

Twin Needle Sewing Techniques

Pattern Balancing and Modification

Managing Stored Patterns in Memory

Saving and Overwriting Patterns

Instructions for saving and overwriting patterns to memory.

Embroidery Preparation and Unit Attachment

Embroidery Setup Precautions

Important safety precautions for embroidery and unit handling.

Attaching Embroidery Foot and Unit

Step-by-step guide for attaching the embroidery foot and unit.

Embroidery Unit Installation and Removal

Thread Exchanger for Embroidery

Thread Exchanger Setup and Operation

Instructions for installing and operating the thread exchanger.

Semi;Fully Automatic Thread Exchange

Steps for semi and fully automatic thread exchange during embroidery.

Endless Automatic Bobbin Winding for Embroidery

Endless Bobbin Winding Mechanism and Setup

Explanation of the endless bobbin winding mechanism and setup.

Embroidery Bobbin Winding Process

Steps for the embroidery bobbin winding process.

Using Sew-Ware Embroidery Cards

How to Sew Embroidery and Handle Frames

Installing and Removing Embroidery Frames

Step-by-step guide for installing and removing embroidery frames.

Basic Embroidery Trial Sewing Procedure

Embroidery Sequence and Threading

Complete Embroidery Sequence Overview

Embroidery Setup and Pattern Selection

Steps for setting up the machine and selecting embroidery patterns.

Bobbin Management During Embroidery

Managing bobbin thread status during the embroidery process.

Changing Embroidering Speed and Layout Editing

Moving and Confirming Pattern Location in Frame

Changing Pattern Location Within Frame

How to change the location of patterns within the embroidery frame.

Confirming Pattern Placement on Fabric

How to confirm the pattern's placement on the fabric before sewing.

Rotating and Resizing Patterns and Letters

Rotating Designs

Instructions for rotating patterns and letters.

Changing Size of Patterns and Letters

How to change the size of patterns and letters.

Mirroring and Orientation Adjustments for Letters

Adjusting Letter Spacing and Dividing Letters

Combining Patterns and Letters for Sewing

LCD Pictogram Functions for Embroidery

Multiple Hoop Embroidery [Example 1]

Specifying Needle Entry Points (a, b, c)

How to specify needle entry points 'a', 'b', and 'c'.

Specifying Needle Entry Points (d, e, f)

Specifying Point d

How to specify the fourth needle entry point ('d').

Specifying Point e

How to specify the fifth needle entry point ('e').

Specifying Point f

How to specify the sixth needle entry point ('f').

Specifying Needle Entry Points (g, h, i)

Specifying Point g

How to specify the seventh needle entry point ('g').

Specifying Point h

How to specify the eighth needle entry point ('h').

Specifying Needle Entry Point i

Layout Multiple Hoop Pattern (Optional Card)

Multiple Hoop Embroidery [Example 2]

Fabric Preparation for Multiple Hoops

How to prepare the fabric for multiple hoop embroidery.

Continuous Embroidery Operations

Power Fail and Temporary Pattern Saving

Saving Work Before Power Off

How to save your work temporarily before turning off the machine.

Resuming Operation After Power On

What happens after turning the machine back on and resuming operation.

Handling Thread Breaks and Embroidery Session Management

Re-starting After Thread Break

How to re-start embroidery after a thread break.

Helpful Messages and Troubleshooting Guide

Updating Machine Software

PC Connection and Data Transfer Procedures

Using Optional Settings for Machine Customization

Bobbin Winding and Loading Procedures

Manual Threading of Machine Head

Automatic Needle Threading and Bobbin Thread Pickup

Automatic Needle Threading Steps

Step-by-step guide for automatic needle threading.

Comprehensive Troubleshooting Guide

Machine Operation and Needle Issues

Troubleshooting for machine not running, rotating, or needle problems.

Stitching Quality and Fabric Feed Problems

Troubleshooting for stitch puckering, skipped stitches, and fabric feed issues.

Machine Maintenance and Lamp Replacement

Singer XL-6000 Specifications

General IconGeneral
BrandSinger
ModelXL-6000
CategorySewing Machine
LanguageEnglish

Related product manuals