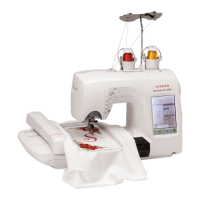
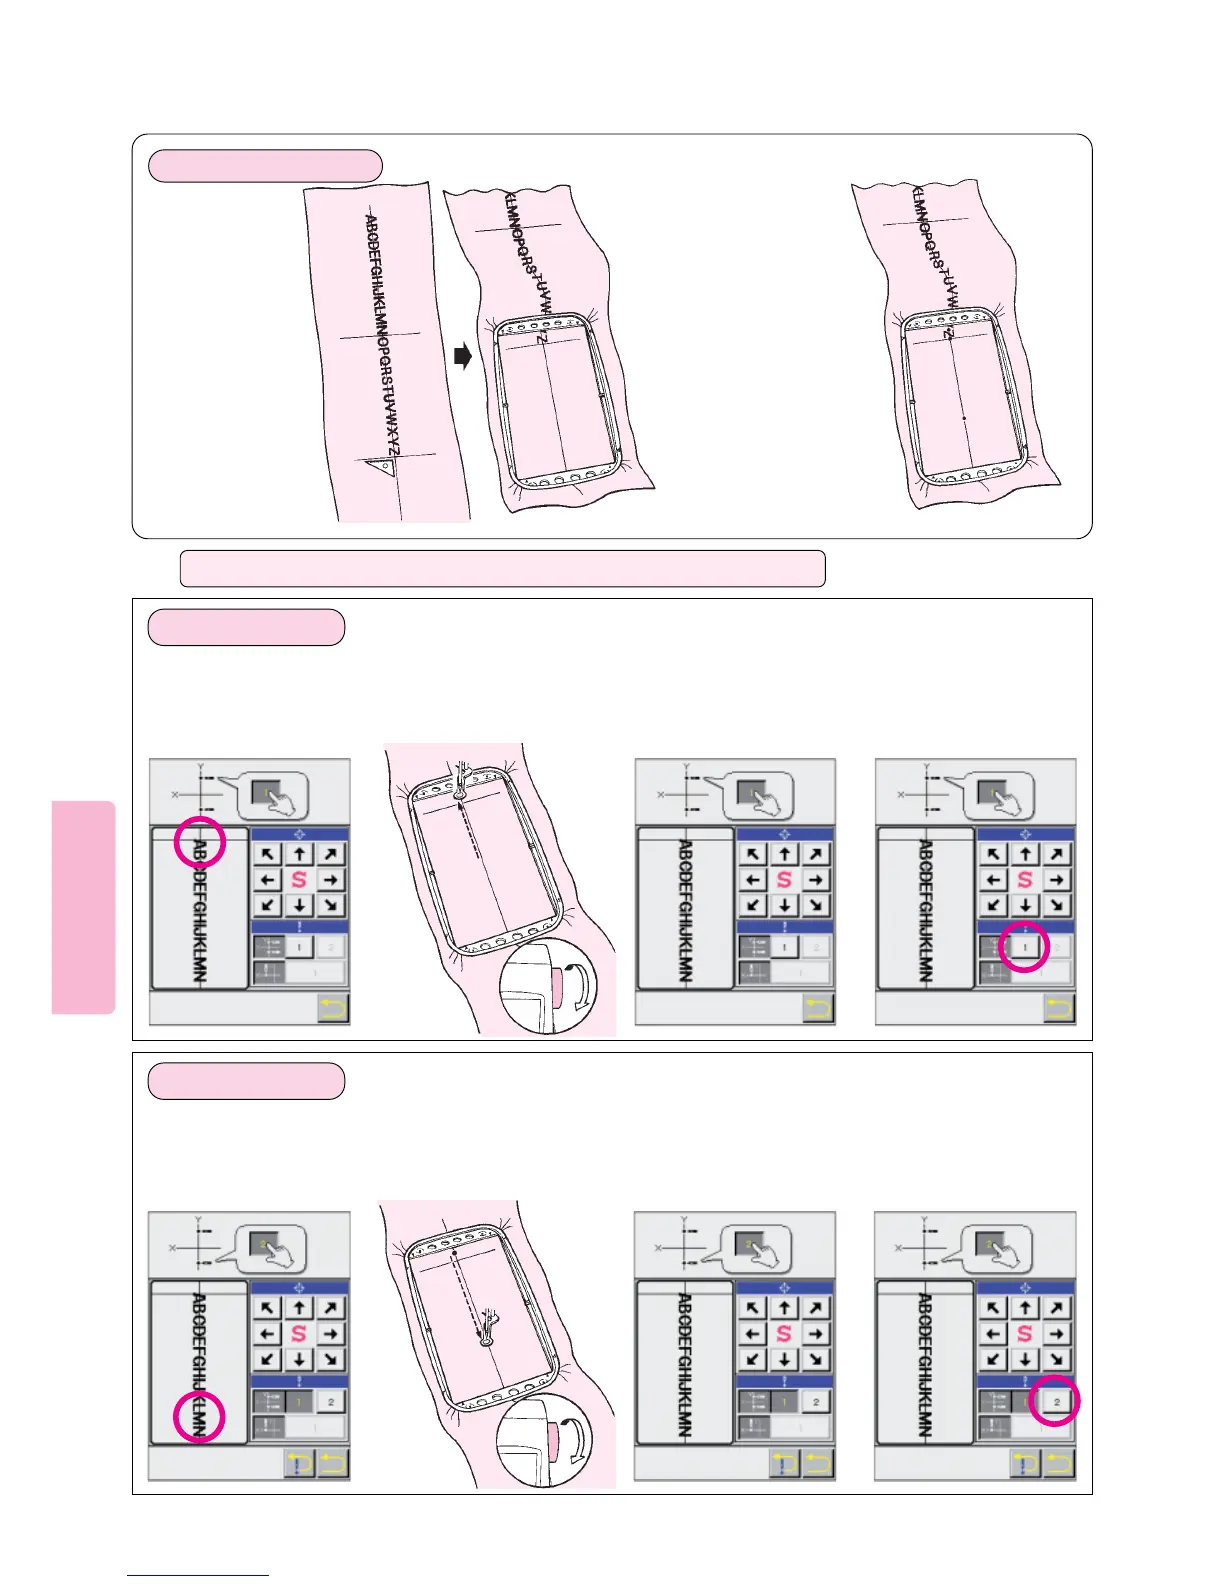
1. Change position
of embroidery
frame.
2. Press the LCD Screen to
position the frame and
establish the needle entry
points “g” and “h” on the Y
axis Vertical line and “i” on the
X axis horizontal line.
1
Touch screen at upper
part of vertical line.
This will move embroi-
dery frame.
Press needle position direction
arrows so that needle point is
directly above Y axis vertical line.
For each needle entry point, be
sure to turn handwheel to lower
needle to verify that needle point
is directly above Y axis vertical
line.
Once needle entry point
is correctly specified on
the Y axis vertical line,
press position memory
[1] for the first point.
324
1
Touch screen at lower
part of vertical line.
This will move embroi-
dery frame.
Press needle position direction
arrows so that needle point is
directly above Y axis vertical line.
For each needle entry point, be
sure to turn handwheel to lower
needle to verify that needle point
is directly above Y axis vertical
line
Once needle entry point
is correctly specified on
the Y axis vertical line,
press position memory
[2] for second point.
324
27
Operation of LCD screen for specifying needle entry points “g” “h” and “i”
1. Specifying point “g”
2. Specifying point “h”
89
Draw a horizontal
line at right angles
to vertical line
according to the
end of letters
g
h
i
g
h
Preparation of fabric
* Points (Y axis
vertical line) must
be at least 5 cm
(2 inches] apart
Turn handwheel to check
that needle is positioned
directly above Y axis
vertical line.
Turn handwheel to check
that needle is positioned
directly above Y axis
vertical line.
 Loading...