Press
For 3rd to 6th color
threads, repeat Step 10.
Finally, machine will sew
portion 6 of selected
embroidery pattern and
automatically stop.
* As you sew each section of
the color thread sewing order
on upper part of LCD Screen
will shift to the left in se-
quence so the current step is
always in the leftmost
position.
74
Refer to instructions
for thread Exchanger
on Pages 63 and 64.
Rewind Color Step 1
thread and use Semi-
Automatic method of
threading to change
thread to 2nd color
thread. Start machine.
10
11
Machine will sew portion “2” of
selected embroidery pattern
and automatically stop.
12
When the threading
has been completed,
press picto-
gram.
123
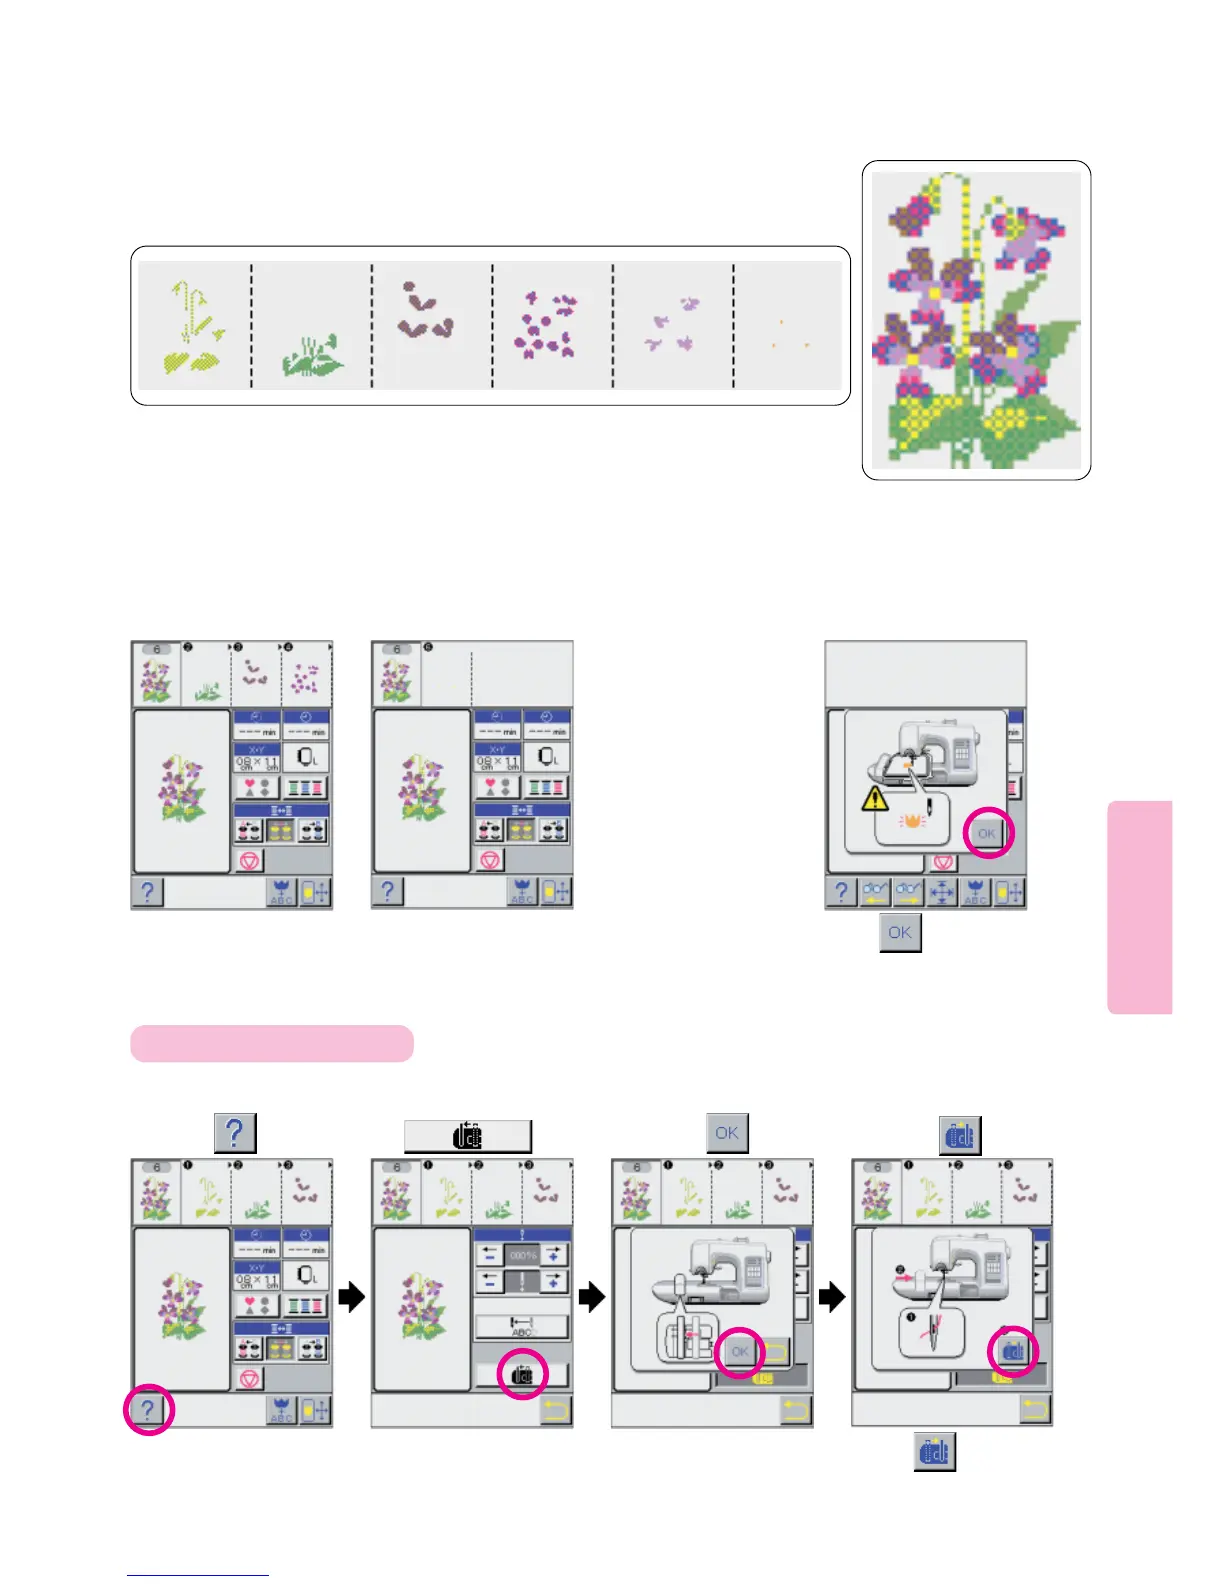
If thread has broken during sewing, move carriage for easier threading.
4
Embroidering sequence
[1] [2] [3] [4] [5] [6]
Press and screen
will return to initial screen.
* Press pictogram,
and screen will return to
screen 1.
For ease in ManualThreading
PressPress pictogram.