94
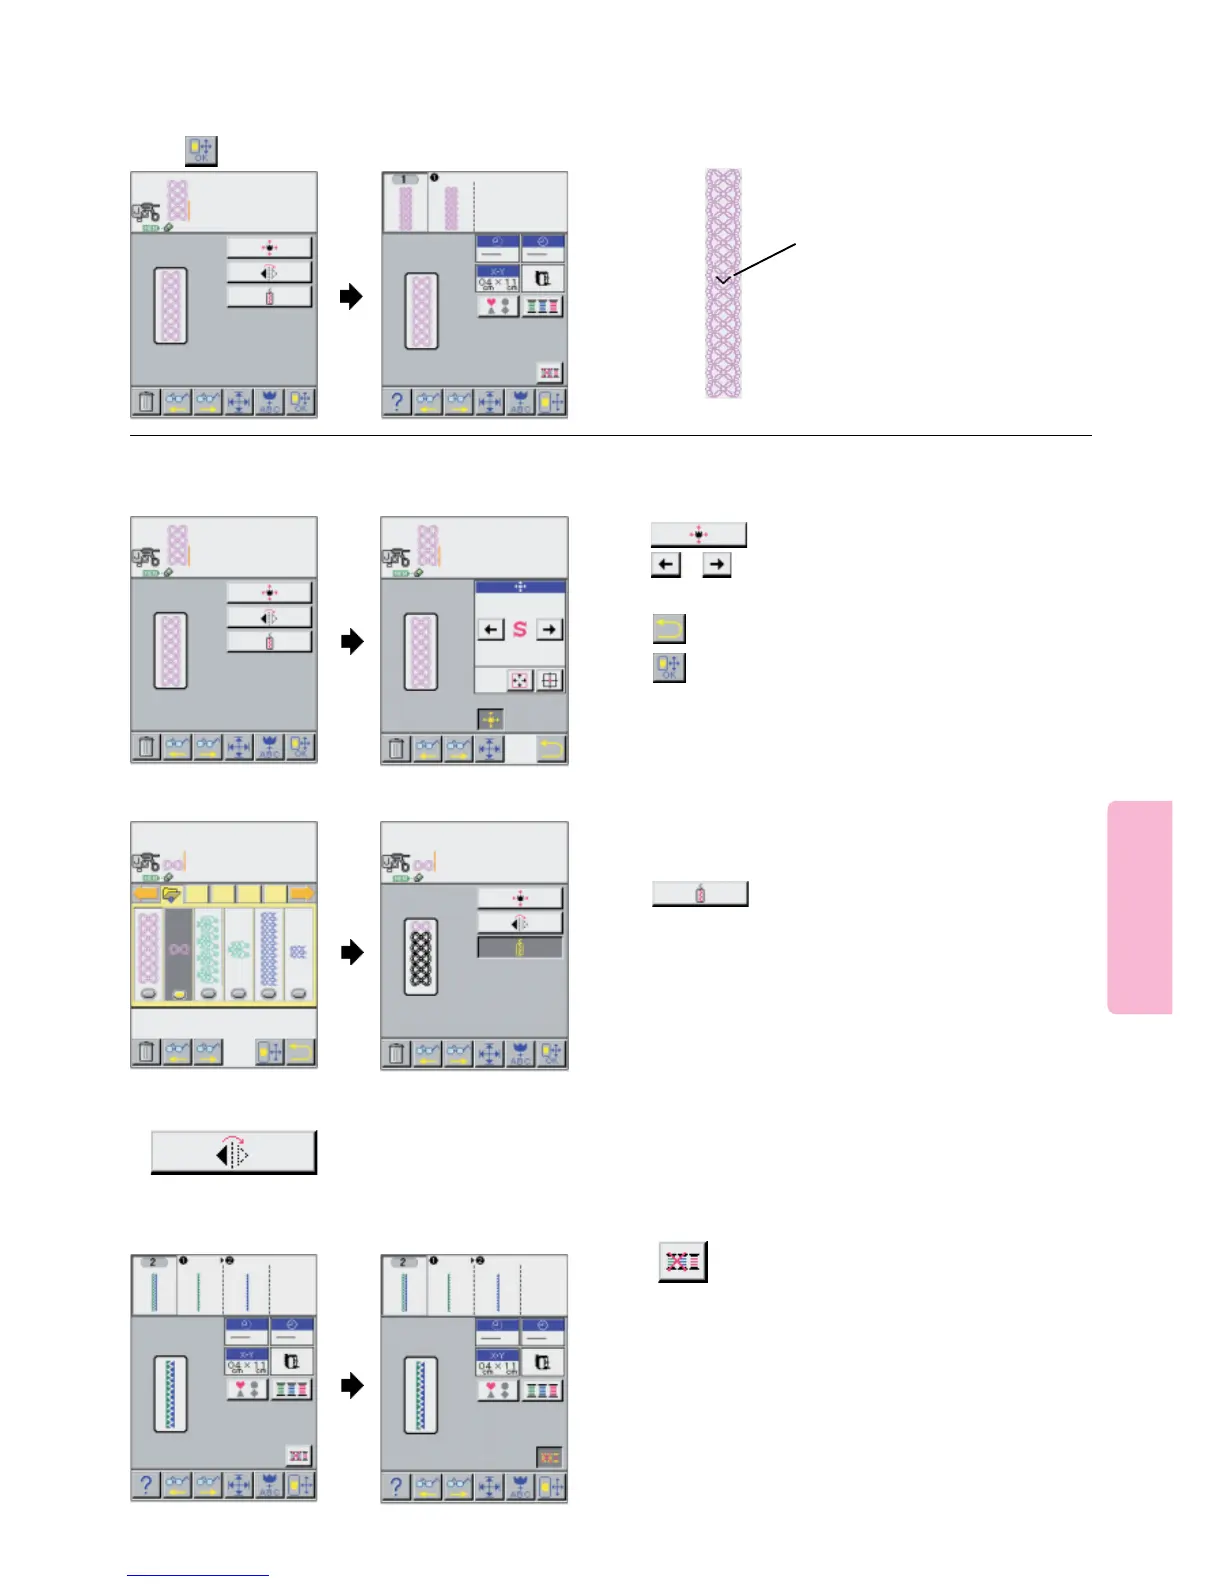
At the end of the 1st pattern, the
machine will sew a " V " mark.
2nd unit of pattern is aligned with
the lower end of the "V " mark.
Turn handwheel to drop the
needle on end of "V" MARK.
Press the Start/Stop Button.
The 2nd pattern is connected and
is sewn.
6
5
Start sewing.
Press pictogram.
Lower presser foot and
press start button.
Press pictogram.
Press pictogram.
Location will move to left or right of the embroidery frame.
Press pictogram.
Press pictogram.
Connecting the patterns.
Use the small pattern to adjust the overall length of the
Continuous Design.
Press pictogram.
Small patterns will be connected automatically within the
limits of the Continuous embroidery frame.
B. Connecting small patterns
Press pictogram
The pattern of two or more colors changes
to single color pattern.
It can sew without exchange of thread continuously.
D. Monochrome-izing pattern
Explanations of other effective functions
A. Change location of pattern
C. Mirroring pattern
Pattern will be mirrored automatically within the
limits of the Continuous embroidery frame.
 Loading...