6. FOUR-STEP
BUTTONHOLE
(Two - size buttonholer)
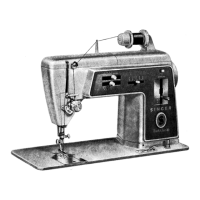
Your
machine
makes buttonholes to any
size you
choose
in only
lour
, easy steps .
• Vou never need to move the
labric
or
repo-
sition the needle.
•
Always
make a
practice
buttonhole on a
sample 01
your
labric.
• Be sure bobb in
contains
enough thread .
• When making buttonholes on
hard-to-
reach areas
convert
mach ine bed to Iree
arm sewing.
•
Mark
buttonhole position on fabric as
indi-
cated in pattern.
• You'lI lind a
two- size buttonhole on the
panel:
Standard size Buttonhole no.
1, for severa/
kinds
01
buttons (S.8mm).
Narrow size Buttonhole no. 8, specially
tor
small buttons (4.Smm).
• The sleps lor selecting lhe buttonhole are
the same as lor zig-zag and Flexi-Stitch.
Position the indicator at Nos.
1 or 8
6.0JALES
EN CUA-
TRO
TIEMPOS
(Dos anchuras)
Su maq uina
hace
ojales ai tamario
deseado
en s610cuatro tiempos.
• No
neces
ita
jamás
mover
el tej
ido
o
camb
iar la aguja.
• Antes de realizar un ojal , haga una prueba
en un trozo dei tejido a util izar.
•
Asegúrese
de
que
la bob ina
cont
iene
sufi
ciento
hilo
.
• AI rea lizar ojales en
áreas de
acceso
dificil,
convierta la máquina para
costura
con
base libre.
•
Marque
sobre el te
jido
la
posic
ión dei ojal
como
se
indica
en el diserio.
• Usted encuentra en el panel dos anchuras
deojal
:
aja/ padran n?
1, para varios tipos de boto-
nes (S.8mm).
Ojal estrecho n? 8, especialmente para
bo-
tones pequerios (4.Smm).
• Los pasos para seleccionar el ojal son los
mismos que de la costura zig-zag yextensi-
bles. Posicione el indicador en los numeras
1
08.
Stitch Width:
Fool:
Needle Plate:
Posiciones recomendadas
Selecc
ión punto: de Ojales nos 1
08
Recommended seltings
Stitch Selection: Buttonholes Stitch
Nos.
1 or 8
Pre-set
Buttonhole (L)
General Purpose (A)
Anchura
punto:
Prensatelas:
Plancha aguja:
Prepuesta
Ojales (L)
Uso general (A)
Step 1
• Raise presser
1001.
• Place fabric under
1001.
• Centre 3 red guidelines (1)
01
foot around
beginning
fine ot buttonhole.
• Turn buttonhole dial to the
lirst
buttonhole
symbol for the first step.
• Position needle in fabric at point (2) by
turning lhe
hand
wheel
towards
you.
• Stitch
down
to point 3.
Step 2
• Raise needle out of fabrico
• Turn buttonhole dial to the
second
button -
hole symbol for the
second
step.
•
Make
at least
íour
stitches, ending at
point
(4).
62
Tiempo 1
• Levante el prensatelas.
•
Coloque
el tejido debajo dei prensatelas.
• Centre las 3 Iineas
-guía
rojas
(1) dei
prensatelas, con la linea de
comienzo
dei
oial.
• Gire el mando para ojales
hac
ia el primer
símbolo dei ojal para realizar el
primer
tiempo.
•
Colocar
la aguja en el tejido
sobre
el
punto
(2)
girando
el volante dei mano
hacia
Vd.
• Cosa hasta el punto (3).
Tiempo 2
• Saque la aguja dei tejido.
• Gire el mando para ojales
hacia
el segundo
símbolo dei ojal para realizar el
segundo
tiempo.
• De un mínimo de
cuatro
puntadas, terrni-
nando en el punto (4).