CHAPTER 4
MAINTAINING THE INTERACTIVE WHITEBOARD SYSTEM
35 smarttech.com/kb/170910
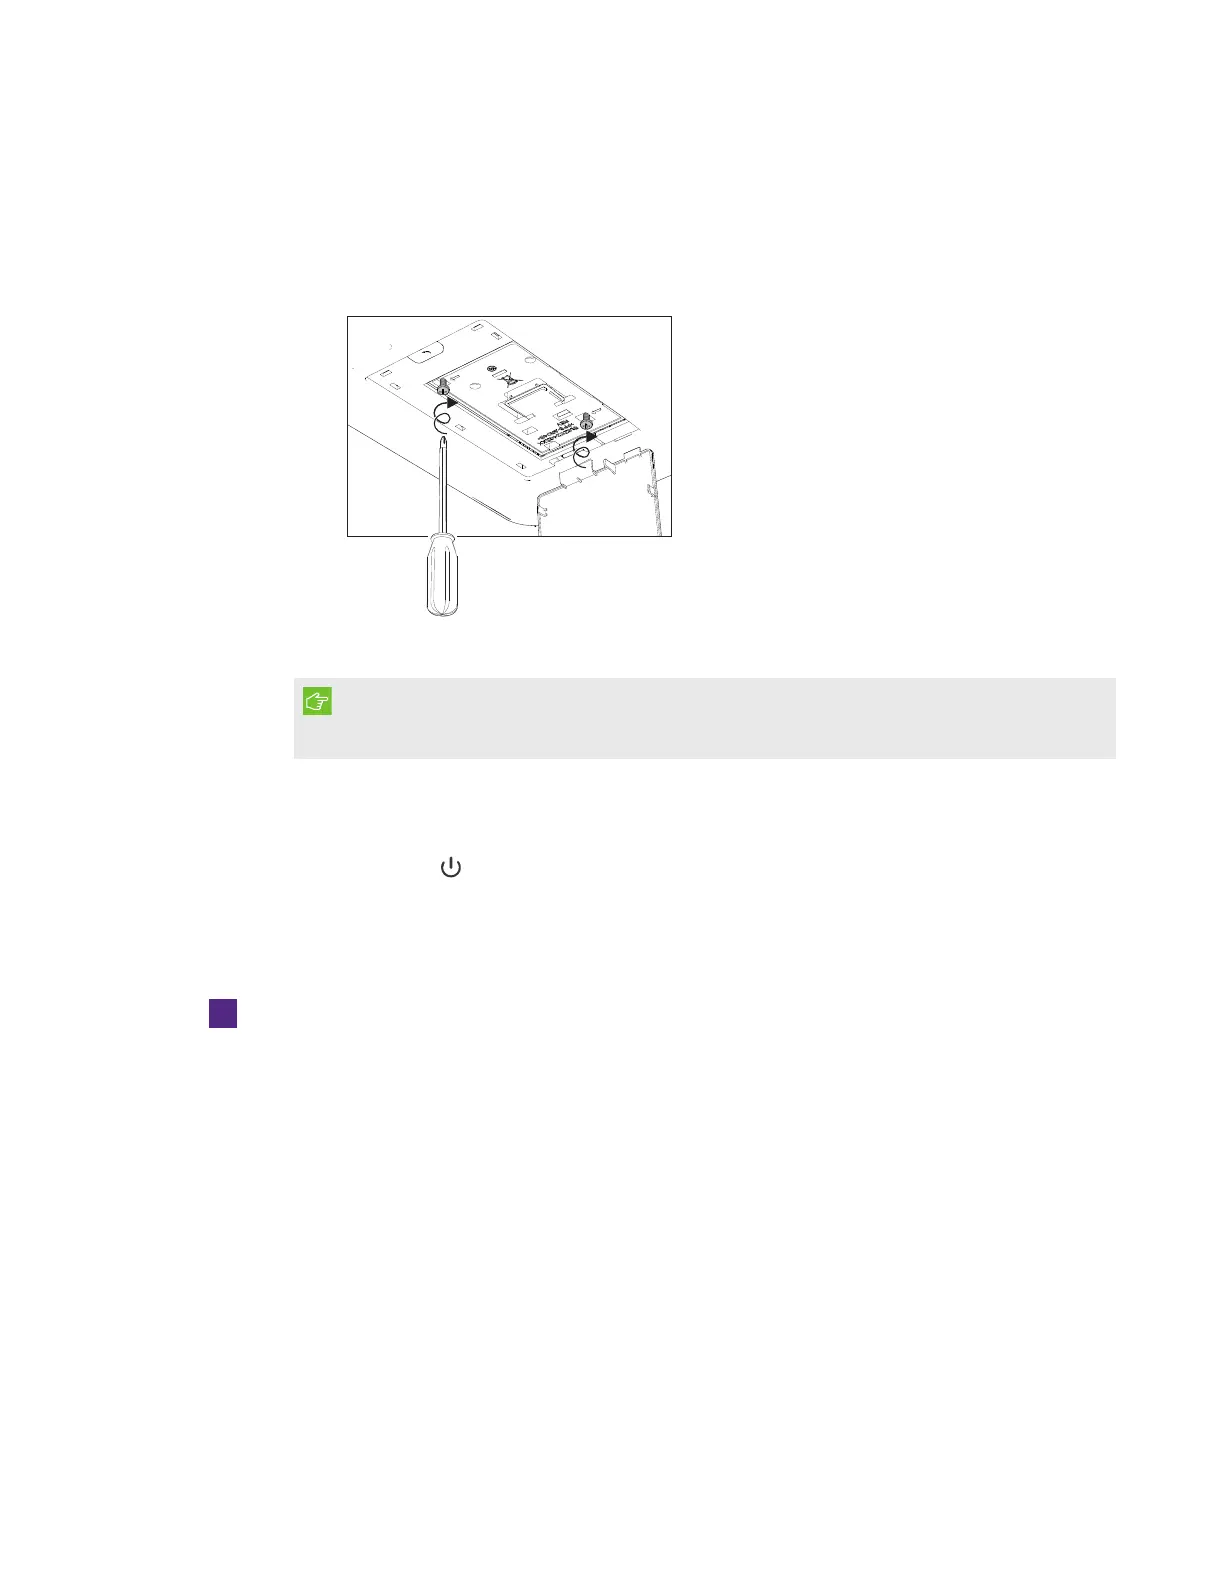
3. Use the Phillips screwdriver to secure the captive screws.
IMPORTANT
Do not over-tighten the screws.
4. Close the lamp cover.
5. Connect the power cable to the wall outlet.
6.
Press the Power button once on the remote control to confirm that the projector is
operating and that the lamp module is correctly installed.
7. Put the old lamp module in a secure container, and handle it gently until you recycle it.
To finish the projector lamp module installation
1. Turn on the projector.
2. Adjust the projector image if necessary (see
Adjusting the image
on page23).
3. Access the service menu to reset the lamp hours (see
Resetting the lamp hours
on the next
page).
4. Activate the projector’s alert emails and lamp warnings if they’ve been deactivated (see
Email
alerts
on page57 and
Control panel
on page52).


 To Next Page